Table of Contents
Advertisement
Advertisement
Table of Contents

Related Manuals for Hytera VM780


Summary of Contents for Hytera VM780
- Page 1 Body Worn Camera USER MANUAL...
- Page 2 Preface Welcome to the world of Hytera and thank you for purchasing this product. To derive optimum performance from the product, please carefully read this manual before use. This manual is applicable to the following product: VM780 4G Body Worn Camera (MPU)
- Page 3 Copyright Information Hytera is the trademark or registered trademark of Hytera Communications Corporation Limited (the Company) in the People's Republic of China (PRC) and/or other countries or areas. The Company retains the ownership of its trademarks and product names. All other trademarks and/or product names that may be used in this manual are properties of their respective owners.
- Page 4 Operation is subject to the following two conditions: This device may not cause harmful interference. This device must accept any interference received, including interference that may cause undesired operation. Note: Changes or modifications to this unit not expressly approved by the party responsible for compliance could void the user's authority to operate the equipment.
- Page 5 The antenna should be kept away from the face and eyes When worn on the body, always place the radio in a Hytera-approved holder, holster, case, or body by use of the correct clip for this product. Use of non-approved accessories may harness or...
- Page 6 ISEDC Statement The device has been tested and complies with SAR limits, users can obtain Canadian information on RF exposure and compliance Après examen de ce matériel aux conformité aux limites DAS et/ou aux limites d’intensité de champ RF, les utilisateurs peuvent sur l’exposition aux radiofréquences et la conformité...
-
Page 7: Icon Conventions
To press a key and keep holding it down. Copyright Information Hytera is the trademark or registered trademark of Hytera Communications Corporation Limited (the Company) in PRC and/or other countries or areas. The Company retains the ownership of its trademarks and product names. -
Page 8: Eu Regulatory Conformance
EU Regulatory Conformance As certified by the qualified laboratory, the product is in compliance with the essential requirements and other relevant provisions of the following directives: 2006/66/EC 2011/65/EU 2012/19/EU 2014/53/EU Please note that the above information is applicable to EU countries only. -
Page 9: Packing List
1. Packing List Please unpack carefully and check that all items listed below are received. If any item is missing or damaged, please contact your dealer. Item Qty. Item Qty. Body Worn Camera USB Cable Battery Power Adapter Belt Clip User Manual Pictures listed in this manual are for reference only. -
Page 10: Product Overview
2. Product Overview 2.1 Product Layout 2.2 LED Indicators Status Description The product is transmitting voice or emergency alarm. The product is being charged. Glows red The TF card is full (lasts for three seconds). The product is being turned off (lasts for two seconds). ... - Page 11 Status Description Flashes orange slowly The product is recording an audio.
-
Page 12: Before Use
Nano SIM card into the slot and lock the flip cover and slot cover, as shown in the following figure. 3.2 Attaching the Battery Use only the Hytera standard or optional battery. Polarity reverse or use of other batteries ... -
Page 13: Attaching The Belt Clip
3.3 Attaching the Belt Clip Attach the belt clip according to the steps shown in the following figure. To remove the belt clip, reverse the attaching steps. 3.4 Charging the Product To charge the product, do as follows:... - Page 14 The LED indicator on the product tells its charging status, see 2.2 LED Indicators for details.
-
Page 15: Basic Operations
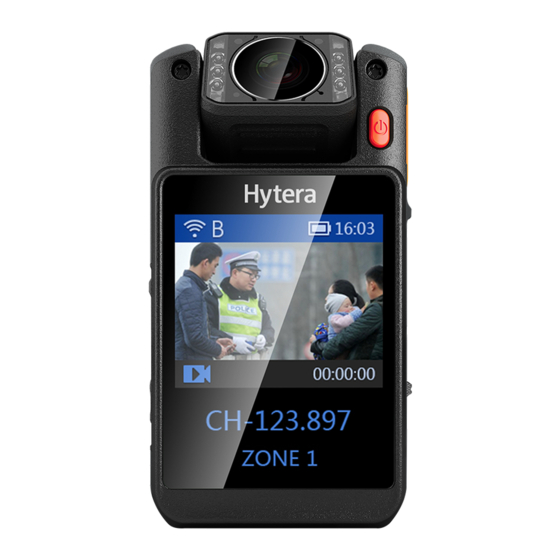
4. Basic Operations 4.1 Turning On or Off the Product Turning On the Product In power-off mode, long press the On/Off key for three seconds to turn on the product and enter the preview mode. Turning Off the Product In power-on mode, long press the On/Off key for three seconds to turn off the product. 4.2 Understanding the Screen 4.2.1 Status Display The status bar displays the notifications and running status of the product in real-time. - Page 16 Icon Meaning Icon Meaning Airplane mode is enabled. WLAN connection is established. Location information is enabled. Cellular network is enabled. BT feature is enabled. No SIM card is inserted. BT connection is established. The battery power is full. Silent mode is enabled. The battery is being charged.
-
Page 17: Connecting To Network
Wakeup When the screen goes off, press any key to wake up the screen. 4.3 Connecting to Network 4.3.1 Cellular Data Before enabling the cellular network, make sure that the SIM card has been registered to the Carrier Networks. When not used, disable the cellular network to save traffic and extend the standby time. Wipe down from the status bar to open the notification center, and tap to enable the cellular network;... - Page 18 In the blank space of the authentication page, tap the screen for six times to display the Auth_ID information. Tap Get Auth_ID, and send the ID to Hytera. After the authentication is completed, the screen displays with Registered. Exit MPU and open it again.
- Page 19 Upon successful login, the Login button turns into Logout.
-
Page 20: System Settings
5. System Settings on the home screen, and enter the Settings. You can set the network, display, voice, BT, language, location information, and silent mode, and view the account information and product information. 5.1 Network 5.1.1 Data Roaming Tap SIM Card Settings, and toggle to enable data roaming. -
Page 21: Volume Adjustment
Tap BT, and toggle the following BT to enable it. Tap a device in the device list, and tap Pair in the popup pair request window. If this product needs to be detected by other BT devices, toggle following VM780. -
Page 22: Date And Time
Other matching methods: slide down the status bar to expand all shortcut switches, and . Tap More Settings, select a device in the device list, and then tap Pair in the popup pair request window. 5.5 Language Tap Language, and select from the language list. 5.6 Location After enabling the location information, the product obtains location information through GPS, WLAN, BT or cellular network. -
Page 23: About Device
5.9 Accounts Tap Accounts to view information such as user name, user number, unit name and unit number. 5.10 About Device Tap About Device to view information such as software version, device name, device ID, serial number, storage capacity and available space. -
Page 24: Infrared Settings
6. MPU Basic Settings In the MPU video preview mode, tap and select Settings. 6.1 Language Tap Language to enter the language setting page. Select the desired language and tap OK. Restart the MPU to validate the language setting. 6.2 Device Info Tap Device Info to enter the device information page. - Page 25 6.6 Version You can view and update the current software version. Viewing the Software Version Tap Version and view the version code and version name. Updating the Software Version Tap Version and enter the version page. Tap Online Update or Local Update to update the software version. 6.7 Platform 6.7.1 Auto Upload Photos By enabling the Auto Upload Photos feature, photos are automatically uploaded to the SmartEye Server.
-
Page 26: Restore Default Settings
: The feature is enabled. 6.7.4 GPS Storage Tap Platform and enter the platform page. Tap the following GPS Storage. : The feature is disabled. : The feature is enabled. 6.8 Restore Default Settings Tap Restore Default Settings and tap OK in the popup window to restore the MPU to factory settings. Please choose carefully. -
Page 27: Auto Record
: The feature is disabled. : The feature is enabled. 6.12 Auto Record By enabling Auto Record, the product automatically records video upon powering-on. Tap the following Auto Record. : The feature is disabled. : The feature is enabled. ... - Page 28 7. MPU Other Settings 7.1 Camera Settings You can set the camera shooting angle by adjusting the camera rotation. In the MPU video preview mode, tap to enter Camera. Tap Camera Rotation to set the camera rotation degree, and tap OK. Check whether the camera picture is adjusted.
-
Page 29: Recording Audios
8. MPU Features 8.1 Adjusting the Focus You can adjust the camera focus up to 4 times zooming. In the MPU video preview mode, drag the icon to adjust the digital focus. 8.2 Recording Videos Normal recording: in preview mode, toggle the Video Recording key to start video recording; the ... -
Page 30: Emergency Mode
to upload the checked files to the SmartEye server. 8.7 Flashlight In the MPU video preview mode, tap icon to enable flashlight; tap he icon to disable it. You can also enable or disable flashlight from the shortcut switch in the status bar. 8.8 PoC Talking In the MPU video preview mode, tap and select Chat. - Page 31 9. Playing Back Videos/Audios/Photos in the home screen; enter the password (123456 as initial password) and tap OK. You can modify the password in the login interface. Tap Video, Audio or Picture to enter the playback list of corresponding media. Tap the video, audio or photo to play back...
-
Page 32: Data Acquisition
10. Data Acquisition You can set the product into disk mode through the BWC Manager, and copy photos, audios and videos BWC Manager Operation Guide to your PC. For details on the operations, refer to the in the BWC Manager folder. -
Page 33: Troubleshooting
11. Troubleshooting Phenomena Analysis Solution The battery may be improperly Remove the battery and attach it attached. again. The battery may run out. Recharge or replace the battery. The product cannot be The battery and the charging turned on probes are in poor contact due to Clean the battery contacts. - Page 34 Phenomena Analysis Solution off. If the above solutions cannot solve your problems, or you may have some other queries, please contact us or your local dealer for more technical support.
-
Page 35: Care And Cleaning
12. Care and Cleaning To guarantee optimum performance as well as a long service life of the product, please follow the tips below. Product Care Do not pierce or scrape the product. Keep the product away from substances that can corrode the circuitry. ... -
Page 36: Optional Accessories
13. Optional Accessories Use the accessories specified by the Company only; otherwise, we shall not be liable for any losses or damages arising out of the use of any unauthorized accessories. Contact your local dealer for the optional accessories of the product. - Page 37 Hytera� is the trademark or registered trademark of Hytera Communications Corporation Limited. ©201 Hytera Communications Corporation Limited. All Rights Reserved. Address: Hytera Tower, Hi-Tech Industrial Park North, 9108# Beihuan Road, Nanshan District, Shenzhen, People's Republic of China Postcode: 518057 http://www.hytera.com...
Need help?
Do you have a question about the VM780 and is the answer not in the manual?
Questions and answers