Table of Contents
Advertisement
Available languages
Available languages
Quick Links
Einbauanleitung für Tweeter
Einbauanleitung für Tweeter-Set
Einbauanleitung für Tweeter
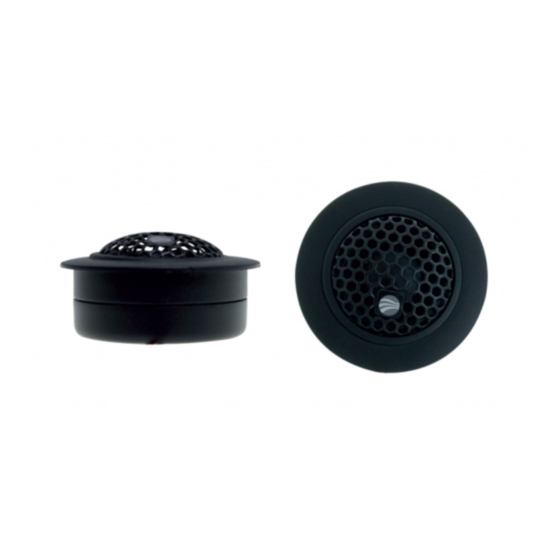
EL-T19
Bitte vor Beginn der Arbeiten Einbauanleitung sorgfältig lesen!
Bitte vor Beginn der Arbeiten Einbauanleitung sorgfältig lesen!
Bitte vor Beginn der Arbeiten Einbauanleitung sorgfältig lesen!
rainbow audio GmbH
ainbow audio GmbH Kreuzenstrasse 94 D-74076 Heilbronn
Experience Line
Experience
Phone +49 7131 / 3958 180 - Fax +49 7131 / 3958 182
Phone +49 7131 / 3958 180
info@rainbow-audio.de
http://www.rainbow-audio.de
19 mm Seide-Hochtöner
ax +49 7131 / 3958 182
0 Watt Art.Nr. 231316
120 Watt
Heilbronn
Advertisement
Chapters
Table of Contents

Summary of Contents for Rainbow Experience Series
- Page 1 Bitte vor Beginn der Arbeiten Einbauanleitung sorgfältig lesen! Bitte vor Beginn der Arbeiten Einbauanleitung sorgfältig lesen! Bitte vor Beginn der Arbeiten Einbauanleitung sorgfältig lesen! rainbow audio GmbH ainbow audio GmbH Kreuzenstrasse 94 D-74076 Heilbronn Heilbronn Phone +49 7131 / 3958 180...
- Page 2 Hörschaden: Anhaltende, übermäßige Lautstärken von über 85 dB können das Hörvermögen auf die Dauer beeinträchtigen. Rainbow® Verstärker sind imstande, auch Lautstärken über 85 dB zu produzieren. Lautstärke und Fahrerbewußtsein: Der Gebrauch von Musikanlagen kann das Hören von wichtigen Verkehrsgeräuschen behindern und dadurch während der Fahrt Gefahren auslösen.
-
Page 3: Table Of Contents
Inhaltsverzeichnis Sicherheitshinweise für Anwender Wichtige Betriebshinweise Inhalt und Teilebezeichnung Technische Daten Leistungsmerkmale Positionierung der Lautsprecher Bild 1 Positionierung der Lautsprecher Einbau und Befestigung der Hochtöner Bild 2 Aufbaupult-Montage Bild 3 Einbautopf-Montage Bild 4 Schrägpult-Montage Kabelvorbereitung Wartung und Pflege Garantiebedingungen Achtung: Wichtige Betriebshinweise, bitte vor der Montage lesen. •... -
Page 4: Inhalt Und Teilebezeichnung
Befestigungsteilkreis 39 mm Leistungsmerkmale Experience Line Rainbow Experience Line Lautsprecher sind hochwertige Car Audio Systeme, welche mit jedem handelsüblichen Verstärker in Betrieb genommen werden können. Zur Nutzung der optimalen Klangwiedergabe im Fahrzeug empfehlen wir die Verwendung eines Linear-Verstärkers von mindestens 35 Watt Leistung. -
Page 5: Positionierung Der Lautsprecher
Positionierung der Lautsprecher In Fahrzeugen bieten sich verschiedene Einbaupositionen für Rainbow Lautsprecher an. Bei der Auswahl des Einbauortes sollten Sie folgende Hinweise beachten: Tieftöner benötigen für die Wiedergabe ein großes Volumen. Die Türen mit großem Luftpolster zwischen Türverkleidung und Außenblech oder die Heckablage mit großvolumigem Kofferraum bieten den idealen Einbauort. - Page 6 Türeinbau: Um ein gutes Frontstaging zu erhalten, dürfen die Hochtöner nicht zu tief im Türraum Um ein gutes Frontstaging zu erhalten, dürfen die Hochtöner nicht zu tief im Türraum Um ein gutes Frontstaging zu erhalten, dürfen die Hochtöner nicht zu tief im Türraum platziert werden.
-
Page 7: Einbau Und Befestigung Der Hochtöner
Einbau und Befestigung der Hochtöner Einbauart: Türeinbau vorne / hinten, Fondeinbau, Spiegeldreieck-, Armaturenbrett- und Heckablageneinbau Aufbaumontage: Bild 2 • Unterteil/Bodenplatte (U) am ausgewählten Einbauort aufstellen, Kabeldurchführung und Befestigungsbohrungen markieren. Bohrung Ø 3,5 mm für Befestigung und Ø 5 mm für Kabeldurchführung bohren. •... - Page 8 Flachbündige Montage: Bild 3 • Flachmontagering (L) am ausgewählten Einbauort aufsetzen und am unteren Durchmesser (X) anzeichnen • Hochtöner (J) auf Unterteil/Bodenplatte (U) einsetzen; Flachmontage-Ring (L) über Hochtöner stülpen und durch Drehen einrasten. • Kompletter Hochtöner in Ausschnitt einsetzen und mit Klammerring (M) von der Rückseite montieren.
-
Page 9: Kabelvorbereitung
Fall Lösungs- oder organische Reinigungsmittel. Garantiebedingungen rainbow audio GmbH übernimmt für die Produkte eine mindestens 2-jährige Garantie oder die gesetzlich vorgeschriebene Garantielaufzeit auf einwandfreie Funktion aller Teile. Die Garantie beginnt mit dem Erwerb des Produktes beim autorisierten Fachhandel und steht nur dem unmittelbaren Erstkäufer zu und ist nicht übertragbar. - Page 10 Diese Anleitung ist urheberrechtlich geschützt. Jede Vervielfältigung, bzw. jeder Nachdruck, auch auszugsweise, und jede Wiedergabe der Abbildungen, auch in verändertem Zustand, ist nur mit schriftlicher Zustimmung der Firma rainbow audio GmbH gestattet. Copyright © 2012 by rainbow audio GmbH. Rainbow® ist ein eingetragenes Warenzeichen.
- Page 11 Please read carefully before you start installation! Please read carefully before you start installation! Please read carefully before you start installation! rainbow audio GmbH ainbow audio GmbH Kreuzenstrasse 94 74076 Heilbronn 74076 Heilbronn Germany Phone +49 7131 / 3958 180 Phone +49 7131 / 3958 180 - Fax +49 7131 / 3958 182 info@rainbow-audio.de...
- Page 12 Use of sound components can impair your ability to hear necessary traffic sounds and may constitute a hazard while driving your automobile. Rainbow® accepts no liability for hearing loss, bodily injury or property damage as a result of use or misuse of this product.
- Page 13 Contents Important Safety Instructions Contents Important Operational Instructions Detail of Parts Technical Data Positioning the Loudspeaker Figure 1 Installing and Attaching the Tweeter Surface Installation Figure 2 Flush Mount Cup Installation Figure 3 Angle Mount Cup Installation Figure 4 Cable Preparation Maintenance Warranty Attention: Important Operational Information.
-
Page 14: Technical Data
39 mm Positioning the Loudspeaker Rainbow loudspeakers may be installed in your vehicle in a variety of places. In determining the installation location the following information should be considered: Woofers require a large area for optimum sound reproduction. Car doors with a large air cushion between the door lining and external metal or the rear windshield deck of an auto with a large trunk are ideal locations. - Page 15 Important: Review mechanical suitability before beginning installation into the selected location! Built-in auto parts should not be removed. Take care with window mechanics and door handles during door removal. Likewise, during rear area installations use care around the gas tank. This area should in no case be worked on in any way. In general, pay close attention to hidden cables and lines, which should not be cut or removed.
-
Page 16: Installing And Attaching The Tweeter
Fig. 1: Positioning the Loudspeakers in Doors and Rear Window Deck. Installing and Attaching the Tweeter Installation Location: Door Installation (front/rear), rear installation, side view mirror area installation, dashboard installation, and rear windshield deck installation Surface installation: Fig. 2 • Place the ground plate (U) on the installation place. - Page 17 Flush mount installation: Fig. 3 • Place the flush mount cup (L) on the installation place. Scribe and cut-out mounting hole. • Place tweeter (J) on ground plate (U), pull cables through the appropriate holes and put flush mount ring (L) over the tweeter and fix it by twisting. •...
-
Page 18: Cable Preparation
Warranty GmbH undertakes for all products a minimum 2-years warranty or the statutory warranty rainbow audio period for the perfect function of all parts. The warranty begins with the acquisition of the product by the authorized dealer, is entitled only to the direct first buyer, and is non-transferable. - Page 19 This document is protected by copyright. All duplications, and/or reproductions, in full or part, as well as all renditions of the illustrations, with or without alterations, are permitted only with written agreement from rainbow audio GmbH. Copyright © 2012 by rainbow audio GmbH. Rainbow® is a registered trademark.
Need help?
Do you have a question about the Experience Series and is the answer not in the manual?
Questions and answers