Table of Contents
Advertisement
Quick Links
Instruction Manual
This instruction manual applies to products with type designations
that begin with KC, or SKCL.
This instruction manual describes important precautions for preventing
accidents and how to handle the product. To ensure safe use, be sure to
read this manual and fully understand its contents before using this product.
Store this manual carefully so that it can be referred to at any time.
Pearl is a trade name of Showa Giken Industrial Co., Ltd.
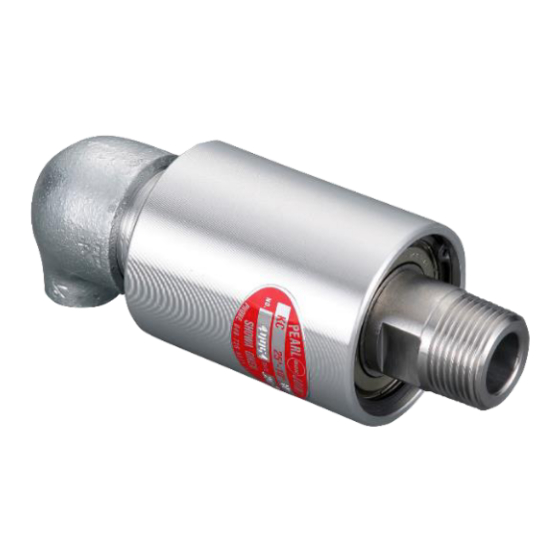
Pearl Rotary Joint
KC Series
No.
: SE20019-0
Issued on : Mar. 16 2020
1
Advertisement
Table of Contents

Summary of Contents for SGK Pearl Joint KC Series
- Page 1 : SE20019-0 Issued on : Mar. 16 2020 Instruction Manual Pearl Rotary Joint KC Series This instruction manual applies to products with type designations that begin with KC, or SKCL. This instruction manual describes important precautions for preventing accidents and how to handle the product. To ensure safe use, be sure to read this manual and fully understand its contents before using this product.
-
Page 2: Table Of Contents
Table of Contents 1. How to Read Nameplate (Nameplate Information) …………………………………………… P3 2. For Safety ……………………………………………………………………………………… P3 2‐1)Symbols …………………………………………………………………………………… P3 2‐2)For safe use ……………………………………………………………………………… P3 3. Product Overview ……………………………………………………………………………… P4 3‐1)Application ………………………………………………………………………………… P4 3‐2)Information indicated by model names …………………………………………………… P4 3‐3)Service conditions …………………………………………………………………………... -
Page 3: How To Read Nameplate (Nameplate Information)
1. How to Read Nameplate (Nameplate Information) Model Name Manufacturing No. Manufacturing Date The nameplate attached to the product indicates the model name, manufacturing number, and manufacturing date. 2. For Safety 2‐1) Symbols The symbols used in this instruction manual are described below. Indicates that failure to follow the warning message may cause bodily WARNING accidents that may result in serious or even fatal injury. -
Page 4: Product Overview
3. Product Overview 3‐1) Application A rotary joint is used for supplying fluid to or draining it from a machine rotating part called a roll, drum or cylinder, via fixed pipes. 3‐2) Information indicated by model names Information indicated by KC series model names is described below. The product list is shown in our catalog or on our website. - Page 5 ●For installation with a parallel thread (simplex only) Note 1) “␣” indicates a space. A model name is indicated without spaces. 2) If two or more option (part change) codes are selected, they are indicated in alphabetical order. 3) The selection of two or more options resulting in a long model name is indicated as type “OKC****”...
-
Page 6: Service Conditions
3‐3) Service conditions Service Conditions of KC Series Max. Series Fluid Size Pressure Rotation speed Temperature (MPa) (℃) (min 6A~25A 1,500 0.98 Air / Gas / Water / Oil 32A~65A 1,000 Note ) The lowest pressure when used under a pressure lower than atmospheric pressure is 1.3 kPa abs (10 Torr). 3‐4)... -
Page 7: Product Structures And Materials
3‐5) Product structures and materials Materials of Main Components (Standard Specification) Part Name Material Stainless Steel Rotor Carbon Steel Casing Aluminum Alloy Seal Ring Carbon O-ring The casing is finished with alumite treatment (anodizing). Note ) Component materials are indicated on product drawings. Contact our sales representative for requests for product drawings. -
Page 8: Accessories
3‐8) Accessories 1. A product installed with a flange is supplied with a gasket (copper jacket) and four sets of a stud bolt (SS400), a hex. nut (SS400), and a spring washer (SWRH). L (mm) Accessories(Flange Connection) K b a Gasket Stud Bolt Spring... -
Page 9: Transport And Storage
4. Transport and Storage 4‐1) Transport Transport this product by following the instructions described below. 1. Do not subject the product to undue impact while it is being transported. Falling down or impact causes product damage (seal ring, etc.) or early leakage. -
Page 10: Installing To A Roll
5‐2) Installing to a roll Install the product by following the cautions and instructions described below. Be sure to install the product so that an inspection hole faces downward. Also, do not block the hole. This hole is used for detecting leakage at an early stage. -
Page 11: Pipe Laying
5‐3) Pipe laying Perform pipe laying work by following the warnings and instructions described below. Use a hose for product connection suitable for characteristics of fluid used and operating conditions (pressure, temperature). If an unsuitable hose is WARNING used, it may be damaged, causing injury to workers or damage to peripheral equipment. -
Page 12: Removal From Machinery
6. Removal from Machinery Remove the product by following the warnings, cautions, and instructions described below in reverse order of the installation. In order to prevent bodily accidents due to residual fluid in the product or WARNING pipes, remove the product after fluid has been completely drained from the product or pipes and temperature has dropped to room temperature. -
Page 13: Operation
7. Operation 7‐1) Operation Perform operation by following the warnings, cautions, and instructions described below. Immediately stop operation if fluid leakage is detected during operation. WARNING If operation is continued with fluid leakage not being repaired, serious accidents including bodily accidents may result. During rotation or high-temperature/pressure fluid flow, keep well CAUTION away from the product to prevent injuries or burns. -
Page 14: Inspection And Maintenance
8. Inspection and Maintenance 8‐1) Daily inspection Perform inspection according to the following instructions. 1. Visually check pipe connections, product connections, and the product for fluid Instruction leakage. If leakage is detected, repair the product or replace it with a new one. 2. -
Page 15: Troubleshooting
9. Troubleshooting This section describes the possible causes of and countermeasures against malfunctions. If a problem persists, contact our sales representative for assistance. Malfunctions Causes Countermeasures A load is applied to the product due to an improper Review the pipe laying method. method of pipe laying. -
Page 16: Disposal
10. Disposal When disposing of packaging materials or products, properly dispose of them according to national laws or local government regulations or ordinances. 11. Product Warranty If a malfunction occurs during the warranty period, contact us or the distributor and send the product to us. - Page 17 Blank Page...
- Page 18 URL http://www.sgk-p.co.jp Export Department Phone : +81-3-3598-1400 Fax. : +81-3-3598-2700 E-mail : sgk-tk@sgk-p.co.jp Headquarters 7-24, Nishi-Kobari, Ina-Machi, Saitama, 362-0811 Japan Phone : +81-48-728-9460 Fax. : +81-48-728-9461 Tokyo Sales Office 2-64-11, Akabane, Kita-ku, Tokyo, 115-0045 Japan Phone : +81-3-3598-1400 Fax. : +81-3-3598-2700...
-
Page 19: Appendix - How To Repair Or Replace Consumables
A. Appendix - How to Repair or Replace Consumables... -
Page 20: For Simplex (Kcl, Kclf, Skcl)
5) Remove seal ring ③, O-ring ⑦, washer ⑧, and spring ⑨ from casing ②. 6) Remove retaining ring ⑥ from rotor ①, and then pull out ball bearings ④. 7-24, Nishi-Kobari, Ina-Machi, Saitama, 362-0811 Japan SHOWA GIKEN INDUSTRIAL CO., LTD Phone : +81-48-728-9460 Fax. : +81-48-728-9461 http://www.sgk-p.co.jp... - Page 21 < Inspection > Clean each part and check for damage. In particular, check the degree of wear and damage on the seal faces of rotor ① and seal ring ③. < Repair and parts replacement > 1) Rotor ① and seal ring ③ may be reused by lapping their seal faces in case of minor damage. 2) Replace O-ring ⑦...
-
Page 22: For Duplex, Stationary Ip, Thread Connection (Kc)
7) Remove seal ring ③, O-ring ⑦, washer ⑧, and spring ⑨ from casing ②. 8) Remove retaining ring ⑥ from rotor ①, and then pull out ball bearings ④. 7-24, Nishi-Kobari, Ina-Machi, Saitama, 362-0811 Japan SHOWA GIKEN INDUSTRIAL CO., LTD Phone : +81-48-728-9460 Fax. : +81-48-728-9461 http://www.sgk-p.co.jp... - Page 23 < Inspection > Clean each part and check for damage. In particular, check the degree of wear and damage on the seal faces of rotor ① and seal ring ③. < Repair and parts replacement > 1) Rotor ① and seal ring ③ may be reused by lapping their seal faces in case of minor damage. 2) Replace O-ring ⑦...
- Page 24 7) Remove seal ring ③, O-ring ⑦, washer ⑧, and spring ⑨ from casing ②. 8) Remove retaining ring ⑥ from rotor ①, and then pull out ball bearings ④. 7-24, Nishi-Kobari, Ina-Machi, Saitama, 362-0811 Japan SHOWA GIKEN INDUSTRIAL CO., LTD Phone : +81-48-728-9460 Fax. : +81-48-728-9461 http://www.sgk-p.co.jp...
- Page 25 < Inspection > Clean each part and check for damage. In particular, check the degree of wear and damage on the seal faces of rotor ① and seal ring ③. < Repair and parts replacement > 1) Rotor ① and seal ring ③ may be reused by lapping their seal faces in case of minor damage. 2) Replace O-ring ⑦...
-
Page 26: For Duplex, Rotational Ip (Kcw, Kcfw)
(*) For a product type whose internal pipe is secured to a roll, the internal pipe comes off from the product when the product is removed from the roll. Therefore, steps 2) and 3) are not required. 7-24, Nishi-Kobari, Ina-Machi, Saitama, 362-0811 Japan SHOWA GIKEN INDUSTRIAL CO., LTD Phone : +81-48-728-9460 Fax. : +81-48-728-9461 http://www.sgk-p.co.jp... - Page 27 < Inspection > Clean each part and check for damage. In particular, check the degree of wear and damage on the seal faces of rotor ① and seal ring ③. < Repair and parts replacement > 1) Rotor ① and seal ring ③ may be reused by lapping their seal faces in case of minor damage. 2) Replace O-rings ⑦...
Need help?
Do you have a question about the Pearl Joint KC Series and is the answer not in the manual?
Questions and answers