Table of Contents
Advertisement
Quick Links
Advertisement
Table of Contents

Subscribe to Our Youtube Channel
Related Manuals for Expert Sleepers super disting EX plus alpha

Summary of Contents for Expert Sleepers super disting EX plus alpha
- Page 1 Firmware v1.1.1 User Manual Page 1...
- Page 2 Expert Sleepers Ltd. Expert Sleepers Ltd assumes no responsibility or liability for any errors or inaccuracies that may appear in this document.
-
Page 3: Table Of Contents
Table of Contents Introduction............5 Load mapping..........23 A note on videos..........5 Save mapping..........23 Installation............6 Reset mapping..........23 Power requirements........6 Name mapping..........23 Connecting expansion modules.....6 Load from SD card........24 Jumpers............7 Save to SD card...........24 Inputs and Outputs..........8 Load all from SD card.........24 Controls..............8 Save all to SD card........24 A note on the... - Page 4 Miscellaneous functions........46 01H – Take screenshot......50 Show firmware version.......46 02H – Display message......50 Reboot............46 22H – Request version string....50 Show MIDI history........47 Sent SysEx messages........50 Show I2C history.........47 32H – Message........50 Show stats............47 33H – Screenshot........50 Tests............47 Select Bus............51 5-pin DIN MIDI I/O........49 Connection..........52 Connections..........49...
-
Page 5: Introduction
Introduction Congratulations on your purchase of an Expert Sleepers 'super disting EX plus alpha' (hereafter 'disting EX'). Please read this user manual before operating your new module. A note on videos Throughout this user manual you will find links to videos, which illustrate the corresponding sections of the text. -
Page 6: Installation
Installation House the module in a Eurorack case of your choosing. The power connector is 16-pin Doepfer standard . If using the power cable supplied with the module, the red edge of the cable is furthest from the top edge of the PCB, and carries -12V. ("-12V" is marked on the PCB itself next to this end of the connector.) Be sure to connect the other end of the power cable correctly, again so -12V corresponds to the red stripe on the cable. -
Page 7: Jumpers
Connect an ES-5 module via the header on the back of the disting EX marked “GT3/To ES-5”, using the 10-way cable provided. The red stripe should be oriented down on both modules, as shown in the photo above, and in the ES-5 user manual Connect an FHX-8GT or FHX-8CV module via the header on the back of the disting EX marked “GT2/FHX Expansion”. -
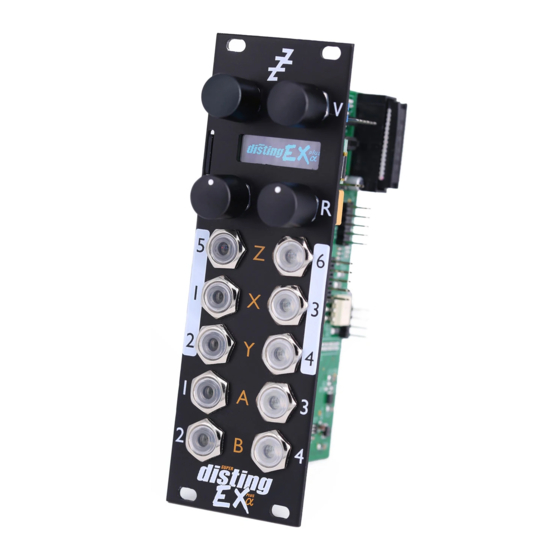
Page 8: Inputs And Outputs
Inputs and Outputs The disting EX has six analogue inputs and four analogue outputs on 3.5mm TS jack sockets. These are designed to cope with any Eurorack signal (with a range of approximately ±10V), and are DC coupled, so can be used for CVs as well as audio. The inputs are numbered on a white background;... -
Page 9: Sd Card Slot
While the menu is active, turning 'P' scrolls through menu items, and pressing 'P' chooses the current menu item (or descends to the next menu level, if the current menu item is a submenu). Pressing 'V' jumps back up one menu level. Holding down 'V' exits the menu completely. SD Card slot The disting EX has a MicroSD card slot, to the left of the display. - Page 10 The maximum speed achievable with the disting EX is around 3 MB/s. Technical note: the disting EX accesses the MicroSD card in SPI mode, and so can never achieve the rated speed of the card, which assumes full SD bus access. It can however use High Speed mode where available to double the throughput.
-
Page 11: Overview
Overview The disting EX is a multifunction module. Its various functions are referred to as algorithms. Types of algorithms include • audio processing (audio in, audio out e.g. delays, reverbs) • CV processing (CV in, CV out e.g. quantisers) • CV generation (e.g. -
Page 12: Single Mode Common
The second line shows the current parameter number and name. Turning the 'P' knob scrolls through the parameters. Video The third line shows the current parameter's value, and if appropriate, its unit (the unit in the screenshot above is “%”). You'll note that there are two values shown. The first (leftmost) is the parameter's base value. -
Page 13: Single Mode Help
Single mode help Video Each algorithm's user manual section can be accessed via the Algorithms menu. Page 13... -
Page 14: Dual Mode
Dual Mode In dual mode, the disting EX essentially behaves like two souped-up disting mk4s Left disting mk4 Right disting mk4 S knob S knob Turn to change parameter value. Hold & turn to choose parameter. Press to enter menu. Z knob Z knob Input Z... -
Page 15: Help
Help Video The per-algorithm help is hardcoded into the firmware – it is not stored on the SD card. Also it displays the help a page at a time, rather than scrolling it a character at a time! Z push functions & the Knob Recorder On the disting mk4, the effect of pushing the Z knob is very algorithm-dependent –... -
Page 16: Entering Dual Mode
• D-2 Tape Delay & M-6 Stereo Tape Delay ◦ Maximum delay time is around 11 seconds (mono)/5.5 seconds (stereo). The algorithms have an extra 'Coarse' parameter to access the extra delay time available. • K-1 Wavetable VCO, K-2 Clockable Wavetable LFO, K-3 Wavetable Waveshaper, K-4 Clockable Wavetable Envelope &... - Page 17 In the main Settings menu (see below) you can choose alternative dual display modes. The options are 'Standard', 'Standard (no zoom)' and 'Retro'. The 'no zoom' option is as above but the display never zooms to use the entire screen for one half. The 'Retro' option recreates the actual disting mk4 display –...
-
Page 18: Presets
Presets A preset on the disting EX stores the following information: • The preset name. • The current algorithm(s). • The algorithm parameters. • For dual algorithms: ◦ The current parameter. ◦ The chosen Z function. • For single algorithms: ◦... -
Page 19: Load From Sd
Load from SD card Loads a preset from the MicroSD card. Use the 'P' knob to choose the preset file to load. Preset files may be located at the top level of the card, or inside folders. If a folder contains preset files, it is included in the names you can choose with 'P', and “(folder)”... -
Page 20: Mappings
Mappings A 'mapping' stores all the information about how an algorithm's parameters are controlled by CV, MIDI etc. It is dealt with separately from a preset on the rationale that you will change a mapping less often than a preset. Mappings can be stored in the module's flash memory and/or on the MicroSD card. -
Page 21: Knob Mappings
Knob Mappings Video Knob mappings let you control algorithm parameters from the module's 'L' & 'R' knobs. Every parameter can be assigned to a knob simultaneously, and each parameter's response to that knob set independently. The knob mappings can either offset the values set manually – the parameter value calculated from the knob is added to the value previously set –... -
Page 22: Midi Mappings
• The parameter number – choose which parameter's mapping you want to edit. • The button – choose the button to use, or “-” for none. • The offset – the value to be added to the parameter when you press the button. MIDI Mappings Video MIDI mappings let you control algorithm parameters via MIDI continuous controllers (CCs). -
Page 23: Mapping
controllers 0 and up. The controller range of 0-16383 is mapped to the parameter's full value range. On the mapping editing screen, move the cursor (the dotted rectangle) with the 'P' knob. Turn the 'V' or 'R' knobs to adjust the value under the cursor. There are six cursor positions: •... -
Page 24: Load From Sd
Load from SD card Loads a mapping from the MicroSD card. Use the 'P' knob to choose the mapping file to load. Mapping files may be located at the top level of the card, or inside folders. If a folder contains mapping files, it is included in the names you can choose with 'P', and “(folder)”... -
Page 25: Single Mode
Single Mode Algorithms The following pages describe the disting EX's “single mode” algorithms. Page 25... -
Page 26: Mixer
1 – Matrix Mixer Mix inputs Mix inputs Mix outputs Mix outputs The Matrix Mixer is a flexible 6 into 4 mixer, mainly designed for CV processing, though it will happily handle audio as well. As well as a static mix, the algorithm is capable of complex dynamic mixes when CV mapping is used, and also of CV generation –... - Page 27 Name Max Default Unit Description 15-38 Mix N->M -200 These 24 parameters set the mix matrix. E.g. 'Mix 5->2' sets the amount of input 5 that will be summed into output 2. A negative amount indicates that the signal will be inverted. 39-44 In offset -10000 10000 0 Input offsets for inputs 1-6.
-
Page 28: Loop
Dry/delay mix left Delay only right Dry/delay mix right Augustus Loop is a disting EX implementation of one of Expert Sleepers' oldest products, the VST plug-in of the same name . Essentially, it's a tape-inspired stereo delay. The delay time can be dialled in manually, or set by tap tempo or a clock input. The longest delay possible is around 44 seconds. -
Page 29: Algorithm-Specific
This diagram is reproduced from the VST plug-in user manual, and explains the signal flow graphically: Output Input Input level level Effect level Master Saturation feedback & Filter Feedback levels Read heads Write head Virtual Tape There are four 'tape read heads' with independent delay times and stereo positions, allowing for straight stereo delays, ping pong delays, or hybrid multi-tap style effects. -
Page 30: Delay Time
Name Min Max Default Unit Description Time (fine) -100 100 Sets an adjustment to the delay time, in milliseconds. The coarse and fine delay times are added to produce the actual delay time. Delay A multiplier to apply to the delay time set by multiplier the parameters, the tap tempo, or the clock. -
Page 31: Inertia Free
Name Min Max Default Unit Description Pitch inertia 0 Sets the amount of 'inertia' or slew on the pitch CV input. At zero, the tape speed follows the pitch input closely; at the maximum value, pitch changes are quite gradual. Stop tape When set to '1', the tape speed is set to zero. -
Page 32: Multipliers
Delay time multipliers Parameter value Multiplier Parameter value Multiplier Parameter value Multiplier 1/64 3/16 x1.5 1/48 1/32 5/16 1/24 1/16 1/12 Tap tempo The 'Tap tempo' parameter allows for a tap tempo function. Typically you would map this to a button push, or a MIDI event. -
Page 33: Algorithm-Specific
WAV files from the MicroSD card. It can have up to 3 input CV/gate pairs, or can be played via MIDI. It supports both velocity switches and round robins per sample. There is also a chord and arpeggio generator, based on those in the Expert Sleepers General CV module. -
Page 34: Outputs
information for the highest active voice: the file name, the file's natural pitch, and its switch setting. Outputs Outputs 1 & 2 are the main stereo outputs. Output 4 is a mono mix of outputs 1 & 2. Output 3 is a 'paraphonic gate' – it will be high while any voices are playing. Parameters Name Min Max Default Unit... -
Page 35: Chord
Name Min Max Default Unit Description Bend range 0 The pitch bend range, in semitones. Applies both to MIDI pitch bend, and to CV pitch bend, in which case a CV of ±5V maps to the chosen bend range. Pitch bend The pitch bend input, or “0”... -
Page 36: Mappings
Default mappings Input 1 is mapped to 'Env Time'. Input 3 is mapped to 'Sustain'. Chord scales The available scales are as follows. Name Notes Example (on C) Major 1, 3, 5, 6, 8, 10, 12 C D E F G A B Natural Minor 1, 3, 4, 6, 8, 9, 11 C D E♭... -
Page 37: Defaults
Name Behaviour Example (on C major triad) Notes are played from lowest to highest. C E G C E G ... Down Notes are played from highest to lowest. G E C G E C ... Notes are played alternately up and down. C E G E C E G ... -
Page 38: Triggers
4 – SD 6 Triggers Video Trigger inputs Trigger inputs Assignable outputs Assignable outputs This algorithm, primarily designed for drum sample playback, offers 6 voices with independent triggers and sample selection. It is somewhat like the disting mk4's 'I-8 Dual Audio Playback with Z Speed' but much more capable. -
Page 39: Outputs
Outputs Outputs 1-4 are audio outputs. Each voice can be routed to one or a pair of these. Parameters Name Min Max Default Unit Description Attenuverter -200 200 Applies an attenuverter to the corresponding input. A negative value indicates that the CV will be inverted. -
Page 40: Recorder
5 – WAV Recorder Record Play Record CV Play CV Left/mono input Right input L/R output pair 2 L/R output pair 1 This algorithm records audio (or CV) to the MicroSD card as a WAV file. It can record mono or stereo files at 48 or 96kHz, 16 or 24 bit. -
Page 41: Outputs
(The image above shows that the left channel has clipped.) The number at the top right is the number of the last recording – this will be incremented when recording starts. While recording, the display looks like this: The top line changes to show the time since recording started, a circle to indicate recording, and a barber pole animation over the recording number. -
Page 42: Options
Output options Thru Output the input signals. Thru/Play Output the input signals, unless playback is active, in which case output the playback signals. Play Output the playback if active, else nothing. Page 42... -
Page 43: Wav
WAV file naming conventions and playlists The disting EX supports WAV file playlists exactly as documented for the disting mk4. However, it also supports naming conventions to set the most commonly used settings without requiring a playlist. Some of these naming conventions set features not available on the mk4 e.g. round robins. Look in the folders on the MicroSD card that is supplied with the module for some examples. - Page 44 sample is pitched down within the gap. For larger gaps, the lower sample is pitched up over half the remaining range. For example: Gap between samples Behaviour (semitones) Higher sample stretched down over 1 Higher sample stretched down over 2 Higher sample stretched down over 3 Higher sample stretched down over 3;...
-
Page 45: Settings
Settings The Settings menu provides access to some global settings which are not part of a preset. These settings are stored when changed and reapplied when the module powers up. General The Settings->General menu contains these settings: Setting Value range Default Function Contrast 0-255... -
Page 46: Favourites
Setting Value range Default Function TX channel (dual R) 1-16 The MIDI transmit channel for dual mode algorithms running on the right half. I2C address 0-127 The module's I2C address. Select Bus function 0-3 The function of the Select Bus – see below. Favourites This menu lets you set up the 'favourites' dual mode slots, numbered O-1 to P-8. -
Page 47: Show Midi History
Show MIDI history Shows the last four MIDI messages received by the module (most recent at the bottom). At the start of each line is 'R' if the message was received on the Select Bus or 'B' if the message was received via the MIDI breakout. - Page 48 Test select bus out Sends MIDI channel 1 CC #1 messages with a value ramping from 0 to 127 on the Select Bus. Test SD speed Performs a large number of reads from the SD card and presents the resulting timing information.
-
Page 49: 5-Pin Din Midi I/O
The header is a standard 0.1" pitch header compatible with e.g. typical IDC cable sockets. When using the Expert Sleepers MIDI breakout, pin 1 of the breakout's header (GT1) corresponds to pin 1 of the disting EX's header (GT4). Orient the ribbon cable to match up these pins. The supplied ribbon cable has two rows of four contacts –... -
Page 50: Sysex Header
All SysEx messages are prefixed with a manufacturer's ID, which is a unique series of hex bytes assigned by the MIDI Manufacturers Association. The Expert Sleepers ID is 00H 21H 27H, so all SysEx messages relating to Expert Sleepers hardware will begin... -
Page 51: Bus
Select Bus The disting EX is capable of both sending and receiving on the Select Bus. Note that the jumper needs to be set appropriately as shown below: The Select Bus is a means of inter-module communication currently supported by a handful of modules from various manufacturers, including the Malekko Varigate 8+ Macro Machines... -
Page 52: Connection
I2C Connection The disting EX supports an connection, via the header on the PCB marked “JP2”. The GND, SCL & SDA lines are clearly marked on the PCB. Be sure to connect these to the corresponding lines on the other I2C device(s) in use. Make/remove I2C connections with the power off. -
Page 53: Select I2C Calibration
Calibration The calibration menu is accessed via the settings, as described above. Calibration requires a 3V voltage reference. Any stable and accurate voltage source can be used. It's a good idea to let the whole system warm up for 5 minutes before calibrating to stabilise any temperature-dependent factors. -
Page 54: Where To Get Acknowledgments
Video The disting EX's firmware can be updated using a MicroSD card. (See 'Supported MicroSD cards' above.) The process is as follows: • Download the firmware from the Expert Sleepers website. • Unzip the download. • Copy the file (which will be named something like 'distingEX_1.0.0.hex') from the unzipped download to the root folder of a MicroSD card.
Need help?
Do you have a question about the super disting EX plus alpha and is the answer not in the manual?
Questions and answers