
Summary of Contents for MediVena ONE-CARE PRO
- Page 1 Operations & Procedures Manual ONE-CARE® PRO Blood Glucose Monitoring System (Model AC500 PRO) For in vitro diagnostic use only...
-
Page 2: Table Of Contents
TABLE OF CONTENT Introduction Intended Use Statement Important Safety Instructions About the Product About the Meter About the Meter Display About the Test Strip About the Test Strip Vial Installing/Replacing the Battery Setting Up the Meter Setting the Date, Time Setting the Reminder Alarm Setting the HI / LO Alarm Setting the Sound... -
Page 3: Introduction
INTRODUCTION Thank you for choosing the ONE-CARE® PRO (Model AC500 PRO) Blood Glucose Monitoring System. As you already know, self monitoring of blood glucose (SMBG) is a necessary part of the treatment plan of people with diabetes mellitus. Adapted for its ease of use and quick response time, the ONE-CARE®... -
Page 4: Important Safety Instructions
IMPORTANT SAFETY INSTRUCTIONS • Users need to adhere to Standard Precautions when handling or using this device. All parts of the glucose monitoring system should be considered potentially infectious and are capable of transmit- ting bloodborne pathogens between patients and healthcare professionals. For more information, refer to “Guideline for Isolation Precautions: Preventing Transmission of Infectious Agents in Health- care Settings 2007”, http://www.cdc.gov/hicpac/2007ip/2007isolationprecautions.html. -
Page 5: About The Meter
Contains meter serial number and customer service phone number. 9. Data Port Connect interface cable to transfer data. (Side of the meter) Front view Back view ONE-CARE PRO (Model: AC500 PRO) Blood Glucose Meter Medidor de Glucosa Manufactured for: Manufacturado para:... -
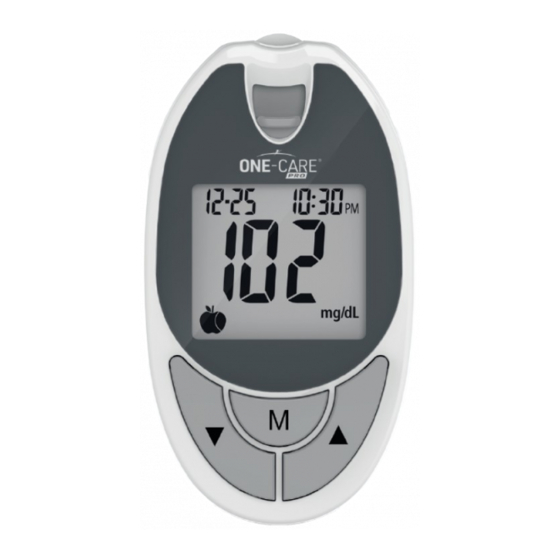
Page 6: About The Meter Display
ABOUT THE METER DISPLAY 1. Memory Symbol Indicates in memory mode. 2. Control Solution Test Appears when doing a control solution test and marking the result as a control solution test. 3. Date 4. Test Result Area Display test results. 5. -
Page 7: About The Test Strip
Re-cap immediately Use only with Use only with One-Care Pro (Model: AC500 PRO) Blood Glucose Meter! One-Care Pro (Model: AC500 PRO) Blood Glucose Meter! Almacenar a 39 ~ 86°F (4 ~ 30°C), No refrigerar Almacenar a 39 ~ 86°F (4 ~ 30°C), No refrigerar Una vez abierto usar en 90 días... -
Page 8: Installing/Replacing The Battery
INSTALLING/REPLACING THE BATTERY When the battery is low, the meter will show a warning signal. When this display appears, it is time to replace a new battery. When the low battery warning signal is shown, the meter will provide accurate results for approximately 50 more measurements. How to Replace the Battery 1. -
Page 9: Setting Up The Meter
SETTING UP THE METER To turn the meter on, rst install the batteries, then proceed with the following instructions. SETTING THE DATE, TIME 1. Press and hold M for 4 seconds with meter turn o to enter this mode. 2. Press ▲ or ▼ to select “24hr” or “12hr” setting. Press M to set. (Fig.1) 3. -
Page 10: Setting The Reminder Alarm
SETTING THE REMINDER ALARM The meter provides four user setting reminder alarms for worry free testing. (Default is alarm o .) 1. Press and hold ▼ for 4 seconds with meter turn o to enter this mode. 2. The rst reminder alarm will appear on the display. (Fig.5). Press ▲ or ▼ to seclect which alarm you want to set (number 1 to 4). -
Page 11: Setting The Hi / Lo Alarm
SETTING THE HI / LO ALARM 1. Press and hold ▼ for 4 seconds with meter turn o to enter this mode. 2. Press and release▼ to move through reminder alarm setting, the HI alarm setting will appear. Press M to con rm. (Fig.9) 3. -
Page 12: Setting The Sound
SETTING THE SOUND 1. Press and hold ▲ for 4 seconds with meter turn o to enter this mode. The “bi and speaker icons” display will appear. (Fig.13) 2. If you want to hear a beep sound during testing, press ▲ or ▼ to select “On”, then press M to set. To turn the beep sound o , press ▲... -
Page 13: Important Information
IMPORTANT INFORMATION You have to know before testing ˙Always keep the test strips in the original vial only. Tightly close the vial immediately after remov ing a test strip. ˙Do not use test strips and control solutions beyond the expiration date printed on the package since this may cause inaccurate results. -
Page 14: Testing Your Blood Glucose Level
TESTING YOUR BLOOD GLUCOSE LEVEL Before testing blood glucose, you need the following items: 1. ONE-CARE® PRO (Model AC500 PRO) meter 2. ONE-CARE® PRO (Model AC500 PRO) test strip 3. Single use disposable safety lancet PREPARING THE TEST STRIP 1. Wash hands using soap and warm water. Rinse and dry thoroughly. 2. -
Page 15: Obtaining A Blood Sample
OBTAINING A BLOOD SAMPLE SAMPLE MAY BE OBTAINED FROM FINGER, PALM or FOREARM 1. Twist and pull o protective tab to break seal on lancet and place in disposal. 2. Position lancet rmly against puncture site as illustrated. Press down rmly until an audible click is heard. -
Page 16: Applying Blood Sample To The Test Strip
Please refer the following practice guidelines: ˙ Biosafety in Microbiological and Biomedical Laboratories (BMBL) found at http://www.cdc.gov/biosafety/publications/bmbl5/ ˙ “Protection of Laboratory Workers From Occupationally Acquired Infections; Approved Guide line-Third Edition” Clinical and Laboratory Standards Institute (CLSI) M29-A3. APPLYING BLOOD SAMPLE TO THE TEST STRIP 1. - Page 17 3. After the test result appears, if no further tests are performed, the meter will automatically shut o after 3 minutes. After nishing the test, you can push the strip eject button to remove the used strip or use a tissue to remove test strip from the meter for proper disposal. Warning: Always discard the used test strip into suitable waste container.
-
Page 18: Available Alternate Sites Testing: Palm And Forearm
AVAILABLE ALTERNATE SITES TESTING: PALM AND FOREARM ONE-CARE® PRO (Model AC500 PRO) Blood Glucose Monitoring System provides you alternate sites testing (AST). This system provides you to test on the palm and the forearm with the equivalent results to ngertip testing. CAUTION: 1. -
Page 19: Control Solution Test
CONTROL SOLUTION TEST The control solution is used to check and ensure that the system is working properly and that you are performing the test correctly. When to Perform a Control Solution Test 1. When you are using your system for the rst time. 2. - Page 20 4. After system checking ok, a ashing “ “ symbol will appear. 5. Press and hold M for 4 sec to switch to control solution mode. The “ “ will appear which indi cates that the meter will mark your current test as a control solution test. Now you are ready to apply the control solution.
-
Page 21: Memory Features
MEMORY FEATURES View results stored in the memory View results stored in the memory 1. Press M to turn on the meter. The date and time will appear rst. 2. Press ▼ to review previous results. Results will be shown starting with the most recent. Test result memory sequence will display when button is pressed and test result with date and time the test was taken will display when button is released. - Page 22 View control solution and day average result 1. Press M to turn on the meter. The date and time will appear rst. Press M again to view the average results. 2. The control solution result will show on screen rst. (Fig.17) Contiune to press and release▼, the 7-days result marked with a pre-meal indicator and post-meal indicator will be shown on display in sequence.
-
Page 23: Transfer Test Results To A Computer
TRANSFER TEST RESULTS TO A COMPUTER You can use your meter with ONE-CARE® Link Health Management Software to transfer test results to your personal computer. 1. Obtain the required software and cable For order information please call Customer Service or visit website of www.one-care.com 2. -
Page 24: Cleaning And Disinfection Procedures
With all recommended glucose meter cleaning methods, it is crucial that the One-Care Pro meter be completely dry before testing a resident’s glucose level. Please follow the disinfectant product label instructions to ensure proper drying time. -
Page 25: Care And Storage
CAUTION: • Ensure that the swab or cloth is only damp, not wet. Liquid entering the meter may cause meter malfunctions. • Wash hands throughly with soap and water after handling the meter, lancing device, or test strips. If you have any questions, please contact Customer Service Hotline (888) 270 6457 Clean and disinfection of Test port, LCD cover or buttons are available. -
Page 26: Display Messages
DISPLAY MESSAGES Display Description Action The system is ready to accept a You may now apply a blood sample. blood sample. The system is ready to accept a You may now apply a drop of control control solution sample. solution sample. appears when the result is For your reference, or you can change the HIGHER than the “HI alarm setting”... -
Page 27: Other Problems That May Occur
Display Description Action An error message indicating a Press “reset” button and check the meter problem with the meter. again with the test strip. If the problem persists, contact customer service for help. Battery power is low. Meter will Replace with two AAA batteries. provide approximately 50 more measurements. -
Page 28: Speci Cations
SPECIFICATIONS Meter Operating Conditions Temperature 50°F ~ 104°F (10°C ~ 40°C) Humidity 10 ~ 90% RH Hematocrit 20% ~ 60% Test Sample Fresh capillary whole blood from ngertip, palm and forearm Sample Volume >0.5 L Measuring Unit mg/dL Measuring Range 20-600 mg/dL (1.1 ~ 33.3 mmol/L) Test Time 5 sec... -
Page 29: Icon Description
ICON DESCRIPTION Authorised Representative in the European Community Do not use if package is damaged Temperature limitation Batch code Use by Keep dry Do not reuse Serial Number Manufacturer In vitro diagnostic medical device Consult instructions for use Su cient for Catalogue number Keep away from sunlight Control... -
Page 30: Tolerance Summary Of Interference Substance
TOLERANCE SUMMARY OF INTERFERENCE SUBSTANCE Highest tested concentration with no Interference substance signi cant interference Acetaminophen 4.25 mg/dL Ascorbate(Ascorbic acid) 3 mg/dL Bilirubin 25 mg/dL Cholesterol 1200 mg/dL Creatinine 10 mg/dL 2 mg/dL Dopamine EDTA 200 mg/dL Galactose 500 mg/dL Gentisic acid 2.5 mg/dL Glutathione... - Page 31 The ONE-CARE® PRO (Model AC500 PRO) Meter, ONE-CARE® PRO (Model AC500 PRO) Test Strip and ONE-CARE® PRO Control Solution are in conformity with the IVDD 98/79/EC. Manufactured for: MediVena 1 Glenlake Parkway, Ste 700 Atlanta, GA 30328, USA (404) 514 2586 info@medivena.com...
-
Page 32: Service And Warranty
System and ONE-CARE® PRO (Model AC500 PRO) test strip are used improperly. Manufacturer Warranty MediVena guarantees that this device will be free of defects in materials and workmanship for a period of three years from the date of original purchase. During the stated three-year period, our company shall repair or replace any ONE-CARE®... - Page 34 Notes:...
- Page 35 Notes:...
- Page 36 Distributed by: Links Medical Products 9247 Research Drive Irvine, CA 92618 email: info@linksmed.com toll free: (888) 425-1149...
Need help?
Do you have a question about the ONE-CARE PRO and is the answer not in the manual?
Questions and answers
The machine does not turn on when I insert the strip.
The MediVena ONE-CARE PRO meter is designed to automatically power on when a test strip is inserted. If it does not turn on, possible reasons include:
1. Dead or Low Battery – The battery may need to be replaced.
2. Incorrect Strip Insertion – Ensure the test strip is correctly inserted.
3. Damaged or Defective Meter – The meter may be faulty and require replacement under warranty.
4. Dirty or Faulty Strip Port – Dirt or damage in the strip port could prevent proper contact.
If the issue persists, contacting MediVena customer service is recommended.
This answer is automatically generated