Table of Contents
Advertisement
Quick Links
Assembly & InstAllAtIon
AssemblAge et InstAllAtIon
montAje e InstAlAcIón
Please read these instructions thoroughly prior to installation, then
store in a safe place for future reference. If at any time you are unclear
about this product, or require further assistance please do not hesitate
to contact our trained professionals operating the customer support
line at 1-888-478-6435 (English/French/Spanish language services,
U.S.A. and Canada only), from Monday to Friday, 8:30 am to 5:00 pm
Eastern Standard Time or email us at info@sunforceproducts.com.
Veuillez lire soigneusement ces instructions avant de commencer l'installation
et conservez-les dans un endroit sûr pour référence ultérieure.
En tout temps, si vous avez des questions au sujet de ce produit ou avez besoin
d'aide, n'hésitez pas à contacter nos professionnels dûment formés à notre système
d'assistance téléphonique au 1-888-478-6435 (anglais / français / espagnol, aux
États-Unis et au Canada seulement) de 8 h 30 à 17 h du lundi au vendredi, heure
normale de l'Est ou par courrier électronique à info@sunforceproducts.com.
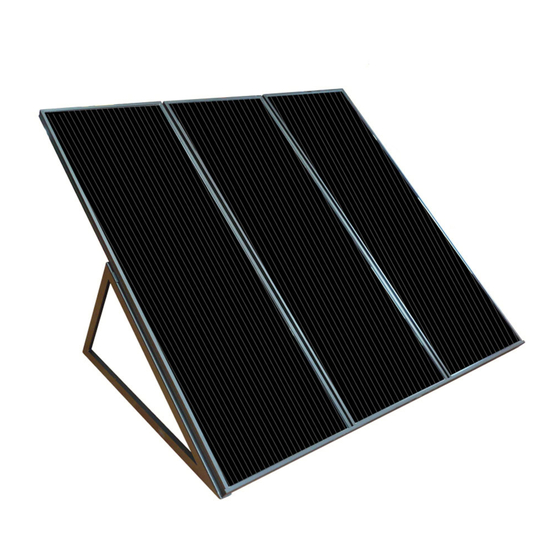
55 WATT
SOLAR 12-VOLT
POWER GENERATOR KIT
GÉNÉRATRICE
12 VOLTS
DE 55 WATTS
KIT GENERADOR
12 VOLTIOS
Y 55 WATTS
Por favor lea estas instrucciones antes de instalar y luego guárdelas
en un lugar seguro para su referencia. Si tiene alguna pregunta sobre
este producto o requiere asistencia, contacte a nuestro equipo de
profesionales en la línea de soporte al 1-888-478-6435 (Servicio en
Inglés / Francés / Español, sólo en Estados Unidos y Canadá) 8:30 am -
5 pm Lunes-Viernes Tiempo del Este o por correo electrónico al
info@sunforceproducts.com.
SOLAIRE DE
SOLAR DE
Advertisement
Table of Contents

Related Manuals for Coleman 58050


Summary of Contents for Coleman 58050
- Page 1 Assembly & InstAllAtIon AssemblAge et InstAllAtIon montAje e InstAlAcIón 55 WATT SOLAR 12-VOLT POWER GENERATOR KIT GÉNÉRATRICE SOLAIRE DE 12 VOLTS DE 55 WATTS KIT GENERADOR SOLAR DE 12 VOLTIOS Y 55 WATTS Please read these instructions thoroughly prior to installation, then Veuillez lire soigneusement ces instructions avant de commencer l’installation Por favor lea estas instrucciones antes de instalar y luego guárdelas store in a safe place for future reference.
-
Page 3: Specifications
SpECIFICATIonS FEATUrES Designed for rechargeable 12-volt batteries such as those used in boats, RVs or cottages. Also ideal SIzE (L x W x h) 38.0 x 30.0 x 22.0 in (96.5 x 76.2 x 55.9 cm) ChARGES 12-VOLT bATTERIES for emergency back-up or remote power use when electricity is unavailable. -
Page 4: Caractéristiques
CArACTÉrISTIqUES SpÉCIFICATIonS Conçu pour des batteries rechargeables de 12 DImENSIONS (LO x LA x h) 38,0 x 30,0 x 22,0 po (96,5 x 76,2 x 55,9 cm) V comme celles utilises sur les bateaux, dans ChARGE DES bATTERIES les VR ou les chalets. Aussi idéal comme source DE 12 V d’alimentation d’urgence ou dans les endroits POIDS... -
Page 5: Especificaciones
CArACTEríSTICAS ESpECIFICACIonES Diseñado para baterías recargables de 12 voltios tales como las utilizadas en botes, vehículos recreativos o CARGA bATERíAS DE 12 casas de campo. Es ideal también como energía de DImENSIONES (L x AN x AL) 38.0 x 30.0 x 22.0 po (96.5 x 76.2 x 55.9 cm) VOLTIOS reserva de emergencia o para uso remoto donde no haya acceso eléctrico. - Page 6 pArTS LIST / LISTE dE pIèCES / LISTA dE pArTES TOOLS REquIRED (nOT InCLuDED): OuTILS REquIS (nOn COMPRIS) : IMPORTAnT: please ensure all components are present prior HERRAMIEnTAS nECESARIAS (nO InCLuIDAS): to installation. IMPORTAnT: assurez-vous que toutes les composantes sont à portée de main avant de commencer l’installation.
- Page 7 PRE-ASSEMBLy / PRÉASSEMBLAGE / PRE -MONTAjE PLACIng THE SOLAR PAnEL Ensure your solar panels are placed so that their exposure to the sun is optimized. Be aware of objects such as trees or property overhangs that may impede the panels’ ability to generate a charge. EMPLACEMEnT Du PAnnEAu SOLAIRE Assurez-vous que vos panneaux solaires sont placés de façon à...
-
Page 8: Installation / Installation / Instalación
InSTALLATIon / InSTALLATIon / InSTALACIón MOunTIng THE SOLAR PAnELS Align the mounting holes (4) in the back of each panel with the mounting heads (5) on the frame. place the panel onto the frame. repeat this process for all 3 panels. MOnTAgE DES PAnnEAux SOLAIRES Alignez les trous de montage (4) à... - Page 9 COnnECTER LES COMPOSAnTES COnnECTIng kIT COMPOnEnTS COnExIón DE LOS COMPOnEnTES DEL kIT Du SySTèME 1. Connect the 3-in-1 connector cable (9) to the 1. Connectez le câble de connexion de fil 3-en-1 (9) aux 1. Conecte el 3-en-1 (9) a los paneles solares (8). solar panels (8).
- Page 10 opErATIon / FonCTIonnEMEnT / opErACIón WARnIng: The solar charge controller and power AVERTISSEMEnT : Le régulateur de charge ADVERTEnCIA: El controlador de carga y el inversor inverter must be used in a dry environment away solaire et l’onduleur doivent être utilisés dans un deben ser utilizados en un entorno seco y alejado de from the elements.
- Page 11 CONNECTiNG ThE iNVERTER / CONNExiON DU ONDULEUR / CONExióN DEL iNVERSOR COnnECTIng THE InVERTER TO A 12V BATTERy Be sure to identify the correct polarity when securing the inverter connector cable (16) to the 12-volt battery. RED is Positive (+) BLACK is Negative (-). Only when the clamps are secure and the polarity is checked should the power inverter (15) be turned on.
- Page 12 ChANGiNG ThE FUSE / REMPLACEMENT DU FUSiBLE / REEMPLAzO DEL FUSiBLE REEMPLAzO DEL FuSIBLE CHAngIng THE FuSE REMPLACEMEnT Du FuSIBLE El inversor incluye un fusible integrado y un fusible de The inverter comes with both a built-in fuse and a L’onduleur est fourni avec un fusible intégré...
-
Page 13: Frequently Asked Questions
FREQUENTLy ASKED QUESTiONS Why isn’t the LED light on the voltage tester Ensure the panel is in full sun and the connection is secure. illuminating? What can be done if the wires are too short? Contact the manufacturer for a list of additional parts to purchase. use the included LED voltage tester or use a multimeter (not included) to accurately read the panel’s How do I know if the panel is producing voltage? voltage. -
Page 14: Foire Aux Questions
FOiRE AUx QUESTiONS Pourquoi est-ce que la DEL du testeur de puissance n’est-elle pas Assurez-vous que le panneau est complètement exposé au soleil et que la connexion est solide. allumée? quelle est la solution lorsque les fils sont trop courts? Contactez le fabricant pour une liste de pièces additionnelles à... -
Page 15: Preguntas Frecuentes
prEgUnTAS FrECUEnTES ¿Por qué no se ilumina el LED del probador de voltaje? Verifique que el panel esté a pleno sol y que la conexión esté firme. ¿qué se hace si los cables son muy cortos? Contacte al fabricante para conocer qué partes pueden adquirirse. utilice el probador LED incluido o use un voltímetro (no incluido) para leer con precisión el voltaje del ¿Cómo sé... - Page 16 Coleman sont des marques déposées de The Coleman Company, inc., utilisées sous licence. © 2016 The Coleman Company, inc. pour de plus amples renseignements ou de l’aide technique, contactez : Les produits Sunforce products Inc., Montréal, qC, Canada 1-888-478-6435 www.sunforceproducts.com info@sunforceproducts.com...
Need help?
Do you have a question about the 58050 and is the answer not in the manual?
Questions and answers