Table of Contents
Advertisement
Quick Links
Installation Instructions
Thank you for purchasing this quality MFL product. To ensure correct function and safety, please read and follow all
instructions carefully before assembly, installation and use. Please keep instructions for future reference.
Warranty
•
This sensor is covered by a 12 month warranty. The warranty is from date of purchase, not the date of installation.
•
If the sensor is not assembled and installed by a licensed electrician the warranty will be void.
•
Please retain proof of purchase and evidence of installation by a licensed electrician for any warranty enquiries.
•
Warranty will be void if there is any damage due to improper usage or modification to the sensor.
•
This sensor is not suitable for use with dimmer switches. Warranty will be void if the sensor is used on the same
circuit which has a dimmer switch.
•
Failure to comply with the instructions in this manual may increase the risk of damage or injury and will void warranty.
Installation Requirements
•
This product must be assembled and installed by a licensed electrician.
•
All wiring and installation of this product must adhere to the latest local and national wiring rules
eg. AS/NZS 3000 Electrical installations.
•
The rated load for the sensor depends on the lamp/luminaire used:
LED: Max. 200W
Fluorescent: Max. 400W
Incandescent: Max. 800W
•
This product is suitable for indoor use only.
•
This is a Class II product and must be maintained during wiring and installation.
•
The sensor is not suitable to use with dimmer switches and must not be used with a circuit which has a dimmer.
•
See the Sensor Information section in this instruction manual for additional information.
•
Lay out all the components on a smooth surface and make sure there are no components missing before
assembling. If parts are missing, return the complete product to the place of purchase for inspection or replacement.
•
Check whether the fitting has been damaged during transport. Do not operate/install any product which appears
damaged in any way. Return the complete product to the place of purchase for inspection, repair or replacement.
•
Ensure power to the circuit you are working on has been switched OFF before commencing any electrical work.
Sensor Information
PIR (PASSIVE INFRA RED) SENSOR:
This product has a PIR (Passive Infra Red) sensing device which continuously scans the operating zone and immediately
switches on when it detects movement in that area. While there is movement detected within the sensor range, the sensor,
will remain on.
SENSOR LOCATION & INFORMATION:
To find a suitable location for installation, please take into consideration the following points:
•
The ideal mounting height for this product is between 2.2m to 4m above the detection area. Fig.1
•
The detection area is approximately 6 metres away at an angle of 360° wide. This may vary depending on the mounting
height and location. Fig. 2
•
The detection area may also alter at different temperatures. PIR sensors are more sensitive in cold weather than warm
weather.
1 | P a g e
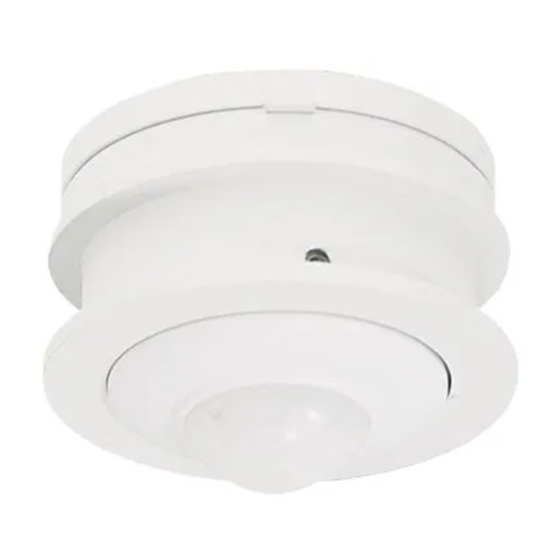
CLICK FULL SENSOR
SKU# 177093
Rated Voltage 220-240V~ 50Hz
v 1 . 1 ( 0 8 / 2 0 1 9 )
Advertisement
Table of Contents

Summary of Contents for Masson MFL 177093
- Page 1 Installation Instructions CLICK FULL SENSOR SKU# 177093 Rated Voltage 220-240V~ 50Hz Thank you for purchasing this quality MFL product. To ensure correct function and safety, please read and follow all instructions carefully before assembly, installation and use. Please keep instructions for future reference. Warranty •...
- Page 2 Installation Instructions • The sensor has better sensitivity with movement across the detection area. • The sensor has reduced sensitivity with movement towards and away from the detection area. • If movement is made walking directly towards or away from the sensor and not across, the apparent detection range will be substantially reduced.
- Page 3 Installation Instructions Connect the luminaire wires to the terminal block. Luminaire Wire Terminal Block Label Neutral – Blue N (Neutral) Live – Brown A (Live) 7. Ensure that the wires are secure and no bare wires are exposed. Secure the mains supply wire and luminaire wires with the cord anchorage by tightening the screws.
- Page 4 Installation Instructions 4 | P a g e v 1 . 1 ( 0 8 / 2 0 1 9 )
- Page 5 Installation Instructions TRIMLESS INSTALLATION SKU# 177092 - Trimless Frame Kit is required for installation, this is sold separately and contains Parts C & D. 1. Remove the trim (B) from the frame body (A). Install the trimless frame (D - not included, sold separately) and the ring (C - not included, sold separately) onto the frame body (A).
- Page 6 Installation Instructions Safety Tips • Always ensure the power is OFF before performing any maintenance, cleaning or making any adjustment to the sensor. • To avoid injury or damage to the sensor, ensure that power leads and screws are secure before connecting the power.
Need help?
Do you have a question about the MFL 177093 and is the answer not in the manual?
Questions and answers