Table of Contents
Advertisement
Advertisement
Chapters
Table of Contents

Related Manuals for FISCHBEIN Empress Series


Summary of Contents for FISCHBEIN Empress Series
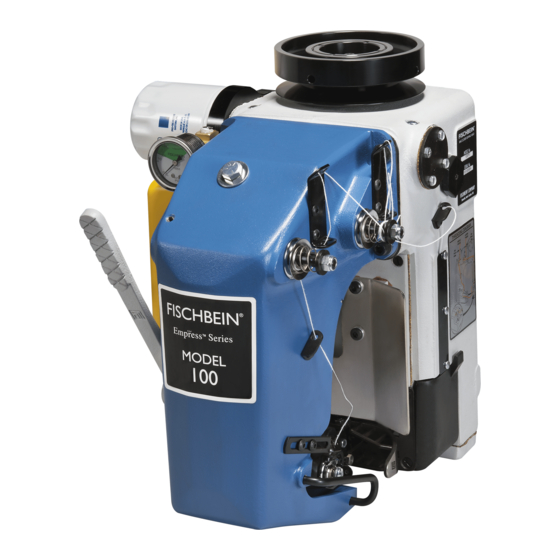
- Page 1 FISCHBEIN Model 100 & 101 Empress Series Sewing Head ...
-
Page 2: Table Of Contents
® FISCHBEIN MODELS 100 & 101 EMPRESS™ SERIES SEWING HEAD OPERATOR’S MANUAL TABLE OF CONTENTS Page Corporate Statement ................. 2 Introduction ................3 1.1 System Description ............3 1.2 Warnings ………………………………………………………………………. 4 1.3 Characteristics ……………………………………………………………….. 5 2. Installation ………………………………………………………………………………. 7 2.1 Unpacking Procedures …………………………………………………….. -
Page 3: Corporate Statement
A worldwide network of distributors assists our customers in meeting their technological requirements and their business objectives. Orders, questions and comments can be addressed to Fischbein through the worldwide web at www.fischbein.com or by writing or calling our North American or European offices:... -
Page 4: Introduction
The use of repair parts other than those included within the FISCHBEIN approved parts list may create hazardous conditions over which FISCHBEIN has no control. Therefore, FISCHBEIN cannot be held responsible for equipment in which non-approved repair parts are installed. -
Page 5: Warnings
• Always use genuine Fischbein spare parts (including Fischbein Lubricating Oil and Fischbein Oil Filters). Our parts are specifically designed for Fischbein equipment to provide optimum performance and safety. Use of non-Fischbein parts can void the product warranty. • Turn off and lock out air and power sources when performing maintenance. -
Page 6: Characteristics
® FISCHBEIN MODELS 100 & 101 EMPRESS™ SERIES SEWING HEAD OPERATOR’S MANUAL 1.3 CHARACTERISTICS Maximum speed: 1800 RPM Stitch length: 2 – 4 stitches per inch Machine Weight: Model 100: 58 lbs. (26,4 kg) (with rotary air knife) Model 101: 64 lbs. (29,1 kg) - Page 7 ® FISCHBEIN MODELS 100 & 101 EMPRESS™ SERIES SEWING HEAD OPERATOR’S MANUAL REV. H 2005 / 11...
-
Page 8: Installation
INSTALLATION 2.1 UNPACKING PROCEDURES Every Fischbein sewing head is packaged to protect the unit during normal shipping, storage and handling. Each sewing head is packed in a corrugated box with cardboard padding surrounding it. It is then taped shut. Before the unit is unpacked, inspect the box for any signs of damage incurred during shipping. -
Page 9: Mounting The Sewing Head
® FISCHBEIN MODELS 100 & 101 EMPRESS™ SERIES SEWING HEAD OPERATOR’S MANUAL 2.3 MOUNTING THE SEWING HEAD Due to the size and weight of the sewing head, a cart should be used to transport it. It is best to have a couple of installers handling the sewing head. - Page 10 ® FISCHBEIN MODELS 100 & 101 EMPRESS™ SERIES SEWING HEAD OPERATOR’S MANUAL If the jack bolts are not properly adjusted, the sewing head can vibrate possibly causing damage or other parts to come loose. The jack bolts must be raised or lowered so that they come into firm contact with the mounting plate.
-
Page 11: Lubrication
® FISCHBEIN MODELS 100 & 101 EMPRESS™ SERIES SEWING HEAD OPERATOR’S MANUAL Illustration 3 2.4 LUBRICATION (WARNING) Refer to Illustration 5. The sewing head is delivered with a screw in the breather plug. Remove this screw before starting up the head. Failure to remove this will result in... -
Page 12: Maintenance
In the event the oil level falls below the marker line, add oil until level is met. 2.5 MAINTENANCE: NOTE: A certain amount of technical knowledge and training is required to perform any maintenance on Fischbein sewing heads. DAILY Keep the machine free of dust. - Page 13 Lock out compressed air and electrical power so the machine cannot run. Fill the replaced filter with oil. Use a genuine Fischbein oil filter, ref. 15054. Coat the seal on the new oil filter with a thin film of oil.
-
Page 14: Start Up Recommendations
The Fischbein Company recommends using Fischbein cleaning solvent (ref. 5-101), Rykon #68 oil (ref. 10200), Fischbein oil filter (ref. 15054) and Fischbein sewing thread. Sewing heads Model 101 use crepe sewing tape, available in a variety of basic colors and widths. - Page 15 ® FISCHBEIN MODELS 100 & 101 EMPRESS™ SERIES SEWING HEAD OPERATOR’S MANUAL Illustration 6 REV. H 2005 / 11...
-
Page 16: Filler Cord (Optional)
® FISCHBEIN MODELS 100 & 101 EMPRESS™ SERIES SEWING HEAD OPERATOR’S MANUAL 3.1.2 FILLER CORD (OPTIONAL) Lock out electrical and pneumatic systems before attempting to thread the filler cord. Follow Illustrations 6, 7 and 8 to thread the filler cord with the looper and needle thread. -
Page 17: Thread Tension Adjustment
Tension is very slight and the adjustment is fixed. Factory settings of tension are made for a 4- ply paper bag with a stitch length of 2.5 stitches per inch (10 mm per stitch) using Fischbein synthetic thread 12/5, unless otherwise specified when ordered, which is valid in most cases. - Page 18 ® FISCHBEIN MODELS 100 & 101 EMPRESS™ SERIES SEWING HEAD OPERATOR’S MANUAL Thread pull off adjustment Illustration 10 shows the factory setting. This is suitable in many cases. For thin materials, distance must be shorter. For thick materials, distance must be larger.
-
Page 19: Stitch Length Adjustment
® FISCHBEIN MODELS 100 & 101 EMPRESS™ SERIES SEWING HEAD OPERATOR’S MANUAL 3.3 STITCH LENGTH ADJUSTMENT Illustration 11 (Bottom Plate View) The standard factory setting of the stitch length is 3/8” (10 mm per stitch). Other stitch lengths can be set according to customer requirements. If a change is needed, please follow the... -
Page 20: Cork Seal Replacement
® FISCHBEIN MODELS 100 & 101 EMPRESS™ SERIES SEWING HEAD OPERATOR’S MANUAL To check the stitch length, tilt the sewing head enough to rotate the drive pulley, without allowing the oil to leak out of the drain hole. Put a sample piece of bag under the presser foot. -
Page 21: Needle Replacement
® FISCHBEIN MODELS 100 & 101 EMPRESS™ SERIES SEWING HEAD OPERATOR’S MANUAL 3.5 NEEDLE REPLACEMENT Refer to Illustration 13. Loosen hex head screw (A) and remove the needle (B). Install the new needle with the flat side (C) toward the hex head screw (A). -
Page 22: Throat Plate Replacement
® FISCHBEIN MODELS 100 & 101 EMPRESS™ SERIES SEWING HEAD OPERATOR’S MANUAL 3.7 THROAT PLATE REPLACEMENT 1. Refer to Illustration 14. Lock out compressed air and electrical power so the machine cannot run. 2. Press lever (A) toward the oil pressure gauge. This will move the presser foot (B) upward and away from the throat plate (D). -
Page 23: Fine Tuning Of The Sewing Machine
® FISCHBEIN MODELS 100 & 101 EMPRESS™ SERIES SEWING HEAD OPERATOR’S MANUAL 3.9 FINE TUNING OF THE SEWING MACHINE Illustration Presser foot adjustment: NOTE: This adjustment is to be done without bag or tape in the sewing head. 1. Refer to Illustration 16. - Page 24 ® FISCHBEIN MODELS 100 & 101 EMPRESS™ SERIES SEWING HEAD OPERATOR’S MANUAL Always use a new needle before starting to adjust the machine. 8. Refer to Illustration 19. Loosen cap screw (J). Move the needle guide to achieve a gap of 0.008” (0,2mm) between the needle (D) and needle guide (I).
- Page 25 ® FISCHBEIN MODELS 100 & 101 EMPRESS™ SERIES SEWING HEAD OPERATOR’S MANUAL Needle and Looper Clearance 1. Refer to Illustration 20. It is very important that the needle (D) and the looper (M) do not touch during the forward movement of the looper (M).
- Page 26 ® FISCHBEIN MODELS 100 & 101 EMPRESS™ SERIES SEWING HEAD OPERATOR’S MANUAL Fine tuning the distance between the needle and the looper 1. Refer to Illustration 23. Check to see if the hole in Illustration 23 the looper (B) lines up with the slot in the needle (A) by rotating the drive pulley (not shown).
- Page 27 ® FISCHBEIN MODELS 100 & 101 EMPRESS™ SERIES SEWING HEAD OPERATOR’S MANUAL Feed dog parallel to the throat plate adjustment 1. Refer to Illustration 26. Look at feed dog (C) from the top. The sides of the feed dog (C) must be parallel to the sides of the slots in throat plate (B).
- Page 28 ® FISCHBEIN MODELS 100 & 101 EMPRESS™ SERIES SEWING HEAD OPERATOR’S MANUAL 6. Refer to Illustration 29. Check the parallelism of the new needle holder (D) using the gauge (F) (part # 10230) where it is parallel to the front edge of the throat plate.
-
Page 29: Tape/Thread Clipper Adjust (Model 101 Only)
® FISCHBEIN MODELS 100 & 101 EMPRESS™ SERIES SEWING HEAD OPERATOR’S MANUAL (Model 101 3.10 TAPE/THREAD CLIPPER ADJUSTMENT only) NOTE: Refer to Illustration 30. Anytime an adjustment or replacement is made to the clipper knives, feed dog or throat plate, locknut (A) must be loosened so that set screw (B) can be turned clockwise until the stationary blade and the moving blade separate. -
Page 30: Installing New Blades (Model 101 Only)
® FISCHBEIN MODELS 100 & 101 EMPRESS™ SERIES SEWING HEAD OPERATOR’S MANUAL 3.11 TAPE / THREAD CLIPPER BLADE REPLACEMENT (Model 101 only) NOTE: Exercise great care while working with the blades and wear proper eye, foot and hand protection. 1. Lock out compressed air and electrical power so the machine cannot run. -
Page 31: Mounting & Adjusting The Rotary Air Knife (Model 100 Only)
® FISCHBEIN MODELS 100 & 101 EMPRESS™ SERIES SEWING HEAD OPERATOR’S MANUAL 3.12 MOUNTING & ADJUSTING THE ROTARY AIR KNIFE (Model 100 only) CAREFUL WORKING AROUND THE KNIFE BLADES TO AVOID GETTING CUT. Illustration 31 (110 VAC shown) REV. H 2005 / 11... - Page 32 ® FISCHBEIN MODELS 100 & 101 EMPRESS™ SERIES SEWING HEAD OPERATOR’S MANUAL Mounting the Air Knife 1. Refer to Illustration 31. Mount the modified throat plate (A) to the sewing head using the original three flat head screws through three of the holes (U).
- Page 33 31. Screw the shaft (S) of air cylinder (O) in or out until the tip of the movable knife is retracted beyond the cutting edge of the fixed blade (G). 8. Further assistance is available from your Fischbein representative or by calling the Technical Service Department at the Fischbein Company. (page 2)
-
Page 34: Using The Gauge
® FISCHBEIN MODELS 100 & 101 EMPRESS™ SERIES SEWING HEAD OPERATOR’S MANUAL Illustration 35 Illustration 36 Illustration 34 3.14 USING THE GAUGE The gauge is a necessary tool for adjusting Models 100 and 101. The following should be used as a reference for your machine. -
Page 35: Sewing Speed Adjustment
® FISCHBEIN MODELS 100 & 101 EMPRESS™ SERIES SEWING HEAD OPERATOR’S MANUAL Other uses for the Gauge: The gauge is exactly 3” long at the longest point. This can be used as a gauge to measure stitch length. The gauge is also a good straight edge to check the rotation of the needle chuck. It should be parallel with the machine. - Page 36 3.14.2 BAG HANDLING CAPACITY The bag speed in English units of any Fischbein system can be determined by multiplying stitches per inch by 12 to determine stitches per foot, and then dividing the maximum sewing rate by that figure. For example: 1800 RPM (sewing rate) / (2.5 stitches per inch x 12 inches/ft) =...
- Page 37 The sewing head, the infeed and the bag transport conveyor can be adjusted to produce the proper set up for a variety of applications. Please consult your Fischbein distributor for the proper set up or call Fischbein directly.
- Page 38 ® FISCHBEIN MODELS 100 & 101 EMPRESS™ SERIES SEWING HEAD OPERATOR’S MANUAL The speed of the bag transport belt is measured in feet per minute (meters per minute). The sewing head is equipped with a variable pitch pulley. The two sections of the pulley can be rotated relative to each other in ¼...
- Page 39 ® FISCHBEIN MODELS 100 & 101 EMPRESS™ SERIES SEWING HEAD OPERATOR’S MANUAL If an infeed system is used, belts of the infeed must run at the same speed as the bag transport belt. NOTES Refer to Illustration 37. When adjusting the sewing head drive pulley, care should be taken so that the set screws are tightened against the flats of the pulley.
-
Page 40: Speed Tables
® FISCHBEIN MODELS 100 & 101 EMPRESS™ SERIES SEWING HEAD OPERATOR’S MANUAL SPEED TABLES 4.1 ENGLISH SYSTEM FISCHBEIN EMPRESS 100 SEWING HEAD SPEED CHART (RPM) - ENGLISH SYSTEM STITCH LENGTH (STITCHES PER INCH) 2.75 3.25 1080 1188 1260 1440 1050... -
Page 41: Metric System
® FISCHBEIN MODELS 100 & 101 EMPRESS™ SERIES SEWING HEAD OPERATOR’S MANUAL 4.2 METRIC SYSTEM FISCHBEIN EMPRESS 100 SEWING HEAD SPEED CHART (RPM) - METRIC SYSTEM STITCH LENGTH (mm PER STITCH) 12,5 12,0 11,5 11,0 10,5 10,0 1000 1059 1125... -
Page 42: Opening A Sewn Bag
® FISCHBEIN MODELS 100 & 101 EMPRESS™ SERIES SEWING HEAD OPERATOR’S MANUAL OPENING A SEWN BAG 1) A : Chain stitch along the back of the bag. B : Chain stitch along the front of the bag. C : Cut the chain stitch along the bag. -
Page 43: Troubleshooting
6. Use another type of bag, a needle 6. Needle overheating. cooler or lubricated thread. 7 Too much thread tension. 7. Less tension. 8. Poor quality thread. 8. Use higher quality thread. (Fischbein lubricated thread) REV. H 2005 / 11... - Page 44 3. Increase size of stitch. 10. Skipped 1. Poor thread tension. 1. Adjust thread tension. stitches 2. Thread pull off badly adjusted. 2. Adjust thread pull off. 3. Use higher quality thread. 3. Poor thread quality. (Fischbein lubricated thread) REV. H 2005 / 11...
- Page 45 15. Low oil pressure 1. Not enough oil. 1. Top off oil. 2. Faulty lubrication pump. 2. Call Fischbein technician. 3. Faulty pressure gauge. 3. Change gauge. 4. Internal oil line plugged. 4. Call Fischbein technician. 5. Filter blocked.
- Page 46 ® FISCHBEIN MODELS 100 & 101 EMPRESS™ SERIES SEWING HEAD OPERATOR’S MANUAL FAULT CAUSE SOLUTION 17. Tape scuffing (model 1. Tape reel drag too tight. 1. Readjust tape reel collar. 101 only) 2. Tape width too wide for 2. Check and change tape if folder.
-
Page 47: Spare Parts List
® FISCHBEIN MODELS 100 & 101 EMPRESS™ SERIES SEWING HEAD OPERATOR’S MANUAL SPARE PARTS LIST PARTS PART NUMBER QUANTITY Gasket, Top Cover 10092 10200 3 quarts Lubricating Oil (1 quart) Screw, soc flat #10-32 x ½ BO F103212 Oil Filter... -
Page 48: Drawings And Parts Lists
® FISCHBEIN MODELS 100 & 101 EMPRESS™ SERIES SEWING HEAD OPERATOR’S MANUAL DRAWINGS AND PARTS LISTS PART No. DESCRIPTION PAGE MODEL 100 HOUSING 48-49 8.1.1 MODEL 101 HOUSING 50-51 MODEL 100 NEEDLE & 52-53 PRESSER FOOT ASSEMBLIES 8.2.1 MODEL 101 NEEDLE &... -
Page 49: Model 100 Housing
® FISCHBEIN MODELS 100 & 101 EMPRESS™ SERIES SEWING HEAD OPERATOR’S MANUAL MODEL 100 HOUSING Item No. Quantity Part No. Description: 10017 Throat plate F103258 Screw, Flat 10-32 x 5/8 F103238 Screw, Flat 10-32 x 3/8 31032 Stationary knife REV. H 2005 / 11... - Page 50 ® FISCHBEIN MODELS 100 & 101 EMPRESS™ SERIES SEWING HEAD OPERATOR’S MANUAL Item No. Quantity Part No. Description: F83214 Screw, Flat 8-32 x 1/4 10015 Post, short-throat plate WN 10 Washer, Nylon SS103258 Screw, Soc. Set 10-32 x 5/8 B103214...
- Page 52 ® FISCHBEIN MODELS 100 & 101 EMPRESS™ SERIES SEWING HEAD OPERATOR’S MANUAL Item No. Quantity Part No. Description: B103214 Screw, Binding HD 10-32 x 1/4 10112 Window, oil level 10111 Plug, drain – magnetic SC103258 Screw, Soc. Cap 10-32 x 5/8...
-
Page 53: Model 100 Needle
® FISCHBEIN MODELS 100 & 101 EMPRESS™ SERIES SEWING HEAD OPERATOR’S MANUAL MODEL 100 NEEDLE & PRESSER FOOT ASSEMBLY REV. H 2005 / 11... - Page 54 ® FISCHBEIN MODELS 100 & 101 EMPRESS™ SERIES SEWING HEAD OPERATOR’S MANUAL Item No. Quantity Part No. Description: 10190 Pad, spring presser foot F63214 Screw, Flat 6-32 x ¼ 10189 Cradle, pad presser foot 10004 Lever, presser foot SC14201 Screw, Soc. Cap 1/4-20 x 1...
-
Page 55: Model 101 Needle
® FISCHBEIN MODELS 100 & 101 EMPRESS™ SERIES SEWING HEAD OPERATOR’S MANUAL 8.2.1 MODEL 101 NEEDLE & PRESSER FOOT ASSEMBLY REV. H 2005 / 11... - Page 56 ® FISCHBEIN MODELS 100 & 101 EMPRESS™ SERIES SEWING HEAD OPERATOR’S MANUAL Item No. Quantity Part No. Description: 10190 Pad, spring presser foot F63214 Screw, Flat 6-32 x ¼ 10189 Cradle, pad presser foot 10004 Lever, presser foot SC14201 Screw, Soc. Cap 1/4-20 x 1...
-
Page 57: Model 100 Lever-Housing
® FISCHBEIN MODELS 100 & 101 EMPRESS™ SERIES SEWING HEAD OPERATOR’S MANUAL MODEL 100 LEVER - HOUSING REV. H 2005 / 11... - Page 58 ® FISCHBEIN MODELS 100 & 101 EMPRESS™ SERIES SEWING HEAD OPERATOR’S MANUAL Item No. Quantity Part No. Description: 31034 Lever, lifter presser foot SC142034 Screw, Soc. Cap 1/4-20 x ¾ SS142014 Screw, Soc. Set 1/4-20 x ¼ 10139 Bushing, lifter presser foot...
-
Page 59: Model 101 Lever-Housing
® FISCHBEIN MODELS 100 & 101 EMPRESS™ SERIES SEWING HEAD OPERATOR’S MANUAL 8.3.1 MODEL 101 LEVER - HOUSING REV. H 2005 / 11... - Page 60 ® FISCHBEIN MODELS 100 & 101 EMPRESS™ SERIES SEWING HEAD OPERATOR’S MANUAL Item No. Quantity Part No. Description: 31034 Lever, lifter presser foot SC142034 Screw, Soc. Cap 1/4-20 x ¾ SS142014 Screw, Soc. Set 1/4-20 x ¼ 10139 Bushing, lifter presser foot...
-
Page 61: Model 100 Feed Assembly
® FISCHBEIN MODELS 100 & 101 EMPRESS™ SERIES SEWING HEAD OPERATOR’S MANUAL MODEL 100 FEED ASSEMBLY REV. H 2005 / 11... - Page 62 ® FISCHBEIN MODELS 100 & 101 EMPRESS™ SERIES SEWING HEAD OPERATOR’S MANUAL Item No. Quantity Part No. Description: 10078 Dog feed SS1032516 Screw, Soc. Set 10-32 x 5/16 F103238 Screw, Flat 10-32 x 3/8 F103212 Screw, Flat 10-32 x ½...
-
Page 63: Model 101 Feed Assembly
® FISCHBEIN MODELS 100 & 101 EMPRESS™ SERIES SEWING HEAD OPERATOR’S MANUAL 8.4.1 MODEL 101 FEED ASSEMBLY REV. H 2005 / 11... - Page 64 ® FISCHBEIN MODELS 100 & 101 EMPRESS™ SERIES SEWING HEAD OPERATOR’S MANUAL Item No. Quantity Part No. Description: 10486 Dog, feed, Tape (STD) SS1032516 Screw, Soc. Set 10-32 x 5/16 F103238 Screw, Flat 10-32 x 3/8 F103212 Screw, Flat 10-32 x ½...
-
Page 65: Mainshaft Assembly
® FISCHBEIN MODELS 100 & 101 EMPRESS™ SERIES SEWING HEAD OPERATOR’S MANUAL MAINSHAFT ASSEMBLY REV. H 2005 / 11... - Page 66 ® FISCHBEIN MODELS 100 & 101 EMPRESS™ SERIES SEWING HEAD OPERATOR’S MANUAL Item No. Quantity Part No. Description: F83214 Screw, Flat #8-32 x ¼ 31032 Stationary knife 31029 Moving knife 10089 Spring knife H103212 Screw, Hex HD #10-32 x ½...
-
Page 67: Looper Assembly
® FISCHBEIN MODELS 100 & 101 EMPRESS™ SERIES SEWING HEAD OPERATOR’S MANUAL LOOPER ASSEMBLY Item No. Quantity Part No. Description: 10060 Looper SC54012 Screw, Soc Cap 5-40 x 1/2 UNC Washer, Flat 5 WF10 Washer, Flat 10 10059 Holder, Looper H103234 Screw, Hex 10-32 x ¾... -
Page 68: Oil Pump Assembly
® FISCHBEIN MODELS 100 & 101 EMPRESS™ SERIES SEWING HEAD OPERATOR’S MANUAL OIL PUMP ASSEMBLY Item No. Quantity Part No. Description: SC103278 Screw, Soc. Cap 10-32 x 7/8 H103212 Screw, Hex HD 10-32 x ½ 15015 Mount Pump 10084 O-ring... -
Page 69: Tape Clipper
® FISCHBEIN MODELS 100 & 101 EMPRESS™ SERIES SEWING HEAD OPERATOR’S MANUAL TAPE CLIPPER (31035) REV. H 2005 / 11... - Page 70 ® FISCHBEIN MODELS 100 & 101 EMPRESS™ SERIES SEWING HEAD OPERATOR’S MANUAL Item No. Quantity Part No. Description: 10447 Assembly, Lever Cutter SC14201 Screw, Soc. Cap ¼-20 x 1 Locking T3129 Washer, Thrust P4024 Bearing, Thrust 10424 Spring, Compression 10420...
- Page 71 ® FISCHBEIN MODELS 100 & 101 EMPRESS™ SERIES SEWING HEAD OPERATOR’S MANUAL ROTARY AIR KNIFE (31130) (110 VAC) REV. H 2005 / 11...
- Page 72 ® FISCHBEIN MODELS 100 & 101 EMPRESS™ SERIES SEWING HEAD OPERATOR’S MANUAL Item No. Quantity Part No. Description 31101 KIT, AIR CYLINDER ASSY 31131 PLATE, SUPPORT 31103 HUB, MOVABLE KNIFE MOUNTING 31104 LEVER, AIR CYLINDER DRIVE 31105 HUB, DRIVESHAFT SUPPORT...
- Page 73 ® FISCHBEIN MODELS 100 & 101 EMPRESS™ SERIES SEWING HEAD OPERATOR’S MANUAL Item No. Quantity Part No. Description WFM12 WASHER, FLAT M12 WFM6 WASHER, FLAT M6 WFM8 WASHER, FLAT M8 31156 GUIDE, AIR KNIFE BAG SC103238 SCREW, SOC CAP #10-32 UNF X 3/8...
- Page 74 ® FISCHBEIN MODELS 100 & 101 EMPRESS™ SERIES SEWING HEAD OPERATOR’S MANUAL (blank page) REV. H 2005 / 11...
- Page 75 ® FISCHBEIN MODELS 100 & 101 EMPRESS™ SERIES SEWING HEAD OPERATOR’S MANUAL 8.10 ROTARY AIR KNIFE (31165) (24 VDC) REV. H 2005 / 11...
- Page 76 ® FISCHBEIN MODELS 100 & 101 EMPRESS™ SERIES SEWING HEAD OPERATOR’S MANUAL Item No. Quantity Part No. Description 31101 KIT, AIR CYLINDER ASSY 31131 PLATE, SUPPORT 31103 HUB, MOVABLE KNIFE MOUNTING 31104 LEVER, AIR CYLINDER DRIVE 31105 HUB, DRIVESHAFT SUPPORT...
- Page 77 ® FISCHBEIN MODELS 100 & 101 EMPRESS™ SERIES SEWING HEAD OPERATOR’S MANUAL Item No. Quantity Part No. Description SFM416 SCREW, SOC FLAT M4 X 16mm SFM48 SCREW, SOC FLAT M4 X 8mm SSM46 SCREW, SOC SET M4 X 6mm T3192...
-
Page 78: Machine Set Up Parts Lists
® FISCHBEIN MODELS 100 & 101 EMPRESS™ SERIES SEWING HEAD OPERATOR’S MANUAL MACHINE SET UP PARTS LISTS 9.1 MODEL 100 PRESSER FOOT THROAT PLATE FEED DOG Std. Curved (Replacement) 10185 10017 10078 (4 Ctr. Teeth) Std. Curved Assembly 10157 10017... -
Page 79: Model 101
10. SAFELY DISPOSING OF A SEWING HEAD If a Fischbein sewing head becomes damaged beyond repair or simply worn to a nonfunctional state after years of service, it should be taken out of service only after it is safe to dispose of it.
Need help?
Do you have a question about the Empress Series and is the answer not in the manual?
Questions and answers