Table of Contents
Advertisement
Advertisement
Table of Contents

Related Manuals for Roxio Easy VHS to DVD Plus

Summary of Contents for Roxio Easy VHS to DVD Plus
- Page 1 Roxio Easy VHS to DVD Plus User Guide...
- Page 2 © 2020 Corel Corporation. All rights reserved. Corel and other Corel marks and logos used herein are trademarks owned by Corel Corporation and/or its subsidiaries. This product and guide include intellectual property (including trademarks) owned, registered and/or licensed by respective third parties. Roxio Easy VHS to DVD Plus...
-
Page 3: Table Of Contents
Contacting Support ......... 6 Converting VHS tapes 7 Converting VHS tapes with Easy VHS to DVD Plus ....8... - Page 4 Converting LPs and audio tapes 11 Converting LPs and audio tapes with Easy VHS to DVD Plus ..12 Editing audio 13 Editing audio ..........14 About adding audio clips .
- Page 5 ..........52 Roxio Easy VHS to DVD Plus...
- Page 6 Roxio Easy VHS to DVD Plus...
-
Page 7: Getting Started
Getting started In this chapter Welcome ..........2 What you get in the box . -
Page 8: Welcome
Welcome Roxio Easy VHS to DVD Plus is the best solution yet for preserving your cherished VHS recordings. You can easily transfer video from VHS, CD or other analog tape to your computer, where you can burn it directly to a DVD, reformat it for playback on a wide range of hand-held devices, or create a digital archive. -
Page 9: Installing The Software
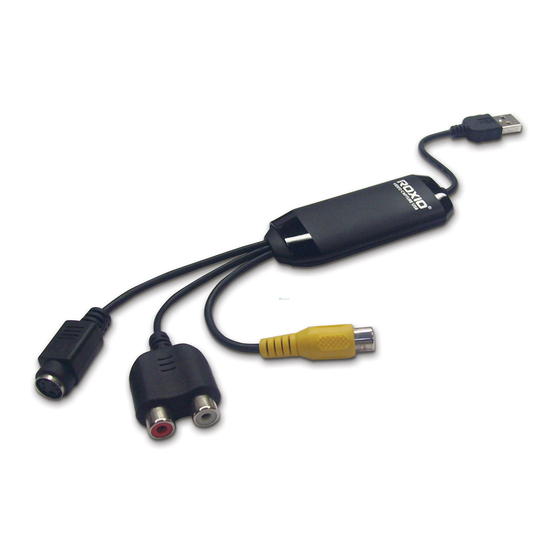
Before you install the software, connect the included video capture device to your computer using a USB 2.0 compatible port (USB 2.0 or higher). Note: No serial number is required—attaching the video capture device to your computer allows you to install the software. Roxio Easy VHS to DVD Plus... -
Page 10: Connecting A Vhs Player To Your Computer
Install the Roxio Easy VHS to DVD PLUS software from roxio.com/ download. Note: As you install the software, one or more Windows message boxes may appear asking for your permission to proceed. Please give your permission at each step to complete the installation. -
Page 11: Resources
In addition to this user guide, you can consult the following resources: In-product Help: Click the Help icon anywhere in the application to open a related Help topic. Knowledgebase (www.roxio.com/support, click the Knowledgebase icon) Roxio Easy VHS to DVD Plus... -
Page 12: Contacting Support
Contacting Support If you are not able to find the answers you are looking for, please contact customer support through www.roxio.com/support email: corelhelp@corel.com calling (North America) 1-877-582-6735 Roxio Easy VHS to DVD Plus... -
Page 13: Converting Vhs Tapes
Converting VHS tapes In this chapter Converting VHS tapes with Easy VHS to DVD Plus ....8... -
Page 14: Converting Vhs Tapes With Easy Vhs To Dvd Plus
Converting VHS tapes with Easy VHS to DVD Plus Easy VHS to DVD Plus can be used to convert VHS or other analog tapes directly to DVDs or digital files. For more information, see the Help within the application. Transfer a VHS tape to a DVD or digital file... - Page 15 The video appears in the Easy VHS to DVD Plus preview window. Click the Record button. If you set a recording duration, Easy VHS to DVD Plus will stop recording automatically. If not, click the Stop button when you are done recording.
- Page 16 If you want to save to an ISO file, click the Export to DVD ISO (you do not need an optical drive for this option). If you selected an optical drive, and have a recordable DVD inserted, click the Burn button. Roxio Easy VHS to DVD Plus...
-
Page 17: Converting Lps And Audio Tapes
Converting LPs and audio tapes In this chapter Converting LPs and audio tapes with Easy VHS to DVD Plus ..12... -
Page 18: Converting Lps And Audio Tapes With Easy Vhs To Dvd Plus
Converting LPs and audio tapes with Easy VHS to DVD Plus Easy VHS to DVD Plus can also be used to convert your tapes and vinyl albums to digital audio files. For more information, see the Help within the application. -
Page 19: Editing Audio
Editing audio In this chapter Editing audio ..........14 About adding audio clips. -
Page 20: Editing Audio
Easy VHS to DVD Plus lets you record, preview, and modify any supported and non-copy-protected digital audio file (including WAV and WMA files). You can use Easy VHS to DVD Plus to import (record) audio from analog sources, including LP records and tapes, then apply audio effects to improve and enhance your recorded audio. - Page 21 Easy VHS to DVD Plus audio window components Clip Editor Zoom controls Project View / Task area Mute/Unmute Volume Track position Enable/Disable Repeat Mode Playback controls Section length 10 Balance controls Audio project file format (.dmse) Audio projects are stored in DMSE format. The project file stores:...
- Page 22 If you share a DMSE file with another user (who must also have Easy VHS to DVD Plus), you must also share all referenced audio files, and the audio files must be in the same folder structure as they are on your computer.
-
Page 23: About Adding Audio Clips
Browse to the file you want to open, select it, and click Open. About adding audio clips A Easy VHS to DVD Plus audio project is a collection of audio clips. You can add audio clips from various sources, improve their quality and add special effects. - Page 24 Adding audio files With Easy VHS to DVD Plus, you can add digital audio files to a project from your hard disk, or from a removable storage device. Note: You can only add files in formats supported by Roxio Easy VHS to DVD Plus. When you browse for files to add, only files with supported formats are visible.
-
Page 25: Editing And Applying Effects
DVDs. Editing and applying effects You can use Easy VHS to DVD Plus to make changes to audio clips. Not only does Easy VHS to DVD Plus let you save your recorded audio to any other supported file format (similar to converting audio file formats), it also lets you edit and enhance your audio clip using the available audio effects and editing tools. - Page 26 To delete a clip or part of a waveform: Select the clip or waveform region you want to delete. For information on how to select a waveform, see Selecting the waveform region to edit on page 19. Roxio Easy VHS to DVD Plus...
- Page 27 Removing or inserting silences You can easily remove or insert silences to further refine your Easy VHS to DVD Plus audio project. To remove silences: Select the silent area on the waveform by clicking and dragging from the start of the silent area to the end. For more information, see Selecting the waveform region to edit on page 19.
- Page 28 The selected area of the waveform is replaced with a silence of the same length. Adjusting volume or balance With Easy VHS to DVD Plus, you can quickly and easily adjust the volume and balance of your audio clip, and apply fading effects. To adjust volume: Select the region on the audio clip where you want to adjust the volume.
- Page 29 Fade from: To move the balance at the beginning of the selection to the left speaker, drag the slider up. To move the balance at the beginning of the selection to the right speaker, drag the slider down Roxio Easy VHS to DVD Plus...
- Page 30 Select the waveform region over which you want the volume to fade from zero to full volume. For information on how to select the waveform, see Selecting the waveform region to edit on page 19. Roxio Easy VHS to DVD Plus...
- Page 31 Fade Out. Adding or deleting track separators You can use Easy VHS to DVD Plus to add track separators to or delete them from your recording. For example, if you intend to play your recording as a playlist, or burn it to disc, you will want to easily identify the tracks and navigate them with your player.
- Page 32 26. Adding or deleting markers You can use Easy VHS to DVD Plus to add markers to your recording, or to delete them. A marker identifies a specific time in a track. Use markers to denote points of interest to which you may want to jump.
- Page 33 Add/Remove Marker. Cleaning audio clips Easy VHS to DVD Plus lets you remove noise common to analog audio sources such as records and tapes. You can also enhance your audio clip in many ways, including adjusting the equalization or bass, brightening the sound, or applying “de-clicking”...
- Page 34 It may be easier to notice your changes when adjusting one frequency at a time. Reset: Resets the frequencies to the default values. Roxio Easy VHS to DVD Plus...
- Page 35 In some audio clips, the zero point of the waveform may not be aligned at zero. (This is a limitation of the sound card.) The DC offset can result in distortion when you edit the recording. Easy VHS to DVD Plus allows you to correct the DC offset.
- Page 36 Enhancing audio clips with effects In Easy VHS to DVD Plus you can apply audio effects to entire audio clips, or to selected areas of audio clips. You can enhance your audio clip in many ways, including adding an...
- Page 37 Level 0 is the original pitch. To adjust it, move the slider up or down. RoboVoice: Similar to the Alienizer, RoboVoice also adds an interesting “processed” sound to your audio. Adjust the Harmonize and Metallize settings to lend a decidedly Roxio Easy VHS to DVD Plus...
- Page 38 We recommend that you log in as Administrator when installing VST plug-ins. To install a VST plug-in: In Roxio Easy VHS to DVD Plus, click Apply various effects and choose VST > Add VST effect. Browse to and select the VST file, and click Add.
-
Page 39: Using The Mix Editor
Using the Mix Editor for basic editing Using the Mix Editor, you can add audio clips in a specific location on a specific layer. You can also copy and paste mixes (the combined content of all layers). Roxio Easy VHS to DVD Plus... - Page 40 To copy a mix: In the Mix Editor, click below the layers (on the timeline that displays the timecodes) and drag the playhead over the section of the mix that you want to copy. Roxio Easy VHS to DVD Plus...
- Page 41 Edit > Paste. Arranging audio clips Once you finish adding audio clips to your Easy VHS to DVD Plus project, you can use the Mix Editor to arrange them in layers. Then, you can play your mix to see how the combined layers sound.
- Page 42 On the Clip Editor toolbar, click the Split Clip button Exporting mix selections Easy VHS to DVD Plus lets you export a selection of your mix. To export the full project or specific clips or tracks, see Completing projects on page 37.
-
Page 43: Completing Projects
CDs on page 40. Saving Easy VHS to DVD Plus audio projects Easy VHS to DVD Plus lets you save your work to an Easy VHS to DVD Plus project file (DMSE), so you can continue working on it later. The... - Page 44 Select the audio clip and choose Edit > Flatten Clip. Exporting audio clips Easy VHS to DVD Plus lets you export audio clips from your project to a variety of popular file formats. To export an audio clip: In the task area, right-click a clip and choose Export Clip.
- Page 45 Click Export. Exporting sets of tracks or audio clips Using Easy VHS to DVD Plus, you can export a set of tracks or audio clips. Each track or clip is saved as a separate file. To export a set of tracks or audio clips to separate...
- Page 46 The Edit Audio Tags dialog box appears. For more information, click Help in the dialog box. Click Export. Roxio Easy VHS to DVD Plus exports each selected track or clip. Burning tracks or clips to audio CDs To burn tracks or clips to an audio CD, follow these procedures: Insert a blank CD into your recorder.
- Page 47 Help in the dialog box. Optional: To rename and tag the tracks, click Edit Audio Tags. The Edit Track Info dialog box appears. For more information, click Help in the dialog box. Click the Export button. Roxio Easy VHS to DVD Plus...
- Page 48 Roxio Easy VHS to DVD Plus...
-
Page 49: Faq: Frequently Asked Questions
How do I check if my system is 64-bit? ......45 How do I connect the Roxio Video Capture device to my VCR? . . . 45 How do I connect the Roxio Video Capture device to my analog camcorder? . -
Page 50: About The Faq
How do I install Easy VHS to DVD? Connect the Roxio Video Capture USB device to a USB port on your computer. Download the installer from Roxio website, and click it to launch the installation. -
Page 51: Do I Need A Serial Key
Do I need a serial key? Easy VHS to DVD does not require a serial key. Your Roxio Video Capture USB device acts as your serial key – simply plug in your capture device to a USB port on your computer and launch the installer. - Page 52 Connect the red and white RCA composite audio outputs on your VCR to the red and white inputs on your Roxio Video Capture device using audio cables. Plug in the Roxio Video Capture device to a USB port on your PC. Roxio Easy VHS to DVD Plus...
-
Page 53: How Do I Connect My Audio Device To My Computer
How do I connect my audio device to my computer? Connect the Roxio Video Capture USB device to a USB 2.0 port on your computer. An optional USB extension cord is included. Connect the Roxio adapter to the capture device. Connect the audio player to the large two-prong plug using the cables supplied with your player. -
Page 54: Capture Troubleshooting: What Do I Need To Check Before I Start To
VHS tapes are generally recorded at a lower quality than we have come to expect in the age of digital video, and degrades over time. Roxio Easy VHS to DVD will faithfully transfer your video to DVD. Roxio Easy... -
Page 55: Why Is The Video Input Not Detected
This typically occurs when your VCR is not properly hooked up to the Roxio Video Capture device. If you are using RCA cables to connect your VCR to the Roxio Video Capture device, make sure the cables are connected to the correct jacks on both your VCR and your Roxio Video Capture device with the matching colors. - Page 56 Open Sound settings from the context menu. On the Sound page of the Settings window, in the Input area, choose Line - Roxio Video Capture USB (name might be slightly different) from the Choose your input device box. Roxio Easy VHS to DVD Plus...
- Page 57 Click the corresponding Device properties link, and on the Devices properties page, adjust the Volume level for the device. Close the Settings window to exit and apply the settings. Roxio Easy VHS to DVD Plus...
- Page 58 In the Sound window, click the Recording tab, and click Line - Roxio Video Capture USB Audio Device (name might be slightly different). Click the Set Default button, click OK, and close the window. Close Easy VHS to DVD Plus, and restart the computer. Roxio Easy VHS to DVD Plus...
Need help?
Do you have a question about the Easy VHS to DVD Plus and is the answer not in the manual?
Questions and answers