
Subscribe to Our Youtube Channel
Related Manuals for Sylvania SRCD1081BT


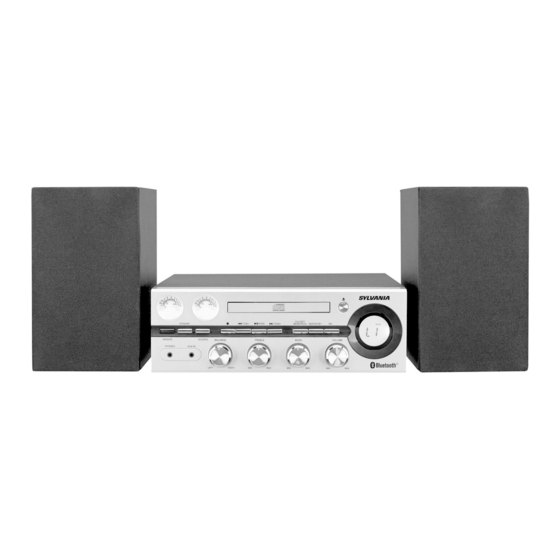
Summary of Contents for Sylvania SRCD1081BT
- Page 1 Model no: SRCD1081BT Bluetooth CD Radio Microsystem Instruction Manual PLEASE READ THIS INSTRUCTION MANUAL CAREFULLY BEFORE USE AND KEEP IT FOR FUTURE REFERENCE.
-
Page 5: Buttons And Controls
BUTTONS AND CONTROLS MAIN UNIT BASS KNOB 1 3. CLK SET, MEM/PROG BUTTON STANDBY REPEAT / M- BUTTON PHONES JACK PHONES JACK AUX IN JACK 1 5. VOLUME KNOB SOURCE BUTTON 1 6. M+ BUTTON LCD DISPLAY BALANCE KNOB STOP BUTTON EJECT/ENTER BUTTON / TUN- BUTTON CD COMPARTMENT... -
Page 6: Remote Control
REMOTE CONTROL CLOCK SET, MEM/PROGRAM: Set clock timer, CD program playback and radio memory. STANDBY BUTTON: Set the unit to ON / STANDBY. SOURCE: Se lect BLUETOOTH, CD, FM or AUX function. 4 & 9. / TUN- , / TUN+: Skip tracks backward or forward in CD mode. -
Page 7: Getting Started
GETTING STARTED CONNECTING THE EXTERNAL SPEAKERS The speaker input sockets are located at the back of the main unit. 1. Unwrap the speaker wire from the left speaker and plug it into the left (L) speaker socket on the main unit. 2. -
Page 8: Listening To The Radio
LISTENING TO THE RADIO 1. Press the to switch to the FM RADIO. The display will show a SOURCE button radio station: “87.5”. 2. Tune to a desired radio station. The frequency is indicated on the display. • MANUAL TUNING: Press the TUN+ or TUN- button briefly and the frequency will tune up or down. - Page 9 LISTENING TO A CD SOURCE 1. Press button until the display reads “CD”. 2. Press the EJECT/ENTER button to open the CD door, put a CD onto the CD tray with the printed label facing up (towards you). To close the CD door, press EJECT/ENTER button again.
-
Page 10: Disc Maintenance
DISC MAINTENANCE Depending on the quality of the disc, and the condition of the recording, some CD-R/CD-RW discs may not be playable. How to remove the disc How to hold the disc How to clean the disc 1. Always place the compact disc in the disc tray with the label facing upward. (Compact discs can be played only on one side). -
Page 11: Aux-In Operation
NOTE: The effective distance between your external device and this apparatus is 10 meters (33 feet). 3. Once “SRCD1081BT” appears on the paired devices list of your external device, select it. 4. If you are asked for a password, enter “0000”. - Page 12 • If the remote control unit is operated near other appliances which generate infrared rays, or if other remote control devices using infrared rays are used near the unit, it may operate incorrectly. Conversely, the other appliances may operate incorrectly. TO ACTIVATE THE REMOTE CONRTOL The remote control comes with a cell battery already PULL...
-
Page 13: Troubleshooting Guide
TROUBLESHOOTING GUIDE In case of trouble with the unit, please look through the problems below and see if you can solve them yourself before calling your dealer. PROBLEM CAUSE SOLUTION Unit does not turn • Unit is unplugged • Connect unit to AC power ON when STANDBY supply is pressed. -
Page 14: Specifications
SPECIFICATIONS AMPLIFIER Section Output Power............ 25W + 25W Frequency Response ........60 to 20,000 Hz TUNER Section FM Section Frequency Range ..........87.5 to 108 MHz CD PLAYER Section Frequency Response ........60 to 20,000 Hz Signal-to-Noise Ratio ........50 dB (IEC-A) SPEAKER SYSTEM Section Impedance............ -
Page 15: Limited Product Warranty
LIMITED PRODUCT WARRANTY This quality product is warranted to be free from manufacturer’s defects in material and workman-ship, provided that the unit is used under the normal operating conditions intended by the manufacturer. Should you have any problem with this product, please and it is highly recommended to visit our website at www.curtisint.com before you take any other steps as we have additional copies of instruction manuals, operating manuals and trouble shooting tips on our website which gives you the answer on most of the questions you could have in operating the unit.
Need help?
Do you have a question about the SRCD1081BT and is the answer not in the manual?
Questions and answers