Table of Contents
Advertisement
Available languages
Available languages
Quick Links
Advertisement
Table of Contents

Related Manuals for FAME LS-1 ECO


Summary of Contents for FAME LS-1 ECO
- Page 1 LAPTOP STAND LS-1 11/2018 DJE0006990-000 Bedienungsanleitung User Manual...
-
Page 2: Garantie
Herzlichen Glückwunsch zu Ihrem neuen FAME Audio Laptop Stand LS-1 eco! Vielen Dank, dass Sie sich für ein Produkt von FAME Audio entschieden haben. Durch effi ziente Entwicklung und ökonomische Produktion ermöglicht FAME Audio hochwertige Produkte zu einem fantastischen Preis. -
Page 3: Spezifikationen
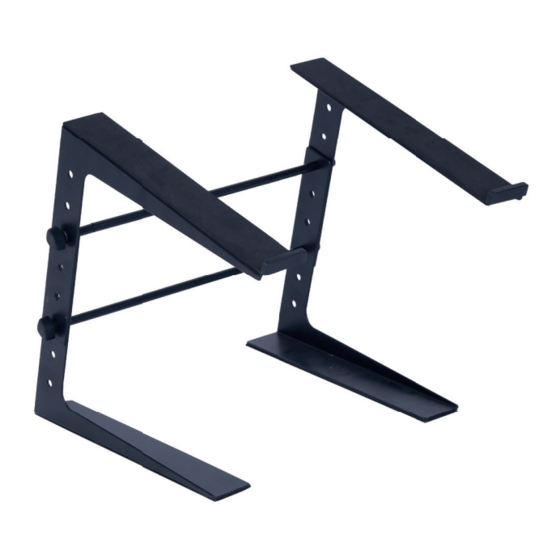
Originalverpackung oder geeignete Transport- oder Lagerverpackungen um das Produkt bei Nicht- benutzung optimal vor Einfl üssen wie Staub oder Feuchtigkeit, etc. zu schützen. Spezifi kationen: Model FAME Audio Laptop Stand LS-1 eco Gesamtabmessung (LxHxB) 269 x 350 x 340 mm Passend für Alle gängigen Laptop-Größen... - Page 4 Aufbauanleitung: Vorbereitung: nehmen Sie die folgenden Teile aus der Box und ordnen Sie diese entsprechend zu: Beginnen Sie mit dem Entfernen der Endkappen von den beiden Stabilisatorstangen. Montieren Sie den linken/rechten Haltewinkel. Nehmen Sie eine Seite der oberen Halterungen und stimmen Sie sie mit der entsprechenden Seite der unteren Halterung ab (die unteren Halterungen sind unten mit einem rutschfesten Griffpolster versehen) - Abbildung A.
- Page 5 HINWEIS: Die Stabilisatoren müssen mindestens 2 Löcher voneinander entfernt positioniert werden. Wiederholen Sie die obigen Schritte 1 und 2, um die andere Seite der Stativhalterung zu montieren und richten Sie die Stabilisatorstangen in der entsprechenden Höhe aus.
- Page 6 Umweltschutz: Die Firma Music Store professional GmbH bemüht sich stets die Belastung durch Verpackungen auf ein Minimum zu reduzieren. Die Verwendung von umweltfreundlichen und wiederverwertbaren Ma- terialen ist dabei stets von elementarer Bedeutung. Bitte führen sie die Verpackungen nach Gebrauch den entsprechenden Verwertungen zu.
-
Page 7: Scope Of Delivery
Intended use: The product FAME Audio Laptop Stand LS-1 eco acts as a stand for laptops, suitable for all com- mon laptop sizes. The product serves as a platform for laptops and similar equipments. The device may only be used in accordance with the operating instructions for this purpose only. Other uses, as well as operation under other operating conditions are expressly not intended and can lead to proper- ty damage or personal injury! Damage resulting from improper use is not liable. -
Page 8: Safety Instructions
Specifications: Model FAME Audio Laptop Stand LS-1 eco Dimensions (LxHxW) 269 x 350 x 340 mm Suited for All common laptop sizes... -
Page 9: Installation
Installation: Preparation: Remove the following parts from the box and assign them accordingly. Start by removing the end caps from the two stabilizer bars. Mount the left/right bracket. Remove one side of the upper brackets and align it with the correspon- ding side of the lower bracket (the lower brackets have a non-slip grip pad at the bottom) - Figure A. - Page 10 Figure B NOTE: The stabilizers must be positioned at least 2 holes apart. Repeat steps 1 and 2 above to mount the other side of the tripod bracket and adjust the stabilizer rods to the appropriate height.
-
Page 11: Environmental Safety
Environmental safety: Music Store professional GmbH always endeavours to reduce the burden of packaging to a minimum. The use of environmentally friendly and recyclable materials is always of fundamental importance. Please recycle the packaging after use. Disposal of packaging: Ensure that paper packaging, plastic material, etc. are recycled separately. Observe the labels and the corresponding regulations.
Need help?
Do you have a question about the LS-1 ECO and is the answer not in the manual?
Questions and answers