Advertisement
Now make your home a safer place
Thank you for choosing socketsafe. Please check that your purchase includes the following:
There is no need to disconnect the mains supply so long as socketsafe is used with correctly
maintained BSI approved wall sockets. In most cases, an insulated screwdriver is the only tool you
will need to complete installation. When working near electricity always take good care. If in any
doubt consult a qualified electrician.
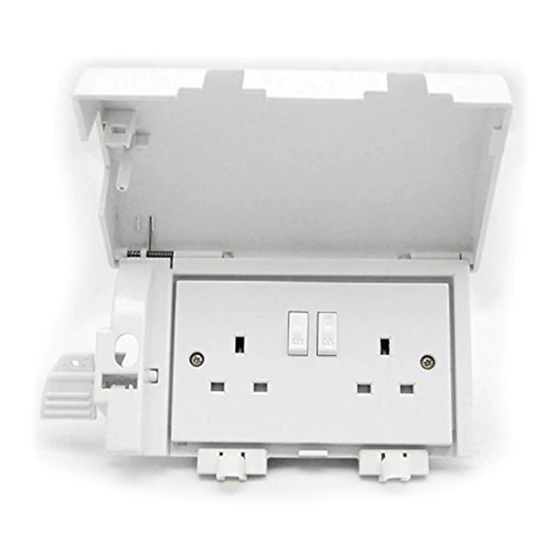
Step 1
Unlock the socketsafe by holding the unit from its underside
in your right hand. Insert the key into the aperture found on
the left side of the unit and gently twist the key by turning
the large paddle section away from you. The front cover
should gently open of its own accord.
Select the wall socket you intend to use with socketsafe,
power off any switches and remove any plugs in use. Loosen
the screws on the socket faceplate and allow a gap of
approximately 3mm, or as much as is needed to allow the
socketsafe base-frame to slide in between the faceplate and
the wall.
Socketsafe is not waterproof and is therefore not
suitable for use outdoors or in environments subject to
extreme dampness or water splashes. Socketsafe works
best on smooth, uniform surfaces.
Step 2
Keeping socketsafe in the open position, slide the legs of the
base frame in behind the socket faceplate. On rare occasions
you may find that, with socketsafe in place, the wall socket
screws are not long enough to engage the back plate. In this
case we recommend fitting slightly longer screws, available
from most DIY stores.
When replacing the screws we suggest you fit them one
at a time, always retaining contact between the wall
socket faceplate and back plate.
Fit the cable tie cross bar to the base of the socketsafe unit
by sliding it upwards, level with the wall socket face, until a
positive click is heard from both sides. An easy way to ensure
correct alignment of the socketsafe frame to the socket face,
once the lower cable tie bar has been fitted, is to allow the
upper edge of the cable tie bar holders (see 4A in the illustration)
to butt up against the lower edge of the socket face.
.
Socketsafe unit
.
2 keys
.
1 crossbar (with 2 horseshoe shaped cable restraints).
Installation &
Operation Instructions
Advertisement
Table of Contents

Summary of Contents for Dormina socketsafe
- Page 1 1 crossbar (with 2 horseshoe shaped cable restraints). There is no need to disconnect the mains supply so long as socketsafe is used with correctly maintained BSI approved wall sockets. In most cases, an insulated screwdriver is the only tool you will need to complete installation.
- Page 2 Sometimes, without the cable ties in place, or when plugs with thicker than standard cables are in use, the socketsafe may not freely disengage of its own accord. In most cases, a gentle helping hand is all that is needed to guide the cover over the offending cable as the key is being turned.
Need help?
Do you have a question about the socketsafe and is the answer not in the manual?
Questions and answers