Advertisement
Quick Links
Advertisement

Related Manuals for Sigma R19

Summary of Contents for Sigma R19
- Page 1 - R19 - Quick Start Guide Guía Rápida...
- Page 4 INDEX ÍNDICE Quick start guide Sigma R19 Guía Rápida Sigma R19 Glossary Glosario Specifications Especificaciones What is in the box? ¿Qué hay en la caja? Unboxing Desembalaje Set up Puesta a punto Safety Seguridad Getting started Puesta en marcha Mirror and Duplication modes Modo Espejo y Duplicación...
- Page 5 Quick Start Guide Guía rápida Contact us if you have any questions about this process: support@bcn3dtechnologies.com Contáctenos en caso de tener dudas con algún proceso: support@bcn3dtechnologies.com...
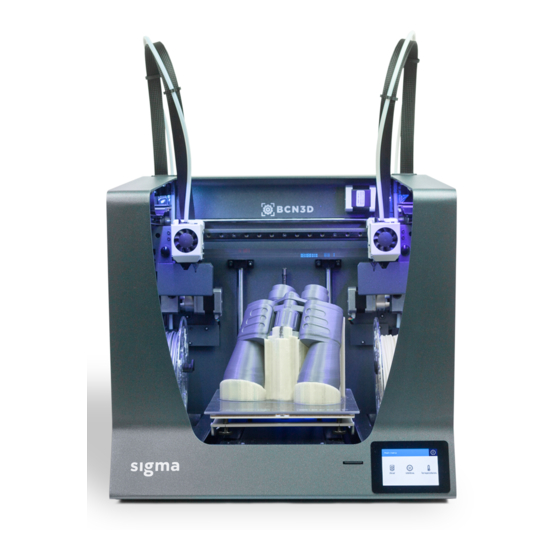
- Page 6 Glossary Glosario 1 Teflon tube Tubo de teflón 9 Touchscreen Pantalla táctil 2 Extruder 10 Filament entry Extrusor Entrada de filamento 3 Hotend cable Cable hotend 11 Filament spool Bobina de filamento 4 Spool holder 12 Switch Soporte bobina Interruptor 5 0.4mm Hotend 13 Platform Hotend de 0.4mm...
- Page 7 Glossary Glosario Guía Rápida Quick Start Guide - 7...
-
Page 8: Specifications
Specifications Especificaciones Manufacturing technology Fused Filament Fabrication (FFF) Tecnología de fabricación Fused Filament Fabrication (FFF) Architecture Independent dual extruder (IDEX) Arquitectura Independent dual extruder (IDEX) General dimensions 465 x 440 x 680 mm (fully assembled) Dimensiones generales 465 x 440 x 680 mm (totalmente montada) Weight 15 kg (without filament spools) Peso... - Page 9 BCN3D Electronics Electronics Electrónica BCN3D Electronics Connectivity SD card (autonomous operation), USB Conectividad Tarjeta SD (funcionamiento autónomo) , USB BCN3D Sigma - Marlin Firmware Firmware BCN3D Sigma - Marlin Operating sound 50 (dBA) Sonido de funcionamiento 50 (dBA) Compatible files...
- Page 10 What is in the box? ¿Qué hay en la caja? Sigma R19: with 0.4mm hotends Quick start guide and warranty 2 teflon tubes 4 Flat cable clips con hotends de 0.4mm Guía de inicio rápido y garantía 2 Tubos de teflón...
- Page 11 Unboxing Desembalaje Retain packaging for warranty service. Se recomienda no deshacerse de la caja de cartón ya que puede ser útil para su transporte, almacenaje o devolución. Take out the printer with the plastic bag. Finally, remove the plastic bag Sacar la impresora con la bolsa de plástico.
- Page 12 Set up Puesta a punto Place the glass printing surface on the platform. The slots must match. Colocar la superficie de impresión de cristal sobre la plataforma, haciendo coincidir las ranuras. The printing surface glass must be handled with care. In case of breakage, may cause injuries.
- Page 13 Set up Puesta a punto Place the spools holders into the spools. Colocar los soportes en las bobinas. Fit them into the indicated holes. Encajar las bobinas y los soportes en los huecos indicados. Guía Rápida Quick Start Guide - 13...
- Page 14 Set up Puesta a punto Move Y axis manually towards the front in order to work more comfortably. Mover manualmente el eje Y hacia adelante para trabajar más cómodamente. Insert the teflon tube until it stops. Insertar el tubo de teflón hasta que haga tope.
- Page 15 Set up Puesta a punto Attach the teflon tubes with the clips. Fijar los tubos de teflón con las anillas. Guía Rápida Quick Start Guide - 15...
- Page 16 Set up Puesta a punto Put together the teflon tube with the hotend cable using the flat cable clips. Unir el tubo de teflón al cable del hotend con los clips de cable plano. 16 - Quick Start Guide Guía Rápida...
- Page 17 Connect the power supply cable. The plug is located at the rear of the machine. Conectar el cable de alimentación por la parte trasera de la Sigma. Insert the SD card into the reader. Introducir la tarjeta SD en el lector. Guía Rápida...
- Page 18 Safety Seguridad · Very important. As with any other appliance, do · Muy importante. Como cualquier electrodoméstico, no not touch the terminals of the mains, the switch, or tocar los bornes de los cables provenientes de la red the power supply. There is a risk of electrocution. eléctrica, del interruptor de encendido o de la fuente de The other cables of the machine operate at 24V and alimentación.
-
Page 19: Getting Started
Getting started Puesta en marcha Setup Assistant Asistente de inicio 1. Welcome 2. Setup Assistant 3. Load filament Press Accept. Press Next. Pulsar Accept. Pulsar Next. 4. Select material 5. Follow screen’s instructions. 6. Repeat the process for the Choose PLA. Seguir las indicaciones de la second extruder. - Page 20 Getting started Puesta en marcha 10. Z Axis calibration 11. Place the Calibration Gauge between the nozzle and the printing When indicated on the screen, surface glass. Hold the gauge by the end and move it back and forth, apply a thin and uniform layer of without pressing the platform.
- Page 21 Getting started Puesta en marcha 14. Repeat processes 11-13 for If so, please check next section: NOTE: Depending on the Z axis calibration, “Installing shims” (page 24) for a detailed it may appear this recommendation screen. the second extruder. explanation of the reason, benefits and NOTA: Dependiendo de la calibración del procedure to perform this operation.
-
Page 22: Mirror And Duplication Modes
The Sigma R19 features two new printing modes: Mirror and Duplication. In these modes both toolheads work simoultaniously. La Sigma R19 dispone de 2 nuevos modos de impresión: Espejo y Duplicación. En estos modos ambos cabezales trabajan de manera simultánea. - Page 23 Mirror and Duplication modes Modos Espejo y Duplicación To avoid such distortion there are different options: Para evitar dicha distorsión hay 2 opciones: 1. Enable raft in BCN3D Cura. 1. Habilitar la opción Raft en BCN3D Cura. The offset will be corrected in the first layers of the La diferencia de alturas se corrige en las primeras raft, so the model won’t be affected by any Z offset.
-
Page 24: Installing Shims
Duplication or Mirror mode, the de imprimir un archivo en modo Espejo o Duplicación, Sigma may suggest you to install shims to correct la Sigma puede recomendar la instalación de galgas the Z offset between nozzle tips. -
Page 25: Installation
BCN3D Cura installation Instalación de BCN3D Cura Guía Rápida Quick Start Guide - 25... - Page 26 BCN3D Cura download and installation Descarga e instalación de BCN3D Cura BCN3D Cura is a free and easy-to-use 3D printing BCN3D Cura es un programa de impresión 3D gratuito software that prepares your digital model for 3D y sencillo de usar que prepara tu modelo 3D digital printing.
-
Page 27: Your First Dual Print
Haz tu primera impresión dual 1. Open BCN3D Cura previously downloaded and installed. Abrir BCN3D Cura previamente descargado e instalado. 2. Select Sigma R19 in the menu Add printer. Seleccionar Sigma R19 dentro del menú Add printer. Guía Rápida Quick Start Guide - 27... - Page 28 Your first dual print Haz tu primera impresión dual 3. Click Open File. 4. Select files to print. Clicar sobre el botón Open File. Seleccionar los archivos a imprimir 5. Click the model and assign the extruder to print with. Clicar sobre el modelo y asignar el extrusor con el que imprimir.
- Page 29 Your first dual print Haz tu primera impresión dual 6. Select the models by Shift+Left Click. Selected 7. Select profile. models will be highlighted with a blue outline. Seleccionar perfil de impresión. Right click on any of the selected models, and select Merge Models.
-
Page 30: First Mirror/Duplication Print
Seleccionar Print en el menú principal de la pantalla de la Sigma. Congratulations! You have started printing your first 3D part with the Sigma R19. ¡Enhorabuena! Ha empezado a imprimir su primera pieza 3D con la Sigma R19. First Mirror/Duplication print Primera impresión Espejo/Duplicación... - Page 31 First Mirror/Duplication print Primera impresión Espejo/Duplicación 3. Select the desired printing mode in the drop-down list. Seleccionar el modo de impresión deseado en la lista desplegable. 4. Note how the available printing volume is reduced and the loaded models automatically move to the left.
- Page 32 32 - Quick Start Guide Guía Rápida...
- Page 33 Guía Rápida Quick Start Guide - 33...
- Page 34 34 - Quick Start Guide Guía Rápida...
- Page 35 Guía Rápida Quick Start Guide - 35...
- Page 36 MS-R19-2018-2 36 - Quick Start Guide Guía Rápida...
Need help?
Do you have a question about the R19 and is the answer not in the manual?
Questions and answers