Table of Contents
Advertisement
Quick Links
D A N G E R
Si no entiende ingles, se prefiere que
busque a alguien que interprete las
instrucciones para usted.
POSTMASTER/
SLAB BLASTER
MODELS
Owner:
Date Purchased:
Model #:
9MPOST2454659
Manual #:
Operator's Manual
Phone: (573) 642-2246
8000
9000
Serial #:
Danuser Machine Company, Inc.
500 East Third Street
P.O. Box 368
Fulton, Missouri 65251
Fax: (573) 642-2240
E-mail: sales@danuser.com
Website: www.danuser.com
Advertisement
Table of Contents

Related Manuals for Danuser POSTMASTER/SLAB BLASTER

Summary of Contents for Danuser POSTMASTER/SLAB BLASTER
- Page 1 Date Purchased: Model #: Serial #: 9MPOST2454659 Manual #: Operator’s Manual Danuser Machine Company, Inc. D A N G E R 500 East Third Street P.O. Box 368 Fulton, Missouri 65251 Si no entiende ingles, se prefiere que Phone: (573) 642-2246...
- Page 2 Dear Owner/Operator, Thank you for purchasing this Danuser Postmaster/Slab Blaster. We appreciate your business. Your safety as an operator of our product is very important to us. Therefore, before you assemble, install, operate, maintain, service, remove, or move your Danuser Postmaster/ Slab Blaster, read and understand this manual thoroughly.
-
Page 3: Table Of Contents
Please read this manual thoroughly! Before you assemble, install, operate, maintain, service, remove, or move your Danuser Postmaster/Slab Blaster, read this manual thoroughly. If there is anything you do not understand, immediately contact your dealer, or call our factory direct at (573) 642-2246. - Page 4 Postmaster/Slab Blaster. If there is anything in this manual you do not understand, contact your dealer or Danuser Machine Company, Inc. The safe use of this attachment is strictly up to you, the operator. If this attachment is used, loaned, or rented by any other person, it is the owner's responsibility to make certain that the operator prior to operating: •...
- Page 5 • Never allow anyone under the attachment at any time. • Keep clear of the Postmaster/Slab Blaster while in operation. Never position, align, or support the post by hand or with any tool when the hammer is in operation. •...
-
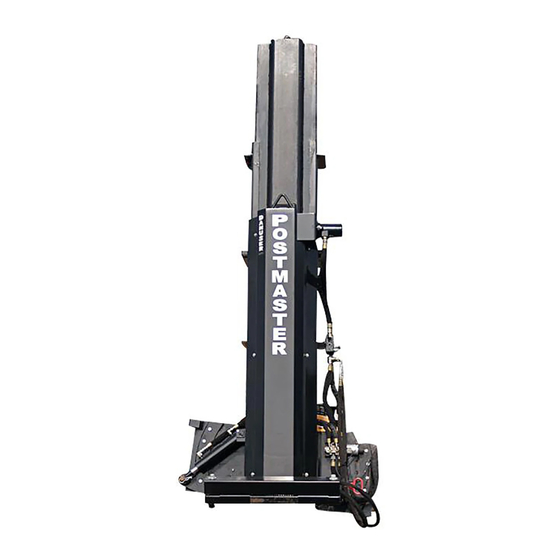
Page 6: Specifications
Specifications Model 8000 Model 9000 Overall Length 48" Overall Width 24" Overall Height 64" 90" Hammer Weight (POSTMASTER) 275 lbs. (700 lbs. max.) Hammer Weight (SLAB BLASTER) 400 lbs. (700 lbs. max.) Length of Stroke 36" 56" Max. Strokes Per Minute 12 GPM Hydraulic Requirements 2000 PSI... -
Page 7: Hydraulic Requirements
Pressure and Flow Requirements: • The Postmaster/Slab Blaster is designed to operate at 12 GPM and 2000 PSI. Valve Requirements: • The hydraulic system used to power the Postmaster/Slab Blaster should be equipped with a four-way valve large enough to carry full pump outlet without restricting flow and causing oil heating. -
Page 8: Assembly & Installation
Postmaster/Slab Blaster. The vehicle must be equipped with a universal quick attach hitch and auxiliary hydraulics. The use of the Postmaster/Slab Blaster may require the addition of counterweights to ensure the attachment does not exceed the rated capacity of your vehicle. - Page 9 Transit Bolt Safety Catch STEP 8: Raise the Postmaster/Slab Blaster in the air, and tilt it forward 90°. Watch for any obstructions or pinching of hydraulic hoses. STEP 9: Shut off the vehicle engine. STEP 10: Grease the exposed hammer rails.
- Page 10 Assembly & STEP 13: Start the vehicle. Running at full throttle, engage the auxiliary hydraulics. Note the direction of the chain rotation (visible from the operator’s seat). The chain Installation should be rotating from the bottom to the top. If it is not, reverse the hydraulic hoses.
-
Page 11: Operation
STEP 17: After setting the flow control, turn off the auxiliary hydraulics. Slide the hammer back into the Postmaster/Slab Blaster. Installation STEP 18: Slowly tilt the Postmaster/Slab Blaster back to a vertical position. (continued) STEP 19: Shut off the vehicle, and disconnect the hydraulic hoses. Route the hydraulic hoses through the quick attach plate hose holder, and reconnect the hydraulic hoses to the vehicle auxiliary hydraulics. - Page 12 Operation STEP 4: After the second person has cleared the area, continue lowering the Postmaster onto the post approximately 24 inches. Gauge this measurement by noting when the post guide is approximately 6 inches above the first reinforcement plate. (continued) BACK OF POSTMASTER Post Guide (when moved 6" above reinforcement plate) Post Guide Reinforcement Plate (when moved up 2")
- Page 13 Before you operate the attachment, check over pins and With Grapple connections to be sure they all are securely in place. Make sure the Postmaster/Slab Blaster is securely latched to the vehicle. D A N G E R D A N G E R...
- Page 14 Picking up a post from the ground may require a few tries to get it perfect. We recommend Operation attaching a 24 inch length of deck chain to the hook provided next to the bottom of the drive assembly. This will help the operator align the Grapple jaws with the head of the post, ensuring a perfect pick-up of the post every time.
- Page 15 STEP 11: Lower the Postmaster onto the post approximately 24 inches. Reposition the Operation vehicle using the guide chain as a plum line. STEP 12: Turn on the auxiliary hydraulics in the forward position. This will open the jaws, (continued) swing the Grapple out of the way, and start the hammer.
- Page 16 Before you operate the attachment, check over pins and Slab Blaster connections to be sure they all are securely in place. Make sure the Postmaster/Slab Blaster is securely latched to the vehicle. D A N G E R D A N G E R...
-
Page 17: Removal & Storage
The thickness (up to 9 inches) and the toughness of the concrete will affect your speed. Before storage, the Postmaster/Slab Blaster should be thoroughly cleaned, washing off all Removal & dirt and grime. If you have a Grapple or Tilt, coat the exposed portions of the cylinder rod Storage with grease. Lubricate the drive chain, chain coupler, and all grease fittings. Make sure the... -
Page 18: Troubleshooting
Hose rating too low for Replace with hoses with hydraulic system pressure working pressure rated higher than vehicle hydraulic pressure. d) Hoses pinched Reroute hoses. For additional assistance, please call your dealer or contact Danuser direct: Phone: (573) 642-2246 Fax: (573) 642-2240 E-mail: sales@danuser.com... -
Page 19: Maintenance
Maintenance DAILY CHECK FOR CLEAN HYDRAULIC OIL The majority of all hydraulic component failures are caused by contamination of the hydraulic oil. At all times, keep dirt and other contaminates from entering the hydraulic system during connecting and disconnecting the hydraulic system. Always use dust caps and plugs on all quick disconnects when not in use. -
Page 20: Service
Lay the hammer on the ground. plugs are recommended during assembly, STEP 2: Disconnect the hydraulic hoses, and remove the Postmaster/Slab Blaster from the installation, operation, vehicle. maintenance, service, removal, or movement of STEP 3: Carefully lay down the Postmaster/Slab Blaster on its back. - Page 21 STEP 8: Position the new drive chain around the frame and sprockets, and install the pick- Service up link. Drive pins through the pick-up link and chain, weld connector pin holes shut, and grind weld flush. (continued) Drive pin through pick-up link Pick-Up Link and chain.
- Page 22 Postmaster. w A R N I N G Do not tilt or operate the Postmaster/Slab Blaster without the safety catch in place. The hammer could slide out of the Postmaster/Slab Blaster and cause serious injury or death.
- Page 23 Slab Blaster. w A R N I N G Do not tilt or operate the Postmaster/Slab Blaster without the safety catch in place. The hammer could slide out of the Postmaster/Slab Blaster and cause serious injury or death.
- Page 24 Postmaster. w A R N I N G Do not tilt or operate the Postmaster/Slab Blaster without the safety catch in place. The hammer could slide out of the Postmaster/Slab Blaster and cause serious injury or...
-
Page 25: Parts
Parts Drive Assembly REF. NO. PART NO. DESCRIPTION QTY. 11150 Bushing (includes 3 Capscrews and 1 Key) 11151 Double Tooth Sprocket 11152 Drive Chain – Models 8000 11153 Drive Chain – Models 9000 11154 Replacement Key 11155 Bearing Assembly 11156 5/16” UNC x 1-1/4” Flathead Socket Capscrew 11157 Nylon Guide Plate –... - Page 26 Parts = Safety Sign Location...
- Page 27 10** 11111 Slab Blaster Hammer 11133 Safety Catch Pin 11134 Hair Pin 11135 Postmaster/Slab Blaster Base Unit – Models 8000 11136 Postmaster/Slab Blaster Base Unit – Models 9000 11137 1/2” UNC Hex Nut 11138 1/2” UNC x 3” Hex Capscrew 11139 M8 x 1.25mm U Nut – Models 8000 M8 x 1.25mm U Nut –...
- Page 28 Parts Hydraulics REF. NO. PART NO. DESCRIPTION QTY. 11168 Hose Assembly 1/2” x 30” 11169 Hose Assembly 1/2” x 24” 11214 90° Elbow 11170 11171 Flow Control Valve 11172 Hose Assembly 1/2” x 80” 11173 Hydraulic Motor 11215 Straight Adapter 11183 Male Coupler 11184 Female Coupler...
- Page 29 Parts Grapple Hydraulics REF. NO. PART NO. DESCRIPTION QTY. 11168 Hose Assembly 1/2” x 30” 11169 Hose Assembly 1/2 x 24” 11214 90° Elbow 11170 11171 Flow Control Valve 11205 Check Valve 11206 11207 Reducer 11208 90° Elbow 11209 Swivel Adapter with Restrictor 11216 Female Coupler 11217 Male Coupler 11172 Hose Assembly 1/2” x 80”...
- Page 30 Parts Grapple...
- Page 31 Parts Grapple (continued) REF. NO. PART NO. DESCRIPTION QTY. 11174 5/8” UNC Lock Nut 11175 5/8” Flat Washer 11176 Chain Guard 11177 Spanner Bushing 11178 Idler Sprocket Bushing 11179 Idler Sprocket 11180 90° Elbow 11181 Hose Assembly 1/4” x 60” 11182 Hose Assembly 1/4” x 68” 11216 Female Coupler 11217 Male Coupler 11185 Cylinder 11186 Grapple Chain (includes Spring Link)
- Page 32 Parts Tilt REF. NO. PART NO. DESCRIPTION QTY. 11214 90° Elbow 11173 Hydraulic Motor 11219 90° Elbow 11220 Cylinder 11221 90° Elbow 11222 Diverter Valve 11171 Flow Control Valve 11215 Straight Adapter 11168 Hose Assembly .50" x 30" 11169 Hose Assembly .50" x 24" 11170 11223 Hose Assembly .50"...
-
Page 33: Decals & Safety Signs
PART NO. DIG13 Location: Unit, Front Decals & Location: Unit, Left Side Safety Signs PART NO. DIG17 PART NO. DIG5 Location: Unit, Rear Shelf Location: Unit, Right Side Tab PART NO. DIG16 Location: Unit, Rear Shelf PART NO. DIG18 Location: Unit, Front PART NO. - Page 34 Any parts or labor required to repair or replace parts not covered under this warranty will be charged to the customer. Parts repaired or replaced by Danuser are then covered by this warranty only for the remainder of the original warranty as if such parts were original parts.
Need help?
Do you have a question about the POSTMASTER/SLAB BLASTER and is the answer not in the manual?
Questions and answers