Table of Contents
Advertisement
Quick Links
Advertisement
Table of Contents

Summary of Contents for Crystal Vision CVT9604E
- Page 3 Thank you for purchasing our product. Crystal Vision Technology is committed to providing our customers with a high quality, reliable security solution. This manual refers to the following models: CVT9604E / CVT9608E / CVT804A / CVT808A For the latest online manual, downloads and product updates, and to learn about our complete line of accessory products, please visit our website at: www.cvtus.com...
- Page 4 your enjoyment and proper use of the product and accessory equipment. Please read them carefully before operating and using your product. General Precautions 1. All warnings and instructions in this manual should be followed. 2. Remove the plug from the outlet before cleaning. Do not use liquid aerosol detergents. Use a water-dampened cloth for cleaning.
- Page 5 the product. Surge Protectors: It is highly recommended that the product be connected to a surge protector. Doing so will protect the product from damage caused by power surges. Surge protectors should bear the UL listing mark or CSA certification mark. Uninterruptible Power Supplies (UPS): Because this product is designed for continuous, 24/7 operation, it is recommended that you connect the product to an uninterruptible power supply.
- Page 6 service personnel. 2. Conditions Requiring Service: Unplug this product from the wall outlet and refer servicing to qualified service personnel under the following conditions: When the power supply cord or plug is damaged. If liquid has been spilled or objects have fallen into the product. ...
-
Page 7: Preface
Thank you for purchasing Crystal Vision products. This user manual is to introduce the operations of Crystal Vision wireless HD systems in more details. If there is any other question which is not covered in this user manual, please contact Crystal Vision support at: support@cvtus.com... -
Page 8: Table Of Contents
Table of contents Preface ..........................5 1. Product Overview 1.1 Product Introduction ....................9 1.2 Product Specifications ....................9 1.3 Product Key Features ....................13 2. Operation Instructions 2.1 NVR Front / Rear Panel .................... 13 2.2 Monitor Display ......................14 2.3 Mouse Operation ....................... - Page 9 5.2.9 Channel ......................24 5.2.10 Wi-Fi Setup ....................24 5.2.11 Repeater ....................... 24 5.3 System Setup 5.3.1 General 5.3.1.1 General ....................26 5.3.1.2 Time ....................27 5.3.1.3 Hard Drive ................... 27 5.3.1.4 Screen ....................28 5.3.1.5 Error ....................29 5.3.2 Record 5.3.2.1 Record....................
- Page 10 5.8 Manual Recording ..................... 46 5.9 Setup Wizard ......................46 5.10 Fast Network ......................46 5.11 Exit System ......................47 5.11.1 Log Out ......................47 5.11.2 System Reboot ..................... 47 5.11.3 Close Screen Display ..................48 5.11.4 System Shutdown ..................48 6.
-
Page 11: Product Overview
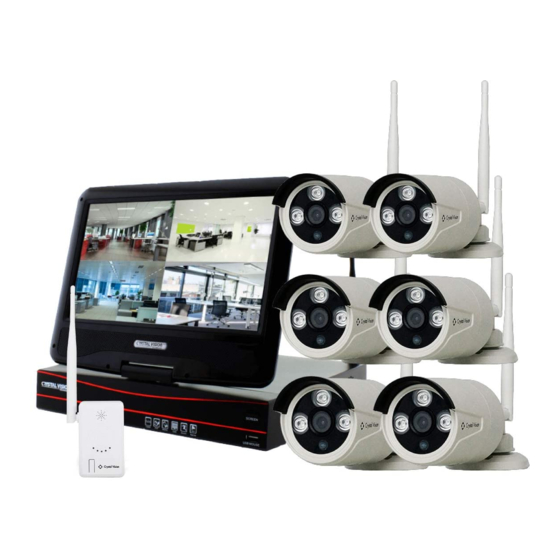
1. Product Overview 1.1 Product Introduction The Crystal Vision wireless HD NVR system is our new generation of NVR. It supports wireless Wi-Fi network video input, real time live view, video playback, and video backup. The NVR system can be widely used for surveillance of home, business, office, villa, etc. - Page 12 Camera: CVT3010W Mega Pixel 1.3MP Operation System Embedded Linux Image Sensor 1/4’ Progressive Scan Senor S/N Ratio > 39.1dB Resolution 1280 x 720 (16:9) High Definition Minimum Illumination Color: 0.1 Lux, B/W: 0.1 Lux Date, Time, Title White Balance Auto Day &...
- Page 13 NVR: CVT804A / CVT808A Operation System Embedded Linux OS NVR Channel 4 Channel / 8 Channel 1024x768, 1366x768, 1440x900, Video Output HDMI Output Video Resolution 720P / 1080P (H.264, H.265, H.265+) Frame Per Second 25 fps Live View / 15 fps Recording Synch-Playback 4 Channel Video / Capture mode...
- Page 14 Camera: CVT20WB Mega Pixel 2.0 MP Operation System Embedded Linux Image Sensor 1/3’ Progressive Scan Senor S/N Ratio > 39.1dB Resolution 1920 x 1080 (16:9) High Definition Minimum Illumination Color: 0.1 Lux, B/W: 0.1 Lux Date, Time, Title White Balance Auto Day &...
-
Page 15: Product Key Features
1.3 Product Key Features HD wireless network video recorder Built-in high-performance high-stability Wi-Fi router module; NVRs support 802.11b/g/n protocol Add Wi-Fi IP network camera to NVR by auto add Video live view/ record/ playback/ backup Easy usability (wireless auto pair, setup wizard, frequently used function menu, plug and ... -
Page 16: Monitor Display
2.2 Monitor Display 1. Camera Title 2. Camera Time Stamp 3. Wi-Fi / Recording Mode 4. System Time 5. Cloud ID / System Internet Connection Status Camera wireless signal indication Motion record Time record Manual record 2.3. Mouse Operation The NVR is designed for mouse navigation. To use a USB Mouse (included), connect the mouse to a USB port on the NVR. -
Page 17: Installation & Connection
If the camera does not connect within minute or two, please follow step 5.2.2 to add the camera to system or contact Crystal Vision Support at: support@cvtus.com. 3.3 Camera Mounting Spots 1. Mount the cameras anywhere within the Wi-Fi range, plug them to power with included power adapters (smaller 12v 1amp power adapter). -
Page 18: Antenna Mounting Tips
3.5 Antenna Mounting Tips The NVR’s antennas radiate signals to all around. The signal pick-up is best while antennas are on same height and parallel. If the cameras cannot be at the same height with NVR, please keep their antennas parallel (up or down). 4. -
Page 19: Setup Guide
Login After system initialized, the system will ask you to login to the system. Users must login to do further operations. Operation Steps: 1. Type in username. Default Username is admin. 2. Type in password. Default Password is empty, means no password, leave it blank. - Page 20 Network : Allows users to connect the NVR to Internet for remote access. Users can either check DHCP to allow NVR obtain IP address from router automatically, or manually set the NVR’s IP Address, Gateway, Subnet Mask, etc. Check DHCP, your NVR will obtain IP address from router automatically.
-
Page 21: System Main Menu
172. When it is done the camera will be added to the system and will automatically connect to the NVR system. When to use Match Code: Adding new camera to your Crystal Vision NVR system or re-pair camera to NVR when the camera lost connection to the system. Note: IP cameras in pre-packed kits have already been paired to NVR. - Page 22 How to pair (sync) camera using match code: 1. Connect the camera to your NVR via Ethernet cable, and power on both of the NVR system & the camera. The Ethernet port at the end of camera will blink, as shown in image below. 2.
-
Page 23: Wifi Add
When it is done the camera will be added to the system and will automatically connect to the NVR system. When to use Match Code: Adding new camera to your Crystal Vision NVR system or re-pair camera to NVR when the camera lost connection to the system. Note: IP cameras in pre-packed kits have already been paired to NVR. -
Page 24: Auto Add
5.2.4 Auto Add Function: Adding all of the cameras back into the system in case the camera has been deleted from the system, or after the NVR firmware update. Auto Add is different from the Match Code. This function help you add the camera to the system by reconfiguring the IP address, however, it does not change the connection type such as wire or... -
Page 25: Modify
5.2.4 Modify Function: Modify Camera information (Camera IP Address, Username & Password, etc..) Operation Steps: 1. Right click to bring up the main menu, and click ‘Video Manage’ 2. Select the camera from top chart you will like to edit and click ‘Modify’ 3. -
Page 26: Manual Edit
Function: Edit system Wi-Fi configuration for camera connection. (SSID, Password, Wi-Fi channel, Region) refer to 5.3.3.6 Wi-Fi Setup 5.2.10 Repeater Function: Setup Air Bridge feature to boost the Wi-Fi signal of Crystal Vision NVR system. ** Air bridge only works on the firmware version listed below ** System Version: v. - Page 27 The Air Bridge technology uses the cameras / IPC router as repeaters. This feature allow you to boost the Wi-Fi signal using the camera / IPC router located near by the camera with weak signal to boost & extend the range of Wi-Fi. This will increase the Wi-Fi range up to %150. Air Bridge setup guide Operation Steps: 1.
-
Page 28: System Setup
Tip: If you have multiple air bridge to setup, please try to setup one at a time to avoid system error. NVR system & cameras need to be stay connected to constant power. If you are having an issue liking the camera with weak signal, please move the camera ... -
Page 29: Time
5.3.1.2 Time Function: Set Time Zone, System Date & Time. Time Zone: Select your local time zone Summer Time: Set summer time manually Date Format: Select date display format System Date: Set the system date System Time :Set the system time Sync Time: Enable to sync time via internet connection. -
Page 30: Screen
Hard disk list – Display list of hard drive with information. Overwrite – Enable / Disable overwrite function when hard drive is full Auto delete old files – Enable / Disable auto delete function. This option allows the system to automatically delete the recordings older then the selected day. -
Page 31: Error
5.3.1.5 Error Function: Enable / Disable System error notification. Error Type: Enable / Disable following system error notification Alarm – display red triangle bottom right of screen Buzzer – sound buzzer when error occurs E-mail notice – Send E-mail notification with error information. Tip: To use the E-mail notification you must first setup the E-mail under the ‘network’... -
Page 32: Network
Setting up recording plan: 1. Right click to bring up the main menu and go to: System setup > Record > Record Plan. 2. From the record plan select the ‘channel’ (camera #) you like to change setting. 3. Click ‘Reset’ to clear all the setting. 4. -
Page 33: Ddns
Web Port: Video signal transmit port for remote viewing. (Default: 80). Net Diagnose Info: Enable / Disable Network status. Network Status: Display current network status. Healthy Network: NVR system is connected to the internet. Network cable disconnected / Gateway unreachable: NVR system is not connected to the internet. -
Page 34: E-Mail
5.3.3.3 E-Mail Function: Setup E-mail server information for e-mail alerts. E-Mail Function: Enable / Disable E-mail SMTP Provider: Preset information of e-mail providers. (If you provider is not listed, you will need to enter in the SMTP information manually.) SMTP Server: Enter in the SMTP server address of e-mail services provider you are using. Port: Enter number of SMTP server Encryption Type: Select the encryption type depends on the SMTP server Sender: Enter your e-mail address... -
Page 35: Wi-Fi Setup
5.3.3.4 Wi-Fi Setup Function: This option allows users to change NVR’s Wi-Fi SSID & password setting and some other router related settings Wi-Fi Version: Current Wi-Fi card version BSSIS: Wi-Fi MAC address ESSID: Current SSID information Password: NVR system Wi-Fi password information Wi-Fi Channel: Current Wi-Fi channel information Region: Wi-Fi Channel Region setup (Default: FCC) Connect Information –... -
Page 36: Channel
5.3.4 Channel 5.3.4.1 Channel info Function: Display the camera current setup information. Such as stream, resolution, bitrate, frame rate, etc… Note: You can only check the current setting, and not able to edit any information. All the setting are fix and not changeable. 5.3.4.2 PTZ Function: Allow to add optional PTZ / Speed dome camera into the system. -
Page 37: Channel Osd
5.3.4.3 Channel OSD Function: Allow user to change the name / title of each camera, and enable / disable the status display. Operation Steps: 1. Right click to bring up the main menu, and go to: system setup > Channel > channel OSD. 2. -
Page 38: Bitrate
Operation Steps: 1. Right click to bring up the main menu, and go to: System setup > Channel > Motion Detection. 2. Select the ‘Channel’ (Camera) you will like to receive notification from. 3. Set the ‘Detection’ as ‘Motion’ and set the ‘Sensitivity’ of the motion detection. Move the slider to adjust the sensitivity. -
Page 39: System
5.3.5 System 5.3.5.1 System info Function: Allow user to check the device’s information including Device name, Device model, Device SN, H/W version, S/W version, Built time, etc. 5.3.5.2 System log Function: Allow users to search and check the system log file of the NVR system. Operation Steps: 1. -
Page 40: User
5.3.5.3 User Function: Allow users to add, delete and edit username and password. Operation Steps: User password change 1. Right click to bring up the main menu, and go to: System setup > System > User. (Log into username you will like to change password). 2. -
Page 41: System Upgrade
Remote: Allow remote view using smartphone or PC Config: Remote configuration of NVR system * Playback: Remote playback using smartphone or PC (*Does not apply to model CVT9604E/8E) 5.3.5.4 System upgrade Function: Allow users to upgrade system firmware version. Operation Steps: 1. -
Page 42: Camera Upgrade
3. Right click to bring up the main menu, and go to: System setup > System > System upgrade. 4. Check the 'Auto restart' box 5. Select 'USB storage' from the drop-down menu. 6. Click on the 'System' from the drop-down menu. 7. -
Page 43: Default Setting
Operation Steps: 1. Right click to bring up the main menu, and go to: System setup > System > Camera upgrade. 2. Check the select boxes next to the camera you want to update from the list. 3. Select 'USB storage' from the Firmware from drop-down menu. 4. -
Page 44: System Maintenance
5.3.5.7 System maintenance Function: Enable / Disable system auto maintenance function (system restart). Operation Steps: 1. Right click to bring up the main menu, and go to: System setup > System > Sys maintenance. 2. Enable ‘Auto maintenance’ by selecting ‘Once’, ‘Everyday’, or ‘Every week’ 3. -
Page 45: Video Playback
5.4 Video Playback Function: Playback recorded video. Operation Steps: 1. Right click to bring up the main menu, and go to: ’Video Playback’. 2. Select the date using the calendar. 3. Once you have selected the date click on ‘Search’ to load the time frame at the bottom. 4. -
Page 46: Video Backup
5.5 Video Backup Function: Backup the recorded videos in the hard drive into the USB flash drive You can back up the video to USB flash drive. Before you start please make sure to plug the USB flash drive into the NVR’s USB port. Operation Steps: 1. -
Page 47: Color Adjust
5.6 Color Adjust Function: Adjust the color and brightness of each camera. Operation Steps: 1. Select the camera you will like to adjust the color by ‘Double click’ on the camera image. 2. Right click to bring up the main menu, and go to: ‘Color adjust’. 3. -
Page 48: Manual Recording
5.8 Manual Recording Function: Allow user to overwrite any recording plan to record continuously. Operation Steps: 1. Right click to bring up the main menu, and go to: ‘Manual Recording’. 2. Select or deselect the ‘Channels’ 3. Click ‘Ok’ to save & exit Tip: Selected channels will enable the manual recording, and overwriting any recording plan. -
Page 49: Exit System
Operation Steps: 1. Right click to bring up the main menu, and go to: ‘Fast Network’. 2. Check the cloud status. (Online / Offline) 3. If the system is ‘Offline’ click ‘Auto Config’ to renew the IP address of the NVR system. 4. -
Page 50: Close Screen Display
5.11.3 Close Screen Display Function: Disconnect all display output Operation Steps: 1. Right click to bring up the main menu, and go to: ‘Exit System’. 2. Click ‘Close screen output’. Tip: This will only stop displaying the image, however, the screen is still “ON”. If you like to turn off the screen please use the “Screen”... -
Page 51: Remote View
6. Remote view. Note: Before setting up the remote view for the smartphone or PC please make sure the NVR system is connected to the internet router / modem via Ethernet cable, and make sure it is ‘Online’. -
Page 52: Smartphone Setup (Android / Ios)
6.1 Smartphone (Android / iOS) Operation Steps: 1. Download the free application IP Pro from Google Play or App store, and install it on our smartphone. 2. Open up the application and if you are a new user, please tap the ‘Register’ to create an new account for the IP Pro. -
Page 53: Cms Software For Windows & Mac
6.2 CMS software for Windows & Mac Function: Allow user to remote view from PC. Using the CMS software you can connect more than one NVR system at the same time. 1. Go to our website at: www.cvtus.com > support > download 2. - Page 54 Product with the original proof of purchase receipt. In its sole discretion, Crystal Vision will either repair or replace the Product at no additional cost to the Purchaser. Any replacement Product (or parts) will be covered by the same warranty as the original Product through the expiration date of the original warranty period.
Need help?
Do you have a question about the CVT9604E and is the answer not in the manual?
Questions and answers