Table of Contents
Advertisement
Ovation Link Controller (LC) User's Guide
Section
1-1.
Overview. . . . . . . . . . . . . . . . . . . . . . . . . . . . . . . . . . . . . . . . . . . . . . . . . . . . . . . . . . 1-1
1-1.1. System Overview . . . . . . . . . . . . . . . . . . . . . . . . . . . . . . . . . . . . . . . . . . . . . 1-1
1-1.2. Link Controller Overview . . . . . . . . . . . . . . . . . . . . . . . . . . . . . . . . . . . . . . 1-3
1-2.
Contents of this Document . . . . . . . . . . . . . . . . . . . . . . . . . . . . . . . . . . . . . . . . . . . . 1-4
1-3.
Additional Reference Documentation. . . . . . . . . . . . . . . . . . . . . . . . . . . . . . . . . . . . 1-5
2-1.
Section Overview . . . . . . . . . . . . . . . . . . . . . . . . . . . . . . . . . . . . . . . . . . . . . . . . . . . 2-1
2-2.
Module Description . . . . . . . . . . . . . . . . . . . . . . . . . . . . . . . . . . . . . . . . . . . . . . . . . 2-1
2-2.1. Base Unit . . . . . . . . . . . . . . . . . . . . . . . . . . . . . . . . . . . . . . . . . . . . . . . . . . . 2-1
2-2.2. Electronics Module . . . . . . . . . . . . . . . . . . . . . . . . . . . . . . . . . . . . . . . . . . . 2-1
2-2.3. Personality Module . . . . . . . . . . . . . . . . . . . . . . . . . . . . . . . . . . . . . . . . . . . 2-2
2-3.
Module Specifications . . . . . . . . . . . . . . . . . . . . . . . . . . . . . . . . . . . . . . . . . . . . . . . 2-5
2-4.
Interface Connections . . . . . . . . . . . . . . . . . . . . . . . . . . . . . . . . . . . . . . . . . . . . . . . . 2-6
2-4.1. Terminal Block Wiring Information . . . . . . . . . . . . . . . . . . . . . . . . . . . . . . 2-6
2-4.2. Applications Port Terminal Block Field Connections . . . . . . . . . . . . . . . . . 2-9
2-4.3. Applications Port (J2) Field Connections . . . . . . . . . . . . . . . . . . . . . . . . . 2-14
2-4.4. Generic Cabling Schemes . . . . . . . . . . . . . . . . . . . . . . . . . . . . . . . . . . . . . 2-22
2-4.5. Cable Selection . . . . . . . . . . . . . . . . . . . . . . . . . . . . . . . . . . . . . . . . . . . . . 2-24
2-5.
Jumpers . . . . . . . . . . . . . . . . . . . . . . . . . . . . . . . . . . . . . . . . . . . . . . . . . . . . . . . . . . 2-25
2-6.
External Personal Computer Connections . . . . . . . . . . . . . . . . . . . . . . . . . . . . . . . 2-26
2-6.1. Computer Requirements . . . . . . . . . . . . . . . . . . . . . . . . . . . . . . . . . . . . . . 2-26
2-6.2. Cable Requirements . . . . . . . . . . . . . . . . . . . . . . . . . . . . . . . . . . . . . . . . . . 2-26
2-6.3. Jumper Requirements. . . . . . . . . . . . . . . . . . . . . . . . . . . . . . . . . . . . . . . . . 2-27
2-6.4. Programming Port (J1) Signal Connections . . . . . . . . . . . . . . . . . . . . . . . 2-29
2-7.
Link Controller Address Locations. . . . . . . . . . . . . . . . . . . . . . . . . . . . . . . . . . . . . 2-31
2-8.
Diagnostic LEDs. . . . . . . . . . . . . . . . . . . . . . . . . . . . . . . . . . . . . . . . . . . . . . . . . . . 2-33
Section 3. Link Controller Initialization
3-1.
Section Overview . . . . . . . . . . . . . . . . . . . . . . . . . . . . . . . . . . . . . . . . . . . . . . . . . . . 3-1
3-2.
Software Needed. . . . . . . . . . . . . . . . . . . . . . . . . . . . . . . . . . . . . . . . . . . . . . . . . . . . 3-1
3-3.
Link Controller Initialization . . . . . . . . . . . . . . . . . . . . . . . . . . . . . . . . . . . . . . . . . . 3-2
3-3.1. Procedure 1 . . . . . . . . . . . . . . . . . . . . . . . . . . . . . . . . . . . . . . . . . . . . . . . . . 3-3
3-3.2. Procedure 2 . . . . . . . . . . . . . . . . . . . . . . . . . . . . . . . . . . . . . . . . . . . . . . . . . 3-7
11/98
Title
i
Westinghouse Proprietary Class 2C
Page
U3-1021
Advertisement
Table of Contents

Subscribe to Our Youtube Channel
Summary of Contents for Ovation 1C31169G01
-
Page 1: Table Of Contents
Ovation Link Controller (LC) User’s Guide Section Title Page Section 1. Introduction 1-1. Overview............1-1 1-1.1. - Page 2 Table of Contents, Cont’d Section Title Page Section 4. Link Controller Programming and Operation 4-1. Section Overview ........... 4-1 4-2.
-
Page 3: Section 1. Introduction
The Ovation I/O modules are locked into Base Units (two modules per Base Unit). These Base Units are housed in the Controller cabinets where they are mounted on DIN rails and wired to the appropriate field devices (see example of Controller... - Page 4 Branch 2 Branch 3 Branch 4 Back Front Note The branches (1 - 8) are used to define bus address locations (this includes an Extended cabinet). Figure 1-1. Ovation Controller Cabinet Example (illustrating modules) U3-1021 2/99 Westinghouse Proprietary Class 2C...
-
Page 5: 1-1.2. Link Controller Overview
1-1.2. Link Controller Overview The Link Controller (LC) module provides the Ovation Controller with a serial data communications link to a third-party device or system. This communication is done via a serial RS-232, RS-422, or RS-485 data link. Two serial ports are provided: •... -
Page 6: Contents Of This Document
This document is organized into the following sections: • Section 1. Introduction describes the Ovation Link Controller module and its uses. This section also describes the contents of this manual and lists additional manuals that might be helpful to the user. -
Page 7: Additional Reference Documentation
Description R3-1100 Ovation Algorithms Reference Provides detailed descriptions of LC (SLC) Manual algorithms. R3-1140 Ovation Record Types Discusses Ovation process points and record Reference Manual fields. R3-1150 Ovation I/O Reference Manual Provides information about all the Ovation I/O modules. U3-1000... -
Page 8: Section 2. Link Controller Hardware
Section 2. Link Controller Hardware 2-1. Section Overview This section describes the Ovation Link Controller module, the wiring, the optional jumpers, and the diagnostic LEDs used to provide communication between an Ovation Controller and a third-party device or system. This communication is done via a serial RS-232, RS-422, or RS-485 data link. -
Page 9: 2-2.3. Personality Module
There are two Personality module groups for the Link Controller Module. Select the appropriate group for the desired serial link. Group One Personality Module Group One (1C31169G01) provides for an RS-232 serial link. • J1 Port is an RS-232 Programming Port which is used to interface to a Personal Computer (used for keyboard input, CRT display, and file transfer functions). - Page 10 2-2. Module Description — RTS/ directly controls the state of the TX-ENA signal as shown below: UART RTS/ RS-485 Transmitter MCR Bit 1 Output State TX-ENA State Output State Tri-stated (disabled) Enabled If two-wire half duplex communication is desired, connect the Link Controller’s base unit terminal block input terminals to the output terminals (that is, connect RX- to TX-, and connect RX+ to TX+).
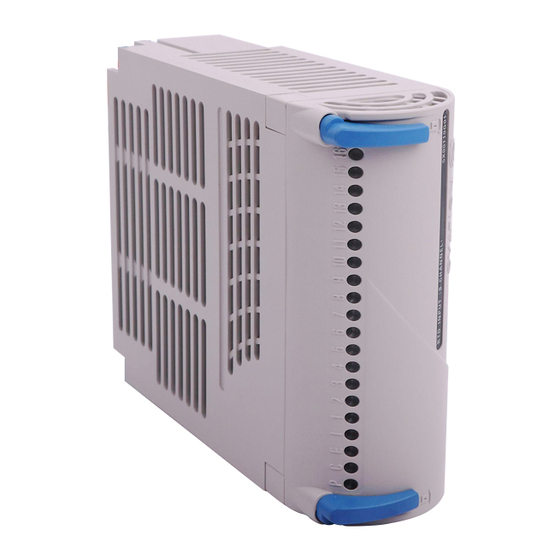
- Page 11 2-2. Module Description DIN Rail Base-to-Base Connector Terminal Block Connections A, B, C Module Base Connectors Spare Fuse DIN Rail Mounting Screw Locations J2 Applications Port J1 Programming Port Status LEDs Module Latches Electronics Module Terminal Block Connections Personality Module A, B, C Figure 2-1.
-
Page 12: Module Specifications
Base unit terminal block (refer to Figure 2-2). (1C31169G01) RS-232 signal levels: Note that standard IBM PC/AT COM1 port pin assignments are present at the J2 DB9 connector (1C31169G02) RS-485/RS-422 signal levels: four wire link, RS-485/RS-422 transmitter/receiver. -
Page 13: Interface Connections
2-4. Interface Connections 2-4. Interface Connections 2-4.1. Terminal Block Wiring Information The field connection to the LC module can be made either at the nine pin J2 connector of the personality module or at the terminal block of the base unit. It is common for RS-422 and RS-485 communication, because the cable length is typically longer, for the connection to be made as field wiring rather than as a pre- manufactured cable. - Page 14 2-4. Interface Connections Abbreviation Definition SH * Applications port cable assembly shield connection (for remotely grounded shields) (for non-CE Mark certified systems) TX/ * RS-232 Transmit Data (Output) TX+ * RS-485/RS-422 Transmit Data (Output) TX- * RS-485/RS-422 Transmit Data (Output) * Applications port 2/99 U3-1021...
- Page 15 2-4. Interface Connections Notes 1. Do not use unmarked terminal block locations. 2. Shield terminals (SH) are not connected in CE Mark certified systems. RS-232 Applications: (1C31169G01) RI CTS RX/ DCD BAU SEL DSR RTS TX/ DTR Earth Earth BT. SEL...
-
Page 16: 2-4.2. Applications Port Terminal Block Field Connections
Non-CE Mark Certified Systems Third Party Device Base Unit Terminal Block Remote Grounding Earth GND Third Party Device Base Unit Terminal Block Local Grounding Earth GND Figure 2-3. Terminal Block RS-232 Interface (1C31169G01) (Non-CE Mark) 2/99 U3-1021 Westinghouse Proprietary Class 2C... - Page 17 2-4. Interface Connections Add jumper if parallel Third Party Device Base Unit Terminal Block termination resistor is desired. Remote Shield Grounding Earth GND Add jumper if parallel Third Party Device Base Unit Terminal Block termination resistor is desired. Local Shield Grounding Earth GND Figure 2-4.
- Page 18 2-4. Interface Connections Add jumper if parallel Third Party Device Base Unit Terminal Block termination resistor is desired. TX+/RX+ TX-/RX- Remote Shield Grounding Earth GND Add jumper if parallel Third Party Device Base Unit Terminal Block termination resistor is desired. TX+/RX+ TX-/RX- Local Shield Grounding...
- Page 19 See note. Note All field wiring must be braid-shielded and grounded at the entry point of the cabinet using the recommended hardware (refer to “Cable Guidelines” in U3-1000). Figure 2-6. Terminal Block RS-232 Interface (1C31169G01) (CE Mark) U3-1021 2-12 2/99...
- Page 20 2-4. Interface Connections Add jumper if parallel Third Party Device Base Unit Terminal Block termination resistor is desired. Local Shield Earth GND See note. Grounding Note All field wiring must be braid-shielded and grounded at the entry point of the cabinet using the recommended hardware (refer to “Cable Guidelines”...
-
Page 21: 2-4.3. Applications Port (J2) Field Connections
The cable assembly metal hood must be in electrical contact with the cable’s shield. Refer to Table 2-2 for pin assignments. Figure 2-8. J2 RS-232 Interface (1C31169G01) (Non-CE Mark) U3-1021 2-14... - Page 22 2-4. Interface Connections Table 2-2. Pin Assignments for J2 Applications Port RS-232 Interface Pin Number Signal Name (Function) Signal Direction DCD (Data Carrier Detect) Input RX/ (Receive Data) Input TX/ (Transmit Data) Output DTR (Data Terminal Ready) Output Com (Isolated Common) DSR (Data Set Ready) Input RTS (Request to Send)
- Page 23 2-4. Interface Connections Add jumpers if parallel termination resistor is desired. Personality Module Third Party Device J2 Applications Port Local Shield Grounding Cable Assembly Base Unit Metal Hood Terminal Block Note If the Personality module’s J2 RS-485/RS-422 Applications port DB9 connector is used in place of the base unit terminal block, only local shield grounding may be implemented.
- Page 24 2-4. Interface Connections Table 2-3. Pin Assignments for J2 Applications Port RS-485/RS-422 Four-Wire Interface Pin Number Signal Name (Function) Signal Direction Input Input Output Output Com (Isolated Common) Top View of J2 Connector 2/99 2-17 U3-1021 Westinghouse Proprietary Class 2C...
- Page 25 Refer to Table 2-4 for pin assignments. The cable MUST be braid-shielded and grounded at the entry point of the cabinet using the recommended hardware (refer to “Cable Guidelines” in U3-1000). Figure 2-10. J2 RS-232 Interface (1C31169G01) (CE Mark) U3-1021 2-18...
- Page 26 2-4. Interface Connections Table 2-4. Pin Assignments for J2 Applications Port RS-232 Interface Pin Number Signal Name (Function) Signal Direction DCD (Data Carrier Detect) Input RX/ (Receive Data) Input TX/ (Transmit Data) Output DTR (Data Terminal Ready) Output Com (Isolated Common) DSR (Data Set Ready) Input RTS (Request to Send)
- Page 27 2-4. Interface Connections Add jumpers if parallel termination resistor is desired. Personality Module Third Party Device J2 Applications Port Local Shield See note. Grounding Cable Assembly Base Unit Metal Hood Terminal Block Notes If the Personality module’s J2 RS-485/RS-422 Applications port DB9 connector is used in place of the base unit terminal block, only local shield grounding may be implemented.
- Page 28 2-4. Interface Connections Table 2-5. Pin Assignments for J2 Applications Port RS-485/RS-422 Four-Wire Interface Pin Number Signal Name (Function) Signal Direction Input Input Output Output Com (Isolated Common) Top View of J2 Connector 2/99 2-21 U3-1021 Westinghouse Proprietary Class 2C...
-
Page 29: 2-4.4. Generic Cabling Schemes
2-4. Interface Connections 2-4.4. Generic Cabling Schemes Once the pin-out of the other device’s serial port connector has been determined, a cable can be made to connect the device to the J2 Port of the LC module. The module’s transmit signal (RS-232) or signal pair (RS-485/RS-422) must be connected to the receive signal (RS-232) or signal pair (RS-485/RS-422) of the other device. - Page 30 2-4. Interface Connections 9-Pin Female J2 Applications Port D Connector at G02 Other Device Personality Module Signal Signal Name Number Name RXD- TXD- RXD+ TXD+ TXD+ RXD+ TXD- RXD- RTS- RTS+ CTs+ CTs- Notes 1. Use loopbacks only if needed by device. 2.
-
Page 31: 2-4.5. Cable Selection
2-4. Interface Connections 2-4.5. Cable Selection Cable for RS-232 serial communication should be multiple conductor with shield. The shield drain wire should be used for the ground connection. Cable for RS-485/RS-422 serial communication should be multiple twisted pairs, overall or individually shielded. Each signal’s two differential connections should be made within a twisted pair;... -
Page 32: Jumpers
2-5. Jumpers 2-5. Jumpers Wire jumpers may be installed in the Base Unit terminal block to select different Link Controller options. Table 2-6 describes the options and the jumpers used to select those options. Table 2-6. LC Jumper Options Option Jumper Positions Description Baud Rate... -
Page 33: External Personal Computer Connections
2-6. External Personal Computer Connections 2-6. External Personal Computer Connections A Personal Computer is connected to the Link Controller module (as shown in Figure 2-14) in order to perform the following: • Initialize the LC module. • Provide keyboard input. •... -
Page 34: 2-6.3. Jumper Requirements
2-6. External Personal Computer Connections 2-6.3. Jumper Requirements Typically, the LC module has DOS installed at the factory on its RAM disk and does not need to have it installed from an external computer. Therefore, the LC module can be rebooted from its internal Flash memory by either removing the module from the Base Unit and then replacing it, or by using the key sequence Control-Shift- Delete... - Page 35 2-6. External Personal Computer Connections COM1 or COM2 Connector J1 Port in LC Module Ovation I/O Cabinet Personal Computer (Rear View) Figure 2-14. Connection Between Link Controller Module and Personal Computer U3-1021 2-28 2/99 Westinghouse Proprietary Class 2C...
-
Page 36: 2-6.4. Programming Port (J1) Signal Connections
The cable assembly metal hood must be in electrical contact with the cable’s shield. Refer to Table 2-7 for pin assignments. 2. This port cannot be a permanent connection in a CE Mark certified system. Figure 2-15. J1 Programming Port Interface (1C31169G01/1C31169G02) (Non-CE Mark) 2/99 2-29... - Page 37 2-6. External Personal Computer Connections Table 2-7. Pin Assignments for J1 Interface Pin Number Signal Name (Function) Signal Direction RX/ (Receive Data) Input TX/ (Transmit Data) Output Com (Logic Common) Top View of J1 Connector U3-1021 2-30 2/99 Westinghouse Proprietary Class 2C...
-
Page 38: Link Controller Address Locations
2-7. Link Controller Address Locations 2-7. Link Controller Address Locations An Ovation I/O module has 16 address locations, but typically does not use all 16 addresses. There are four possible address locations in each I/O module that are reserved for special use. - Page 39 2-7. Link Controller Address Locations Table 2-8. Link Controller Configuration Register (Address 13 or D in Hex) Not defined Not defined Not defined Not defined Not defined Not defined Not defined Not defined Bit 0: After module reset, the Controller must write to the module’s configuration register and set bit 0.
-
Page 40: Diagnostic Leds
2-8. Diagnostic LEDs 2-8. Diagnostic LEDs The Link Controller has 12 LEDs on the Personality module. These LEDs are used to show the status of the module and how it is communicating to the Controller. Table 2-9. Link Controller Module Diagnostic LEDs Description P (Green) Power OK LED. -
Page 41: Section Overview
Section 3. Link Controller Initialization 3-1. Section Overview This section describes the initialization of the Ovation Link Controller card. 3-2. Software Needed The following programs are provided on floppy disks for the initialization of the LC module through an external personal computer: •... - Page 42 COM2 port. In this configuration, code generated on the external personal computer can be loaded into the LC. COM1 or COM2 Connector J1 Port in LC Module Ovation I/O Cabinet Personal Computer (Rear View) U3-1021 11/98 Westinghouse Proprietary Class 2C...
-
Page 43: 3-3.1. Procedure 1
— Any applicable LC executable programs — Any applicable configuration files 2. Place the LC module (Personality and Electronics) in an appropriate Base Unit in an Ovation I/O cabinet (if necessary, refer to “Planning and Installing Your Ovation System” (U3-1000)). 11/98... - Page 44 3-3. Link Controller Initialization 3. Connect an applicable cable from the LC module (J1 Programming Port) to the personal computer (COM1 or COM2). (See Section 2 for additional information on the cable to be used.) 4. Copy the following programs and files from Drive C on the PC to the floppy disk in Drive A.
- Page 45 3-3. Link Controller Initialization 7. The LC module will perform a set of self-test diagnostics. Figure 3-1 illustrates the diagnostic LEDs on the LC Electronics module (refer to Table 2-9 for LED descriptions). P C E I 1 2 3 4 5 6 7 8 Status LEDs Electronics Module Figure 3-1.
- Page 46 3-3. Link Controller Initialization 9. Copy any programs and files necessary for the operation of the LC application to Drive A from Drive B. These may include the following: — Any applicable LC executable programs. — RLCFLASH.EXE program (if desired, and if there is sufficient space on the LC’s internal Drive A).
-
Page 47: 3-3.2. Procedure 2
— Any applicable configuration files 2. Place the LC module (Personality and Electronics) in an appropriate Base Unit in an Ovation I/O cabinet (if necessary, refer to “Planning and Installing Your Ovation System” (U3-1000)). 3. Connect an applicable cable from the LC module (J1 Programming Port) to the personal computer (COM1 or COM2). - Page 48 3-3. Link Controller Initialization 5. Copy the following programs and files from Drive C on the PC to the floppy disk in Drive A. — FORMAT.COM program (DOS program) — RLCFLASH.EXE program (on RLC10A disk) — RLCEXTPC.EXE program (on RLC20A disk) —...
- Page 49 3-3. Link Controller Initialization 9. Run RLCEXTPC.EXE using the command line syntax shown below: RLCEXTPC.EXE [port] [baud] where: port = COM1 or COM2 (default = COM1) baud = 9600 or 19200 (default = 19200 with no jumper installed) Note If a baud rate of 9600 is desired, install a wire jumper in the Base Unit terminal block of the LC module between B7 and B8.
- Page 50 3-3. Link Controller Initialization 11. When power is applied, the LC board will perform a set of self-test diagnostics. Figure 3-2 illustrates the diagnostic LEDs on the LC Electronics module. Refer to Table 2-9 for LED descriptions. P C E I 1 2 3 4 5 6 7 8 Status LEDs Electronics Module Figure 3-2.
- Page 51 3-3. Link Controller Initialization 14. Copy any programs and files necessary for the operation of the LC application to the LC disk (Drive B). These may include the following: — Any applicable LC executable programs. — RLCFLASH.EXE program (if desired, and if there is sufficient space on the LC’s internal disk, Drive B).
-
Page 52: Section 4. Link Controller Programming And Operation
LC is highly application dependent. However, in order to design an effective LC application, the user must be aware of how the LC communicates through the Ovation I/O Bus (OIOB). This section provides the following information: •... -
Page 53: Lc Programming Approach
• Create the Controller application program to place the OIOB information into Ovation process points (or write point data to the OIOB). Figure 4-1 illustrates the information flow between a field device and a Controller, using the LC interface. In this example, data is transmitted to the LC from a field device in RS-232 format. -
Page 54: 4-2.1. Application Programming For The Lc Module
For detailed descriptions of the Ovation SLC algorithms, see “Ovation Algorithms Reference Manual” (R3-1100). • For information on Ovation point record types and fields, see “Ovation Record Types Reference Manual” (R3-1140). • For general information on Controller application programming, including procedures to add text algorithms to an application, see “Ovation Control... - Page 55 4-2. LC Programming Approach The SLC algorithms reference locations in LC memory in one of two ways: • As a series of 16-bit registers. • As a series of 256-word circular buffers (for ASCII data only). Figure 4-3 illustrates the correlation between the register numbers and memory addresses.
- Page 56 4-2. LC Programming Approach Buffer Base Corresponding LC Dual Port Number Register Memory Address A0000H A0200H A0400H A0600H 1024 A0800H 1280 A0A00H 1536 A0C00H First 6 words of each buffer are reserved 1792 A0E00H (each buffer can hold up to 500 bytes of data. A1000H 2048 A1200H...
- Page 57 4-2. LC Programming Approach Provided Algorithms The following Ovation text algorithms are provided for LC applications: • SLCAIN reads up to 16 analog point values from an LC (or redundant pair of LCs). The values are read from consecutive registers in the LC static RAM, starting at a user-specified register.
-
Page 58: Application Notes
4-3. Application Notes 4-3. Application Notes The following application notes may be helpful in planning the LC application and in programming the LC module. 1. Typically, the programs to be run in the LC will be specified in the AUTOEXEC.BAT file. As in any other IBM-compatible microcomputer, AUTOEXEC.BAT will be executed automatically when the LC is reset or powered-up. - Page 59 If an LC watchdog time-out is detected, the LC can be reset by removing the LC module from its Base Unit, waiting five seconds, and then replacing the module. 12. After the LC is reset, the Ovation IO Bus registers (dual port RAM) are uninitialized. The application program in the LC should initialize these memory locations, as necessary.
- Page 60 4-3. Application Notes Starting Ending Address Address 00000H 640 KBYTES SRAM 9FFFFH OIOB access A0000H DUAL PORT RAM A3FFFH FLASH MEMORY A4000H WINDOW A7FFFH A8000H HIGH SRAM ABFFFH AC000H WESTINGHOUSE USE ONLY NOT USED EFFFFH RESERVED FFFFFH Figure 4-5. LC Memory Map 2/99 U3-1021 Westinghouse Proprietary Class 2C...
- Page 61 0 = Use a 9600 baud rate for the Pmod’s J1 Programming port. Bit 3 = (Mod_IDA/) Bit 4 = (Mod_IDB/) Bit 4 3 Personality Module Style 0 0 RS-232 (1C31169G01) 0 1 RS-485/RS-422 Four wire (1C31169G02) 1 0 Not defined 1 1 Not defined...
- Page 62 4-3. Application Notes Table 4-1. User-Accessible I/O (Cont’d) Description I/O Address Width Bit Definitions Board Option Register 0A00H 8 bits Bit 5 = 0 (No function) (Read only) Bit 6 = 0 (No function) (Cont’d) Bit 7 = 0 (No function) Board Control Register 0A80H 8 bits...
- Page 63 1. When using the LC module, status values equivalent to the board status register bits (with the exception of bit 5) are available to the Controller through the SLCSTATUS algorithm. For details, refer to “Ovation Algorithm Reference Manual” (R3-1100). U3-1021 4-12...
-
Page 64: Appendix A. Link Controller Programming Examples
This appendix contains example application programs for the LC. These examples (written in C language) illustrate the following: • Functions used to transfer values to and from the Ovation IO Bus (OIOB) registers. • Test of LC functions (access OIOB registers and LC status register, and set LC LEDs) from the external personal computer. -
Page 65: A-2. Example Functions
A-2. Example Functions A-2. Example Functions The following listing contains functions used to obtain and store OIOB data, to read the LC status register, to write to the LC LEDs, and to write ASCII data to the J2 Applications serial port. # include “lc.h”... - Page 66 A-2. Example Functions /* store real with status (format 2) in OIOB register */ void str_fm2(int reg, format2 value) int far *base = (int far *) 0xa0000000; ((format2) *(reg + base)) = value; /* set LED state */ void lc_led(char status) outp(0x980,status);...
-
Page 67: A-3. Function Declarations (Lc.h
A-3. Function Declarations (LC.H) A-3. Function Declarations (LC.H) The following header file contains data structure and function declarations for the example functions in Section A-2. typedef struct int status; float ireal; } format2; /* real with status */ int get_fm0(int reg); /* get integer value void str_fm0(int reg, int value);... -
Page 68: A-4. Example Lc Test
A-4. Example LC Test A-4. Example LC Test This example program can be used to test the following LC functions: • Store a value (integer, real, or real with status) from a specified OIOB access register. • Display a value (integer, real, or real with status) from a specified OIOB access register. - Page 69 A-4. Example LC Test printf("LC TEST FUNCTIONS \n"); printf("1: Store Hex integer in Controller Buffer Area \n"); printf("2: Retrieve Hex integer from Controller Buffer Area \n"); printf("3: Store Real in Controller Buffer Area \n"); printf"4: Retrieve Real from Controller Buffer Area \n") printf("5: Store Real with status in Controller Buffer Area \n");...
- Page 70 A-4. Example LC Test case 3:{ printf("ENTER REGISTER NUMBER TO STORE REAL reg=data "); scanf("%d=%f" ,®,&data1); printf("\n"); str_fm1(reg,data1); break; case 4:{ printf("ENTER REGISTER NUMBER TO RETRIEVE REAL "); scanf("%d" ,®); data1 = get_fm1(reg); ‘ printf("\n Real in reg# &d is %f \n\n" ,reg,data1); break;...
- Page 71 A-4. Example LC Test case 7: status = lc_stat(); printf("\nLC Status register value is %02x \n\n" ,status); break; case 8: printf("\nENTER STATUS TO DISPLAY ON LEDs (hex): "); scanf("%x" ,&status); lc_led(status); printf("\n"); break; printf("\n\n\n Strike any key to continue"); while(kbhit() == 0); system(*cls);...
- Page 72 Index address locations 2-31 hardware configuration Address word 12 (C in Hex) 2-31 memory 4-9 Address word 13 (D in Hex) 2-31 OIOB interface 4-3 Address word 14 (E in Hex) 2-31 Address word 15 (F in Hex) 2-31 algorithms 4-6 initialization application notes 4-7 Procedure 1 (DOS already installed) 3-3...
- Page 73 Index RS-422 wiring 2-13, 2-16, 2-20, 2-23 memory 4-9 RS-485 addresses (buffer numbers) 4-5 wiring 2-13, 2-16, 2-20, 2-23 addresses (register numbers) 4-4 map 4-9 SLC algorithms 4-4 SLCAIN algorithm 4-6 OIOB interface 4-3 SLCAOUT algorithm 4-6 overview 1-1 SLCDIN algorithm 4-6 SLCDOUT algorithm 4-6 SLCSTATUS algorithm 4-6 Personal Computer...
Need help?
Do you have a question about the 1C31169G01 and is the answer not in the manual?
Questions and answers