Advertisement
Quick Links
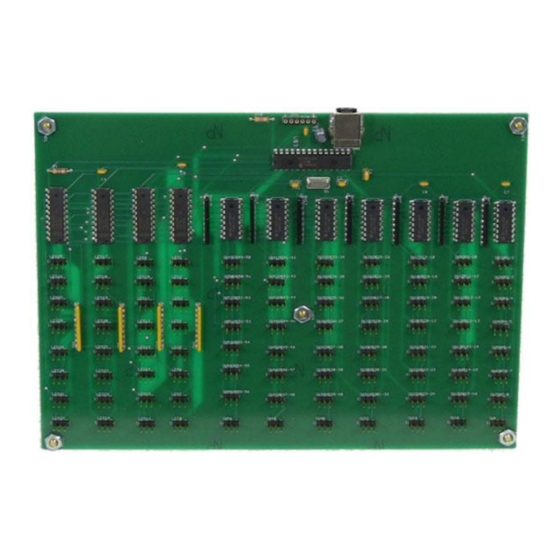
Congratulations on the purchase of a GF-
DIO Digital Input/Output Board, a custom
cockpit build essential. This unit is part of
the extensive family of GoFlight Custom
Cockpit System modules. The GF-DIO
board is designed to maximize
customization of any home built cockpit
system by allowing unique placement of
each and every knob, switch and rotary
component.
The steps below will assist in the installation, configuration and operation of the GF-DIO Board.
Following these instructions will help any vpilot get up in the "virtual skies" as quickly as
possible.
Installing the latest GoFlight Technologies software
Note – If you own other GoFlight hardware and have already installed the latest version of
GoFlight software, you do not need to install the software again. Simply skip Step 1 in the
instruction manual below.
STEP 1:
1. Get online and go to
2. On the GoFlight home page click "Support"
3. Click the link "GF Config Setup #.##" (# - reflects latest release)
4. Click "Run" or "Save" and follow the instructions to install the software
If the software installer detects that GoFlight software is already installed on the system, it will
prompt it to be overwritten. Click the Yes button to overwrite the existing version of GoFlight
software. This is useful if it is desired to keep the configuration settings for other GoFlight
1
Digital Input/Output Board
www.goflightinc.com
GF-DIO MANUAL
Custom Cockpit System
2012
GF-DIO
Advertisement

Summary of Contents for GoFlight GF-DIO
- Page 1 Installing the latest GoFlight Technologies software Note – If you own other GoFlight hardware and have already installed the latest version of GoFlight software, you do not need to install the software again. Simply skip Step 1 in the instruction manual below.
- Page 2 STEP 2: Mounting the GF-DIO Board Mounting Options: Option 1 – Screw Mounted (not pictured) The DIO board comes with standoff screws giving you the option to screw mount your DIO board where you place within your home built cockpit.
- Page 3 The pattern repeats throughout the DIO board. STEP 5: Connecting the GF-DIO Board Now the GF-DIO Board must be connected to the computer. With the provided USB cable, simply plug the appropriately matching ends into both the GF-DIO Board’s USB slot and any non USB 3 port on the...
- Page 4 On the right side is the Input area, here are options to select each of the positions on the GF-DIO. Flip each of the switches that are connected to the board. Once the switch is flipped, a box will appear in use on the right side corresponding to each numbered position on the board.
- Page 5 STEP 7: Configure the DIO with Keystrokes If configuring the GF-DIO Board through key strokes is preferred, this too can be done through GF-Config. Start by flipping the desired switch to be programmed. Then select Key Sequence in the Input Function 1 Box in the GF-Config program. Now use the keyboard to set the keystrokes for the switch.
- Page 6 This product is warranted to the original purchaser to be free from defects in materials and workmanship for a period of one (1) year from the date of purchase. During this warranty period, GoFlight Technologies, Inc. ® (“GoFlight”) will, at its option, repair or replace, at no charge, any component determined to be defective. The liability under this warranty is limited to the repair and/or replacement of the defect or defective part, and does not include shipping expenses.
Need help?
Do you have a question about the GF-DIO and is the answer not in the manual?
Questions and answers