
Summary of Contents for Intech Micro 2100-A16
- Page 1 INTECH Micro 2100-A 16 REV 1.3 TECHNOLOGY & QUALITY Z985 Installation Guide. 14.01-1...
- Page 2 Connection examples of a PLC with open collectors commoned to 24V of an external power supply. Page 18 commoned to the 20V of the first 2100-A16 power supply. Page 18 commoned to 0V of an external power supply. Page 19...
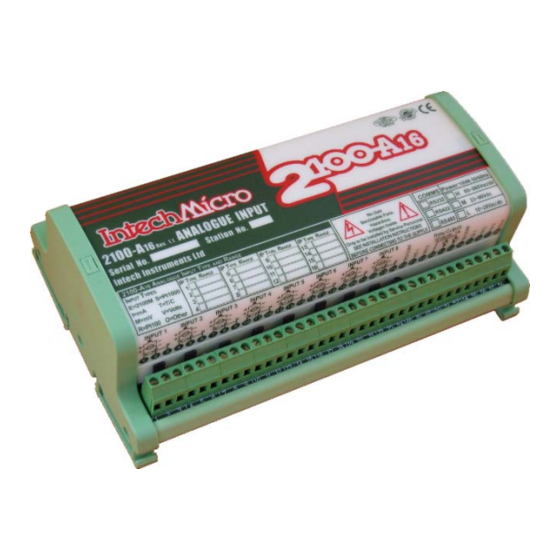
- Page 3 INTECH Micro 16 Universal Analogue Inputs. 4 Digital Inputs. 2 Analogue 2100-A Outputs. 2 Relay Output. 16 Rev 1.3 Features. TECHNOLOGY 16 Universal Analogue Inputs. & QUALITY Each Input Individually Selected & Scaled. Z985 16 Bit Resolution. Inputs for: RTD: 0~25C to -200~850C.
- Page 4 0~60C. - CJC Drift <0.03C/C Typical for Input 1. Refer to notes under 2100-A16 Input Connection Diagram for T/C Inputs. - Sensor open Circuit Floats to ambient ±10C typical. For Upscale or Downscale Drive Refer ‘2100-A16 Input Connection Diagram for Thermocouple Upscale (US) / Downscale (DS) Drive.’...
- Page 5 Note 2. For mA inputs a 2 pin jumper must be installed for each input. Note 3. The 2100-A16 is C and F selectable. This selection affects all temperature readings. (CJC must be calibrated in C.) Product Liability. This information describes our products. It does not constitute guaranteed properties and is not intended to affirm the suitability of a product for a particular application.
- Page 6 2100-A Terminals and Layout. H4: RTD SELECTION H3: EXPANSION CONNECTOR S1: FUNCTION JUMPERS 1 2 3 4 5 6 Note. 20Vdc Transmitter Power Supply on Terminal 49, is not available with the Ethernet 10/100 comms option. AO COM H2: COMMS 20Vdc SELECTION AO 1...
- Page 7 Section B: 2100-A Jumpers and LED Functions Tables. CAUTION: Dangerous Voltages may be present. The 2100-A has no user serviceable parts. Protective enclosure only to be opened by qualified personnel. Remove ALL power sources before removing protective cover. * For ALL programming tables. Jumper Status: 0=JUMPER NOT INSERTED 1=JUMPER INSERTED. * Refer to ‘2100-A Terminals and Layout’...
-
Page 8: Connection Example
Section C. Input and Output Connection Diagrams. 2100-A Input Connection Diagram for mA Inputs. Connection configuration for 2 wire, 3 wire and 4 wire transmitters, and digital inputs. Connection Example 1. 24Vdc Regulated Power Current Output + Supply. - Field Transmitters Note 1. - Page 9 9 to 16 can be selected in the Scada software as an * Refer to Wiring & Installation. RTD CJC for inputs 9 to 16.The mounting orientation of the 2100-A16, (eg vertical or horizontal) affects the CJC accuracy of different inputs.
- Page 10 2100-A Connection Example Diagram for Digital Inputs. 24Vdc 2100-A Note 1. Inputs can be: State - i.e. ON or OFF. DI4 58 Open Collector Count - 0~50Hz Note 2. LED indication per input. LED intensity depends on voltage level at the input terminals. Refer to ‘Specifications’...
-
Page 11: Option 1. 5 Wire Connection Diagram
This uses 5 wires for the first 2100-M, with 2 additional wires for each additional 2100-M. In this configuration the analogue inputs are differential. The maximum peak input voltage is 18V. First 51 COM Analogue Input No.1 Note 1. The 2100-A16 resolution on 2100-M 2100-M 53 Iout multiplexer inputs is 12 bits (4096 steps) 60 CS COM 2100-A 61 RESET Note 2. - Page 12 The 2100-ME Memory Expansion Card is designed to allow the 2100A to stand alone, retaining the data collected for intermittent download. Data is held in permanent memory. Connecting the 2100-A16 to the 2100-ME. Only fit 2100-ME-32 to 2100-A16 Rev.1.3. Power must be off before installing the 2100-ME.
- Page 13 Remove the cover off the 2100-A An exchange cover, with a precut slot for the ribbon cable, is available free of 1x20mm charge from your supplier. P/N: 2100-A16-COVERSLOT. SLOT Alternatively you may wish to modify the existing cover: Cut a 1mm slot, 20mm deep, just below terminal numbers 1, 2 & 3.
- Page 14 IN-2000-AI, IN-2000-AO, IN-2000-DI, IN-2000-DO, FP21, IMPORTANT: SR25, etc. Use a 2100-4S to interface an RS485 Data Hi-way to an To other INTECH MICRO Remote (i) All cables must be existing RS422 Data Hi-way Stations & Shimaden Controllers etc.
- Page 15 2100-A RS232 Serial Connection. The 2100-A16 with RS232 comes complete with: 1 x 5m RJ11 RS232 Cable. (2, 10 & 15m available.) 1 x 9 Pin D-type Connector. (25 pin D-type available.) USB to RS232 convertor available. Part No. BF-810.
-
Page 16: Section E. Connecting To A Plc
2100-A TXE and TX Delay Settings. The TXE and TX delays are software selectable in the MicroScan Outstation Programming Box. These delays are used for RS485/RS232 operation, to control the behaviour of the transmitter on the outstation, when it is ready to send data. The TXE delay controls how long the transmitter waits before turning on. - Page 17 Note 1. '0' = No voltage on the terminal. '1' = 5~30Vdc on the terminal. Note 2. Ensure that if the analogue output from each 2100-A16 is fed into the same unit (eg PLC), then it is recommended the analogue inputs to the PLC, etc, be isolated.
- Page 18 2100-A Used as an Intelligent Multiplexer. Connection Example 1. Connection of a 2100-A to a PLC with open collectors, commoned to 24V of an external power supply. 60 AO COM Note 1. In this configuration the 2100-A DI COM and Analogue Input No.1 Digital inputs are isolated from the 2100-A 61 AO 1...
- Page 19 2100-A Used as an Intelligent Multiplexer. Connection Example 3. Connection of a 2100-A to a PLC with open collectors commoned to 0V of an external power supply. 60 AO COM Analogue Input No.1 Note 1. This configuration reverses the logic so when 61 AO 1 PLC Input the PLC digital output is off, the 2100-A...
-
Page 20: Section F. Communications
2100-A ‘Modbus RTU/TCP’ Communication Protocol. Note 1: This section only applies to an 2100-A16 with Modbus RTU Protocol. Note 2: Can be used on Modbus TCP with a Modbus TCP to RTU Bridge. ie Schneider Electric ‘174 CEV 300 20’. -
Page 21: Using The Modbus Protocol
* For ALL programming tables. Jumper Status: 0=JUMPER NOT INSERTED 1=JUMPER INSERTED. * Refer to ‘2100-A16 Terminals and Layout’ for the location of the following jumpers and switches. Use the station programming dialog boxes to set the address of the unit and the ranges of inputs etc. Then power down unit, insert jumper in position S1-5/6 and power up unit. - Page 22 2100-A Input RTU/TCP Registers. Note: The multiplexers 1-4 cannot be used if the stations Analogue outs AO1 & AO2 are used for general purpose outputs or retransmission controls. 14.02-22...
-
Page 23: Supported Modbus Commands
2100-A -NET Ethernet 10/100. The Ethernet converter on the 2100-A16-NET, the XPort, uses the Ethernet Protocol (IP) for network communica- tions and the Transmission Control Protocol (TCP) to assure that no data is lost or duplicated, and that everything sent to the connection arrives at the correct target. - Page 24 2100-A -NET by connecting and disconnecting as required. For TCP connection; Sockets = 1. 2100-A16-NET Troubleshooting. Duplicate 0xFF Characters, port numbers 14001 -14009. Do not use port numbers 14001-14009 with Modbus RTU/TCP protocol or other binary based protocols.
- Page 25 Description of 2100-A -NET Ethernet LED Functions. & L1 LED is the LED closest v i t y t i to terminal 48. d i l f l a L2 LED is the LED closest f l a v i t y t i f l a v i t...
- Page 26 2100-A Wiring and Installation Continued. RS422/485 Comms Signal Cabling. Use only low capacitance, twisted pair, overall screened data cable. The cable must equal or better the following specifications. . r i l l a > > c i t : r i NOTE: All cables are to be subject during manufacture to in-process spark testing @ 4kVrms.
- Page 27 On open circuit thermocouples (T/C) floats to ambient ±10C typical. For upscale or downscale drive resistors must be fitted externally. Refer to ‘2100-A16 Input Connection Diagram Thermocouple Upscale (US) / Downscale (DS) Drive.’ If ground loops or excessive noise are present on the T/C inputs, or between T/C and other inputs, the readings may not be accurate, and an open circuit T/C may not drive as expected.
- Page 28 Check extension and compensating cable circuits. Do not use the same chromel-alumel (Type K) thermocouple below 540C if it was used above 860C. Intech INSTRUMENTS LTD www.intech.co.nz Christchurch Ph: +64 3 343 0646 Auckland Ph: 09 827 1930 Email: sales@intech.co.nz 2100-A16-r1 020908.p65 14.02-28...
Need help?
Do you have a question about the 2100-A16 and is the answer not in the manual?
Questions and answers