Table of Contents

Related Manuals for Labounty MSD Series


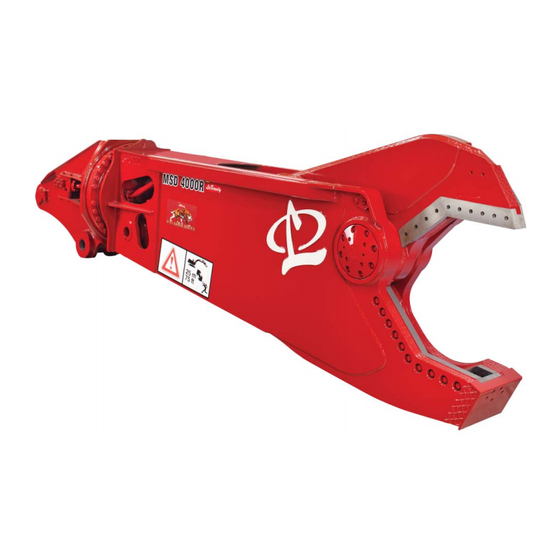
Summary of Contents for Labounty MSD Series
- Page 1 LEGEND SERIES SHEAR SAFETY, OPERATION & MAINTENANCE 516649 User Manual 1/2020 Ver. 5 LaBounty | 1538 Hwy 2 | Two Harbors, MN 55616 | 1-800-522-5059 | www.stanleyinfrastructure.com/brands/labounty...
- Page 2 LaBounty dealer. You may also download a PDF copy at www.stanleyinfrastructure.com. REGISTRATION FORM The Warranty Registration Form must be filled out by the dealer or customer and returned to LaBounty indicating the date the machine went into service. POSSIBLE VARIATIONS LaBounty cannot anticipate every possible circumstance that might involve a potential hazard, as the owner’s...
-
Page 3: Table Of Contents
CONTENTS SAFETY .....................4 DECALS ......................6 TERMS .......................7 INSTALLATION..................8 Second Member Installation .............................8 Third Member Installation ..............................8 Non-Rotating Installation ..............................8 Hydraulic Installation ................................9 InSite™ Electrical Installation ............................10 Connect to Excavator DC Power .............................11 Connect to the Excavator Ignition Switch ........................11 InSite Power Cable Wiring Diagram ..........................12 Download &... -
Page 4: Safety
• NEVER approach power lines with any part of the LaBounty, determine whether it is safe for you and others, machine. Keep clear at a minimum of 15 feet (5 and that the equipment will not be damaged or made meters). - Page 5 BASE MACHINE • Ensure that the cab is equipped with the proper safety guards for LaBounty applications. The cab MUST be equipped with an approved Falling Object Protection Structure (FOPS) and cab guarding. The FOPS must meet the requirements of SAE standard J1356. A transparent, shatter-resistant shield covering the front of the cab, is also required.
-
Page 6: Decals
DECALS Pressure Relief Decal Top and front cab 512572 guarding required during any material processing Figure 1 application Cab Safety Decal Cylinder Bleed Decal 503647 512554 Figure 6 Figure 7 InSite Decal 516648 Figure 8 1538 Highway 2 Two Harbors, MN 55616 tel: 1-800-522-5059 fax: 218-834-3879 www.stanleyhydraulics.com... -
Page 7: Terms
TERMS PierCiNg rOTATiNg HeAD TiPS uPPer SHeAr SeriAL NuMBer uPPer CuTTiNg BLADeS LOWer SHeAr MAiN STiCK PiVOT (SHEAR BODY) STICK / BOOM grOuP LINKAGE / CONNeCTiON CYLINDER CONNeCTiON FrONT CYLINDER TrANSPOrT PiN LOWer CuTTiNg BLADeS guiDe CrOSS BLADe BLADe reAr CYLINDER HYDRAULIC MANiFOLD... -
Page 8: Installation
INSTALLATION 1. Locate flat, hard ground (e.g. concrete floor). 2. Place the shear on the ground so the boom pivot is up. Use blocking to keep the shear stable and level. 3. Remove the excavator bucket. Follow the manufacturer’s recommended procedure Note: Plug hydraulic hoses and lines to prevent contamination. -
Page 9: Hydraulic Installation
STOW TrANSPOrT PiN reMOVe TrANSPOrT PiN Stowed Transport Pin Figure 12 HYDRAULIC INSTALLATION Note: refer to “Hydraulic Schematics” on page 49. Do not connect hydraulic lines while they are pressurized. Escaping fluid under pressure can penetrate the skin, causing serious injury. Hydraulic Circuit Requirements Note: Values given are standard values. -
Page 10: Insite™ Electrical Installation
• One 1/2” (13 mm) diameter case drain 3. Install jump lines from each of these lines to the shear bulkhead or manifold fittings. Refer to the parts manual. 4. Torque all hydraulic fittings to values shown in “Inspect / Torque Bolts” on page 25. Do not check for hydraulic leaks with your hands. -
Page 11: Connect To Excavator Dc Power
CONNECT TO EXCAVATOR DC POWER 6. Connect one 5A fuse holder to the white wire of the power supply cable. 7. Connect a length of 18 AWG wire from the terminal on the opposite end of the 5A fuse holder to the positive terminal of the excavators main battery disconnect switch. -
Page 12: Insite Power Cable Wiring Diagram
12 | MSD Legend Series Operation & Maintenance Manual... -
Page 13: Download & Install The Insite Mobile Application
DOWNLOAD & INSTALL THE INSITE MOBILE APPLICATION InSite sends data about each of your InSite equipped LaBounty shears to a smart phone or mobile device. 1. Access the app store for your iPhone, iPad or Android device. Search for “InSiteProCall”. -
Page 14: Storing The Shear
Trapped hydraulic pressure may be present after the base machine is shut off. Extreme caution must be taken when removing hydraulic hoses or lines. injury or death could result. 7. Disconnect the hydraulic fittings. Plug the fittings,hoses and lines to prevent contamination of the hydraulic oil. 8. -
Page 15: Operation
NeVer leave the attachment suspended or pass it • Ensure all decals are installed and legible. Contact over people, occupied vehicles or buildings. LaBounty for replacements as required. • ALWAYS lower the attachment to the ground and • Have a DAILY safety dialog with all workers. Inform turn the base machine off when leaving the machine them of any abnormal work that is planned. -
Page 16: Technical Specifications
overheating or damage to the hydraulic system. • DO NOT alter factory preset hydraulics. This may void • Cycle the cylinder completely when processing. the warranty. Fully cycling will allow hydraulic fluid to circulate and • DO NOT use attachment as a jack hammer or prevents overheating. -
Page 17: Operating Tips
Arm Out → Shear Out Arm In → Shear In Bucket Dump → Jaws Open Bucket Curl → Jaws Closed Figure 13 Figure 14 Third Member Control Note: When installed as a third member, use the excavator auxiliary control to open and close the jaws. Bucket Dump →... -
Page 18: Bleed The Shear Hydraulic Circuit
• When processing oversized material, make partial bites to start the breakage and then back off before making the next partial bite. This will allow the broken material to fall away between bites. • When processing any rigid member, use the rotator to square the jaws to the cut. If the jaws are not square, the rotator will back-drive to adjust to the cut. -
Page 19: Bleed Insite
BLEED INSITE 1. Remove the cover from the InSite box. 2. Connect a bleed hose (part number 227831) to the CW and CCW bleed couplers on the InSite control box. Be aware that the shear may move slightly when connected. Note: If you have a non-rotating shear, you will not have CW and CCW bleed couplers. -
Page 20: Check For Leaks
6. Connect a bleed hose (part number 227831) to the ROD and BORE bleed couplers on the InSite control box. Bleed Hose BORE Bleed Coupler ROD Bleed Coupler Clear all persons and equipment from the area of operation and machine movement. NeVer move loads over people or equipment. -
Page 21: Maintenance
MAINTENANCE 8-HOUR INSPECTION CHECKLIST Inspect all safety devices ________ Safety decals are in place and legible (see “Decals” on page 6) ________ Cab protection and guarding is installed and in good condition. ________ Excavator warning systems are working. Visually inspect for damage ________ Check for physical damage to the attachment, jaws, hoses , lines and fittings. -
Page 22: 80-Hour Inspection Checklist
80-HOUR INSPECTION CHECKLIST Build-up, hard-surfacing & Blade Rotation ________ Build-up jaws and hard surface, if necessary (See “Jaw Build Up & Hardsurfacing” on page 38). ________ Check wear plates and bars. Replace if necessary (see “Replace Wear Plates & Bars” on page 41). ________ Inspect slide screw (see “Slide Screw Adjustment”... -
Page 23: Hydraulic Inspection
HYDRAULIC INSPECTION Wear personal protection equipment at all times. This Trapped hydraulic pressure may be present after the includes eye protection, hard hat, steel toe shoes, base machine is shut off. Extreme caution must be leather gloves and hearing protection. taken when removing hydraulic hoses or lines. -
Page 24: Planetary Gearbox Lubrication
Note: The plugs are magnetic and will collect metal debris. Discard any found debris. 5. Install the oil drain plug. 6. Fill the gearbox with oil, as specified in the LaBounty Parts Manual (shipped with the attachment). 7. Install the oil fill plug. -
Page 25: Inspect / Torque Bolts
12.9 metric socket head cap screws. When installing new bolts, ensure that the bolt is clean and dry. Note: Some bolts have unique torque specifications. Refer to the LaBounty Parts Manual. Never use an inferior class fastener. Fastener failure can cause damage, injury or death. -
Page 26: Blade Maintenance
BLADE MAINTENANCE Overview The MSD Legend shear has eight blades that must be maintained regularly to ensure the attachment has a long and dependable service life. Blade maintenance requires that all blade gaps and hardware torques are checked and adjusted if necessary every 8 hours. Every 80 hours, the slide screw must be adjusted and blade positions must be rotated. - Page 27 Curl the Shear Under Figure 20 Loosening Blades 1. Back out the bolts holding the blade in place. Ensure the bolts are still threaded into the blade. Never strike the blade with a hardened steel tool. The blade may chip and cause severe injury. 2.
-
Page 28: Measuring & Shimming Blade Gaps
5. If the blade is still jammed, contact your LaBounty dealer for further assistance. Removing Blades LaBounty shear blades are designed so that you may use the blade mounting bolts as handles to aid in removing blades. 1. Remove one bolt from each end of the blade being removed. - Page 29 SHiM gAP TO Be LeSS THAN .030” (.762 MM) Guide Blade Gap Figure 23 Secondary Blades The upper and lower jaw secondary blades must be parallel with each other and have less than .030 inch (.762 mm) gap. Check the secondary blades gap every 8 hours of operation and each day, before using the attachment. Note: For most applications a gap of .010 - .020 inches (.254 - .508 mm) will yield the best results.
- Page 30 Special Applications Some applications, such as cutting stainless steel, aluminum or thin material, may require the blade gaps to be shimmed smaller or larger. When using the shear in these special applications, contact LaBounty Customer Service for proper blade gap measurements.
-
Page 31: Blade Rotation
The blade rotation procedure will help 180° you get the maximum life from your LaBounty blades. Blade rotation is a four step process, which is repeated for the life of the shear. Every 80 hours, you will perform one step in the process. - Page 32 ROTATION In the second rotation, remove each blade, perform a 180° roll rotation, then move it to a different blade seat. The piercing tip blades will also be rotated. If you are using the shear in a heavy piercing application, rotate or replace the piercing tip blades more frequently.
- Page 33 Set Aside for Step 9 5. Rotate the previously set aside lower secondary blade 6. Place the shear upside down so that the upper blades (step 1), along the long edge, 180° (Roll Rotation). are as close to the ground as possible. Remove the Install the blade into the lower primary blade seat.
- Page 34 9. Rotate the previously set aside upper primary blade 10. With the shear still upside down, remove both (step 6), along the long edge, 180° (Roll Rotation). piercing tip blades. Install it into the lower primary blade seat. Note: Each piercing tip blade will remain in its blade seat when the bolts are removed.
- Page 35 Blade Clearance 13. Install each piercing tip into the opposite blade seat 14. Measure the clearance between the tip blades. from which it was removed. Torque bolts to values Ensure the clearance is within the specification found show in “Inspect / Torque Bolts” on page 25. in the table below.
- Page 36 The third blade rotation will be performed exactly the same as the first rotation. After completing the third rotation, order a complete LaBounty blade kit, as all blades will need to be discarded and replaced with new blades during the fourth rotation.
- Page 37 3. Place the shear upside down so that the upper blades 4. With the shear still upside down, remove both piercing are as close to the ground as possible. Remove the tips. Clean the mating surface of the blade seats, as upper blades.
-
Page 38: Jaw Build Up & Hardsurfacing
Build Up Instructions Wear personal protection equipment (PPe) at all times while welding. Allow only qualified, certified welders to maintain LaBounty products. 1. Disconnect InSite power cable before welding. 2. Throughly clean the area to be built up. 3. Preheat the area to 200° F (94° C) to remove moisture. - Page 39 For hardsurfacing, LaBounty recommends; • Amalloy 814H or equivalent If you have questions about what hardsurface material to use, contact LaBounty Customer Service at 1-(800) 522- 5059. • Always use hardsurfacing weld material with a chromium content of less than 0.10% and a severe impact- resistance rating, to prevent cracking.
- Page 40 • When grinding or sanding, wear an approved respirator. • Remove solvent, paint strippers and other flammable material from the area before hardsurfacing. • Have a fire extinguisher nearby. • Do all work in a well ventilated area. • Disconnect the excavator battery before welding. Hardsurface Instructions Build-up 1.
-
Page 41: Replace Wear Plates & Bars
BLADe WeAr BArS Wear personal protection equipment (PPe) at all times while welding. Allow only qualified, certified welders to maintain LaBounty products. LOWer BLADe WeAr BArS Inspecting Wear Bars & Wear Plates 1. Measure the thickness of each wear item. -
Page 42: Check The Cylinder Gap
2. Measure the gap between the rod eye shoulder and the head face, as shown in Figure 36. Cylinder Gap Measuring the Cylinder Gap Figure 36 If the cylinder gap exceeds the value in the “Maximum Cylinder Gap” table, contact the LaBounty Service Department at (218) 834-6901. Maximum Cylinder Gap Table MSD Model... -
Page 43: Speed Valve
If ANY fluid is injected into the skin, seek immediate medical attention. Chemicals used on LaBounty Saber Series hydraulic cylinders include hydraulic oil; refer to the excavator operator’s manual and have MSDS sheets and proper treatment equipment available. - Page 44 Note: Slowly removing the poppet ensures residual hydraulic pressure is relieved from the speed valve. POPPeT POPPeT Poppet Location Figure 37 3. Remove the poppet and the plunger from the pilot valve. POPPeT SeALS PLuNger Poppet Valve and Seals Figure 38 4.
-
Page 45: Speed Valve Assembly Illustrations
SPEED VALVE ASSEMBLY ILLUSTRATIONS Test Port Locations MSD Legend Series Operation & Maintenance Manual | 45... - Page 46 Main Valve Assembly Main Valve Assembly Item Part Number Description 513876 Main Valve Housing 511568 Valve Cap 511569 Valve Cap 511548 End Stop 511515 Screw Plug Torque to 15 ft. lbs. (20 Nm) 513086 Screw Plug Torque to 15 ft. lbs. (20 Nm) 513087 Screw Plug Torque to 7 ft.
- Page 47 Pilot Valve Assembly Pilot Valve Assembly Pilot Valve Assembly Item Part Number Description Item Part Number Description 512316 Housing 512324 Spring 512317 Valve Seat 511565 Spring Torque to 73 ft. lbs. (100 Nm) 511507 O-Ring - 15.4 x 2.1 511555 Thread Pin - M12 x 50 512325 O-Ring - 36.2 x 3...
- Page 48 Check Valve Assembly Check Valve Assembly Item Part Number Description 513875 Check Valve Housing 511580 Plunger 511578 Spring 511579 Screw Plug Torque to 103 ft. lbs. (140 Nm) 512515 O-Ring Seal 48 | MSD Legend Series Operation & Maintenance Manual...
-
Page 49: Hydraulic Schematics
HYDRAULIC SCHEMATICS HYDRAULIC SCHEMATIC - STANDARD ROTATING SHEARS HYDRAULIC SCHEMATIC - STANDARD NON-ROTATING SHEARS MSD Legend Series Operation & Maintenance Manual | 49... - Page 52 Additional copies of this manual are available by contacting your dealer or the LaBounty parts department, and requesting a CE Operation & Maintenance manual. You must include the attachment model number and serial number. LaBounty | 1538 Hwy 2 | Two Harbors, MN 55616 | 1-800-522-5059 | www.stanleyinfrastructure.com/brands/labounty...