Table of Contents
Advertisement
Quick Links
DUDE v1.2c - Assembly Guide
INTRODUCTION
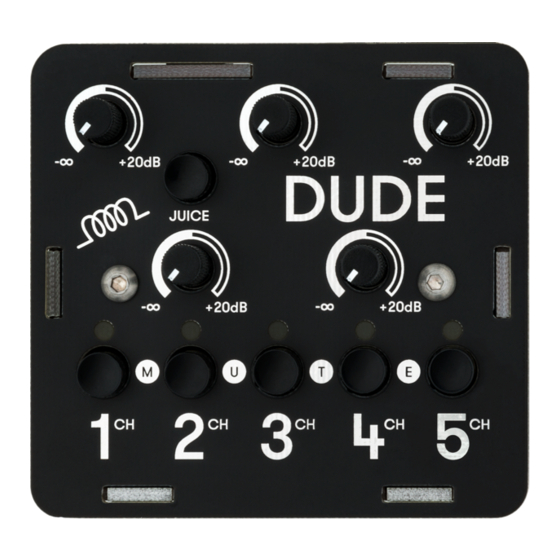
Welcome to the assembly guide for the D UDE by B ASTL INSTRUMENTS . It is a portable battery
operated 5 channel audio mixer with mini jack inputs and output. For all the features go
is suitable for beginners. It is good to have basic soldering skills and to be able to identify electronic
components before starting this kit. However if you have never soldered before, check out some of
tutorials
h ere
2
or
h ere
3
. We also included one of the best quality solder to help you solder everything
faster and better.
The Dude consists of just one printed circuit board PCB. All the parts comes mainly in two bags
separated for the soldering and assembly parts. Please check all of your parts BEFORE you begin
work to make sure you are not missing anything. See the bill of materials (BOM) for detailed list.
1
h ttp://www.bastl-instruments.com/instruments/dude/
2
h ttps://cdn-learn.adafruit.com/downloads/pdf/adafruit-guide-excellent-soldering.pdf
3
h ttp://www.instructables.com/id/How-to-solder/
Bastl-instruments.com
1
last update: 17. 7. 2019
h ere
1
. This kit
Advertisement
Table of Contents

Summary of Contents for Bastl Instruments DUDE v1.2c
- Page 1 17. 7. 2019 DUDE v1.2c - Assembly Guide Bastl-instruments.com INTRODUCTION Welcome to the assembly guide for the D UDE by B ASTL INSTRUMENTS . It is a portable battery operated 5 channel audio mixer with mini jack inputs and output. For all the features go ...
-
Page 2: Bill Of Materials
BILL OF MATERIALS DUDE v1.2c BOM SOLDERING value part 100R R-EU_0204/5 R-EU_0204/5 220k R-EU_0204/5 22pF ceramic capacitor 470nF polyester capacitor 47uF electrolytic capacitor 1N4007 DIODE-D-7.5 L78L06 voltage regulator NE5532 IC in foam 8 pin DIL DIL socket - in foam jack TRS 3.5mm... - Page 3 BEFORE STARTING THE KIT... Prepare the following tools: ● Soldering iron ● Multi-meter ● Flush cutters ● n2. hex screwdriver or allen key (enclosed with kit) ● Isopropyl alcohol + smaller and clean brush (optional) ● Protective eyewear We suggest to work in a clean and well lit and ventilated environment to avoid accidents or losing any of the small components.
- Page 4 SOLDERING RESISTORS Start soldering with the r esistors . There are just t hree v alues of them: 2 2k (14x), 1 00R (2x), and 220k (1x). Before you start soldering, check the values by u sing a multimeter (or you can check the color codes if you are seasoned enough).
-
Page 6: Jack Connectors
DIODE Next solder the 1 N4007 d iode - b e careful, diodes are polarized! Make sure that the grey stripe on the diode matches the stripe on the PCB. JACK CONNECTORS Add the 3 ,5mm jack connectors (6x). They have to be soldered precisely down on the PCB. You can start soldering just one leg of each connector, check it and then do the rest. - Page 7 IC SOCKETS Insert the I C sockets (2x; 8 pin DIL). Just be aware of the r ight direction of sockets - there is a notch on the sockets that has to match with the ring on the PCB. CERAMIC &...
- Page 8 Then do the 4 70nF p olyester ones (8x). They have insulating plastic film. LEDs Solder the L EDs (5x) now - t hese are polarized too ! Be sure to insert the longer lead into the plus (+) hole.
-
Page 9: Voltage Regulator
VOLTAGE REGULATOR Now you can do the v oltage r egulator ( L 78L06 ) . The f lat side has to match with the printing on the PCB. -
Page 10: Electrolytic Capacitors
ELECTROLYTIC CAPACITORS Also don't forget to solder two e lectrolytic c apacitors (47μF) . These ones a re polarized! T here is a plus (+) sign on the PCB that should match the longer lead of the electrolytic capacitor (actually the minus (–) side is also marked on the body of the capacitor with a white strip). -
Page 11: Power Connector
POWER CONNECTOR Let's add the p ower connector. Just be sure to solder it flat with the PCB and straight. BUTTONS Go for the b utton switches now. Be aware that these parts have to be o riented ! There is a marked line on the one side of button which has to be oriented upwards. - Page 12 POTENTIOMETERS Move to soldering of p otentiometers (A100k). Install them in s traight (you have to push them down), solder just one side leg, check the position and do the re-heat and repositioning adjustments in need. Then solder the rest if there is no problem. Remember - they have to be soldered straight really seriously!
-
Page 13: Double Check
DOUBLE CHECK Take your time now and relax for a while. Do the last d ouble check of all soldered joints at this point . After next steps it would be M UCH HARDER to do any repairment. CLEANING (OPTIONAL) Before you begin to move forward, you might want to ... - Page 14 Don’t forget to place the two I Cs into the sockets ( N E5532P ) . There is a signed n otch on each IC that has to match with the n otch on the socket . Installing ICs can be also a little tricky. You should bend the IC leads in slightly with your fingers first.
-
Page 15: Battery Holder
BATTERY HOLDER Take the remaining leads then and solder them into the holes near the power connector. It is good to melt some solder into the holes first and then reheat them and place the wire inside. Before placing the battery holder you have to do a little adjustment. See the photo and cut the signed legs. - Page 16 Then place the plastic washers on the PCB to fit them with the holes. Let's secure the battery holder now with the s pacers and s crews (the longer ones) from the bottom. Watch out for the o rientation o f the holder!
- Page 17 Secure the holder with spacers from top. Now you will do the soldering. You have to connect the leads with the lugs. D o not let the lug heat too much! (it would break the connection of the coil and the lug) Use just the tip of your soldering iron for a second.
- Page 18 YOU ARE ALMOST DONE... Now you can complete the Dude with the plastic enclosure parts. Start with the b utton covers . Push them on the buttons. Push the s ide parts in. First do the front and back one. Then two side parts.
- Page 19 Finish the enclosure with the t op cover and mounting screws. Here it is, your Dude is finally completely alive! Congratulations!
-
Page 20: Troubleshooting
TROUBLESHOOTING Check the F .A.Q. on our website first. If you are still in trouble the best thing is to take a nap! Especially late at night! Then you can can send the detailed description of the problem with enclosed high-resolution photos on ...
Need help?
Do you have a question about the DUDE v1.2c and is the answer not in the manual?
Questions and answers