Table of Contents
Advertisement
Available languages
Available languages
Quick Links
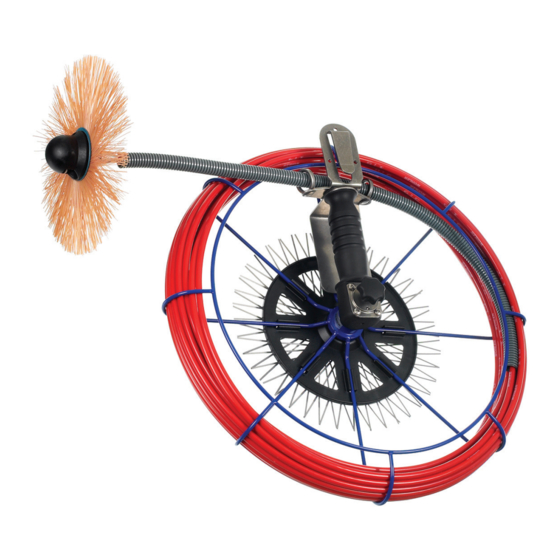
Handkehrhaspel 42
mit Schnellwechselstoßkopf
Inhalt
1. Wichtige Hinweise ...................................... 2
2. Bedienung der Handkehrhaspel ................. 2
3. Stangenwechsel ......................................... 3
5. Montage des Haspelfußes (optional) .......... 5
6. Garantie und Service .................................. 6
Technik nach Maß
Advertisement
Chapters
Table of Contents

Related Manuals for Wohler Viper 42

Summary of Contents for Wohler Viper 42
-
Page 1: Table Of Contents
Handkehrhaspel 42 mit Schnellwechselstoßkopf Inhalt 1. Wichtige Hinweise ........2 2. Bedienung der Handkehrhaspel ....2 3. Stangenwechsel ......... 3 4. Montage des Schnellwechselstoßkopfes ... 3 5. Montage des Haspelfußes (optional) ..5 6. Garantie und Service ........6 Technik nach Maß... -
Page 2: Wichtige Hinweise
1. Wichtige Hinweise Wöhler Handkehrhaspel 42 1. Wichtige Hinweise Vor der Inbetriebnahme der Wöhler Handkehrhaspel 42 ist die Bedienungsan- leitung aufmerksam zu lesen und in allen Punkten zu befolgen. Die Handkehrhaspel sollte grundsätzlich nur von fachkundigem Personal für den vorgesehenen Zweck und innerhalb der spezifizierten Daten eingesetzt werden. -
Page 3: Stangenwechsel
3. Stangenwechsel Wöhler Handkehrhaspel 42 muss nach einer längeren Ruhezeit diese Bremskraft durch das Drehen des Korbes gelöst werden. 3. Stangenwechsel Beim Stangenwechsel wird die alte GFK-Stange komplett abgewickelt und aus der Hülse am Haspelkorb herausgezogen. Die Ersatzstange wird in umgekehrter Reihenfolge aufgewickelt. Es ist darauf zu achten, dass das Stangenende sicher in der Hülse sitzt. - Page 4 4. Montage des Stoßwechselkopfes Wöhler Handkehrhaspel 42 Aufsetzen des Stoßkopfes · Das Innengewinde M10 des Stangenendstücks (1) muss einwandfrei und sichtbar sein. · Stecken Sie den Kegelring (2) mit der Konusfläche nach unten auf. · Setzen Sie auf das Stoßkopfoberteil (3) einen Stern (4) und schieben Sie das Stoßkopfoberteil nun mit Stern auf das Stangenendstück.
-
Page 5: Montage Des Haspelfußes (Optional)
5. Montage des Haspelfußes Wöhler Handkehrhaspel 42 5. Montage des Haspelfußes (optional) Um einen sicheren Stand der Haspel während des Kehrens zu gewährleisten, kann zusätzlich zur Handkehrhaspel ein Haspelfuß aus Edelstahl erworben werden (Best. Nr. 7823 J). Zur Montage des Haspelfußes die Auflagefläche des Haspelfußes unter die Befestigungsfläche an der Koppelhalterung der Wöhler... -
Page 6: Garantie Und Service
6. Garantie und Service Wöhler Handkehrhaspel 42 6. Garantie und Service 6.1 Garantie Jede Wöhler Handkehrhaspel 42 wird in allen Funktionen geprüft und ver- lässt unser Werk erst nach einer ausführlichen Qualitätskontrolle. Bei sach- gemäßem Gebrauch beträgt die Garantiezeit auf die Haspel 12 Monate ab Verkaufsdatum. - Page 7 Viper 42 with quick-change push-head adapter 1. Important information ...... 8 2. Operation of the viper ...... 8 3. Changing the rod 9 4. Mounting the quick-change push-head adapter ......9 5. Mounting the Viper Stand (option) 11 6. Guarantee and Service ....12...
-
Page 8: Important Information
Carefully study and observe all items of these operating instructions before commissioning the unit. In principle, the Wöhler Viper 42 should only be used by skilled personnel for its intended purpose and within the specified range of data. Any liability or warranty for results established or for defects caused when using the unit is excluded by all means. -
Page 9: Changing The Rod
3. Changing the rod Wöhler Viper 42 3. Changing the rod For changing the rod, you first have to unwind the old GRP rod completely. After that, pull it out of the basket sleeve. Install the new rod by reversing the above steps. - Page 10 4. Mounting the quick-change push-head adapter Wöhler Viper 42 Attaching the quick-change push-head adapter · The M10 female thread of the rod-end piece (1) must be visible and in perfect condition. · Attach the cone ring (2) with the cone area pointing downwards.
-
Page 11: Mounting The Viper Stand (Option)
5. Mounting the Viper Stand Wöhler Viper 42 5. Mounting the Viper Stand (option) For a secure stand when sweeping, a viper stand made out of stainless steel can be acquired. (Art. n° 7823 J). For the assembly of the Viper... -
Page 12: Guarantee And Service
6. Guarantee and Service 6.1 Guarantee In the case of proper usage, the guarantee period for the Wöhler Viper 42 amounts to 12 months from the date of sale. Excluded here is the rod, becau- se this is consumable material. - Page 13 Enrouleur pour tiges 42 à boulet de lestage à changement rapide 1. Consignes importantes ...........14 2. Utilisation de l’enrouleur pour tige de ramonage .....14 3. Changement de la tige flexible .........15 4. Montage du boulet de lestage à changement rapide ..15 5.
-
Page 14: Consignes Importantes
1. Consignes importantes Wöhler Enrouleur pour tiges 42 1. Consignes importantes Avant la mise en service, il est absolument nécessaire de lire attentivement les instructions de service et de les suivre en tout point. Par principe, l’enrouleur pour tige 42 ne devrait être utilisé que par un person- nel compétent, conformément à... -
Page 15: Changement De La Tige Flexible
3. Changement de la tigre flexible Wöhler Enrouleur pour tiges 42 Attention: La partie intérieure de forme conique a un effet de freinage automatique. C’est pourquoi il est nécessaire de desserrer ce freinage en tournant le panier après un temps de repos prolongé. 3. - Page 16 5. Montage du boulet Wöhler Enrouleur pour tiges 42 Mise en place du boulet de lestage · Le filet intérieur M10 de l’extrémité de la tige (1) doit être visible et en bon état. · Placez l’anneau conique (2) de sorte à ce que la base du cône soit orien- tée vers le bas.
-
Page 17: Montage Du Support De L'enrouleur (Option)
5. Montage du support de l‘enrouleur Wöhler Enrouleur pour tiges 42 5. Montage du support de l‘enrouleur (Option) Pour garantir une position sûre pendant le travail, on un support de l‘enrouleur d‘acier fin peut être acheté comme accesoire (art. n° 7823 J). Pour mettre en place le support de l‘enrouleur, pousser le surface d‘appui du support de l‘enrouleur... -
Page 18: Garantie Et Service Après-Vente
6. Garantie et service après-vente Wöhler Enrouleur pour tiges 42 6. Garantie et service après-vente 6.1 Garantie En cas d’utilisation correcte, la garantie couvrant l’enrouleur pour tige de ramonage 42 est de 12 mois à compter de la date de vente. Les tigres GFK (pièces d’usure) ne sont pas couvertes par cette garantie. - Page 19 Aspo 42 con testata di sostituzione rapida 1. Informazioni importanti ........20 2. Impiego dell‘aspo ..........20 3. Sostituzione dell’asta ......... 21 4. Montaggio della testata di sostituzione rapida .. 21 5. Garanzia ed assistenza ........22 Tecnica a misura...
-
Page 20: Informazioni Importanti
1. Informazioni importanti Wöhler Miniaspo 42 1. Informazioni importanti Prima di ogni messa in esercizio leggere attentamente le istruzioni per l’uso e osservarle in tutti i punti. In via di principio il Wöhler Aspo 42 va usato per lo scopo previsto solo da personale esperto e in conformità... -
Page 21: Sostituzione Dell'asta
3. Sostituzione dell‘asta Wöhler Miniaspo 42 3. Sostituzione dell’asta Nella sostituzione dell’asta, la vecchia asta GFK viene completamente svolta ed estratta dal manicotto situato sul cestello dell’aspo. L’asta di ricambio viene avvolta seguendo gli stessi passi, ma in ordine inver- Occorre fare attenzione che l’estremità... -
Page 22: Garanzia Ed Assistenza
3. Sostituzione dell‘asta Wöhler Miniaspo 42 Installazione della testata · La filettatura interna M10 dell’estremità dell’asta (1) deve essere perfetta e visibile. · Inserire l’anello conico (2) con la superficie conica verso il basso. · Applicare sull’elemento superiore della testata (3) una stella (4) e spin- gere l’elemento superiore della testata insieme alla stella sull’estremità... - Page 23 Tel.: +49 89 1589223-0 Fax: +49 89 1589223-99 sued@woehler.de Service in other Countries Australia Czech Republic Wohler USA Inc. INLINE Systems Pty. Ltd. Wöhler Bohemia s.r.o. 8 Prosperity Parade Za Naspern 1993 20 Locust Street, Suite 205 Warriewood NSW 2102...
- Page 24 Tel.: +31 35 68 38 444 WR102QSV Worcester- Wöhler Austria Fax: +31 35 68 53 764 shire Tel.: +49 89 1589223-0 w.noorlander@vugt.nl Tel.: +44 1386 862900 Fax: +49 89 1589223-99 Fax: +44 1386 862901 sued@woehler.de stefan@wohler.co.uk Hotline: +49 2953 73-211 Fax: +49 2953 73-250...
Need help?
Do you have a question about the Viper 42 and is the answer not in the manual?
Questions and answers