Advertisement
Quick Links
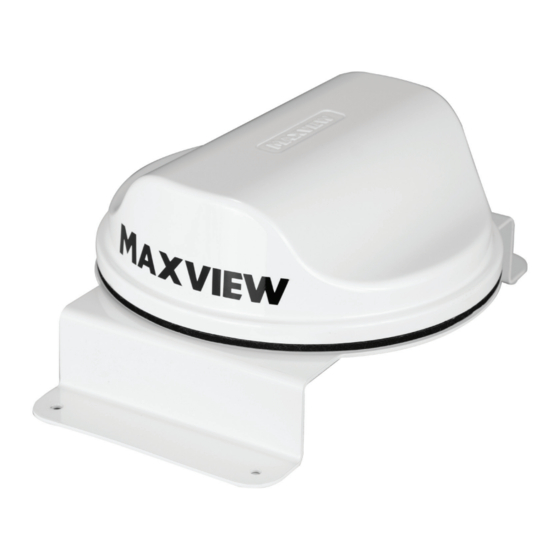
Roam
MXL050/KIT1
Installation Instructions
Anbauanleitung
UK contact:
Helpline:
+44 (0)1553 811000
Email:
support@maxview.co.uk
Web:
www.maxview.co.uk
Maxview reserve the right to change specifications without prior notice
9111432 Iss 1
Bracket Fixing Kit/Dachhalterung
DE Kontakt:
Tel:
Email:
Web:
Technische Änderungen vorbehalten
08145 / 996 998 - 0
info@maxview.de
www.maxview.de
Advertisement

Related Manuals for Maxview Roam

Summary of Contents for Maxview Roam
- Page 1 Anbauanleitung UK contact: DE Kontakt: Helpline: +44 (0)1553 811000 Tel: 08145 / 996 998 - 0 Email: support@maxview.co.uk Email: info@maxview.de Web: www.maxview.co.uk Web: www.maxview.de Maxview reserve the right to change specifications without prior notice Technische Änderungen vorbehalten 9111432 Iss 1...
- Page 2 Introduction/Anleitung The Roam Bracket Fitting Kit gives the flexibility to mount your 3G/4G Antenna anywhere on your roof without entering the cables directly below the Antenna. This allows you to route the cables to your preferred location using the supplied extension cables and cable entry cover.
- Page 3 Kit Contents/Lieferumfang 1 x Antenna Roof Bracket 1 x Cable Entry Cover 2 x 3m Extension Cables 1 x M18 Full Nut 1 x M18 Security Washer 4 x Bracket fixing Screws 8 x Cable Clips 1 x Instructions 1x Dachhalterung 1x Dachdurchführung 2x 3m Koaxial-Verlängerungskabel 1x Befestigungsmutter...
- Page 4 Installing Your Bracket and Roam/Aufbau der Dachhalterung und der Roam Positioning your Roam. Please refer to page 6 of your Roam Installation Instructions to find the best position. Positionierung der Roam. Siehe hierzu Seite 6 der Montageanleitung Positioning your Bracket The Bracket can be used on flat roofs and most ridge roofs.
- Page 5 Bei unebenen Dächer z.B. bei begehbaren Dach mit This is useful for an Elevated Roof (Pop Top) installation Edelstahlplatte muss genügend Dichtmittel where you may use your Roam with both the Roof flat respektive Kleber auf getragen werden um and at an incline.
- Page 6 Kabeldurchführung angebracht wird von Schmutz und Fett. Once you have selected a suitable position for your Roam Antenna select the cable entry location. We recommend to fit the antenna to the bracket before fixing the bracket. Option 1 – Use supplied Cable Entry Cover Option 2 –...
- Page 7 Dichtung. Front of vehicle Fahrtrichtung Fit the Roam Antenna to the Bracket - Press firmly around the edges of the antenna to ensure a watertight seal has been achieved Drücken Sie nun die Roam auf die Dachhalterung NOTE: Remember to mount the antenna to the bracket so once installed the embossed arrow is facing the front of the vehicle.
- Page 8 Do not over tighten. Befestigen Sie die Roam an der Unterseite der Halterung. Legen Sie die Zahnscheibe über den Gewindestutzen und schrauben Sie die Mutter auf.
- Page 9 When using the Extension cables take care to ensure the pins are aligned correctly before tightening the connectors together. The Roam comes with 0.8m cables as standard. If the chosen cable entry point is further than 0.8m away from the Roam Antenna the join will be external and exposed on the roof.
- Page 10 = *tragen Sie den Klebstoff großzügig auf Complete Installation/Installationsbeispiel Internally route the cables to your router. Refer to page 6 of your Roam Installation Instructions Verlegen Sie die Kabel intern zum Router. Siehe hierzu Seite 6 der Front of vehicle...
-
Page 11: General Safety Warnings
• The maximum speed of vehicle with product mounted on roof is 81mph (130km/h) Servicing & Support • Any inspection or repair must be carried out by Maxview or an appointed representative of the manufacturer • No regular maintenance required on the product •... -
Page 12: Allgemeine Sicherheitshinweise
• Säubern Sie den Artikel nicht per Hochdruckwäsche. • Wir empfehlen, dass die mechanische Integrität von dachmontierten Artikeln mindestens einmal jährlich überprüft wird. • Falls Sie ein Problem mit dem Artikel haben, wenden Sie sich bitte an den Kundenservice von Maxview. +49 (0)8145-996998-0 1 Jahre Garantie Die Garantie gilt zwei Jahre ab Kaufdatum.
Need help?
Do you have a question about the Roam and is the answer not in the manual?
Questions and answers