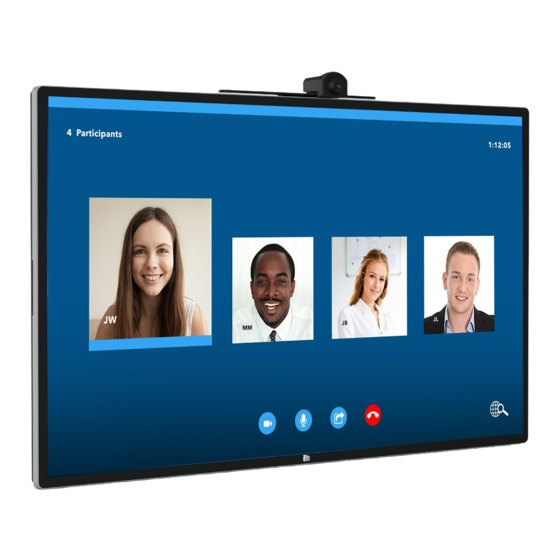
Advertisement
Quick Links
Elo Huddle Kit
Quick Installation Guide
Hardware Installation Steps
1.
Install Interactive Display and Elo Computer Module (ECM)
A. Unpack display and carefully lay face down on table. (Do not lift
by the speakers or rest the display on the speakers.)
B. Unscrew and remove the (ECM) docking tray cover on back of display.
C. Unpack ECM from huddle kit box. (Be sure to save the two license cards included.)
D. Place the ECM over the guides on the rear of display and slide ECM back to seat the connector.
E. Tighten the security screw on the front of the ECM.
Elo reserves the right to change or update, without notice, any information contained herein; to change, without notice, the design, construction, materials, processing or specifications of any products; and to discontinue or limit production or distribution of any products. Elo, the Elo logo are either trademarks or registered trademarks of Elo Touch Solutions, Inc. All other trademarks are the property of their respective owners.
© 2020 Elo Touch Solutions, Inc. All rights reserved. 20041AEB00001 P/N - E434046 Rev B
What's
Included
Conference
i5 Windows 10
Computer Module
Camera
with Applications
2.
Mount Display to Wall and Connect Cables
A. Mount display to the wall using Elo low-profile wall mount or third-party wall
mount following instructions provided with mount. (Some third-party mounting
systems may require 15 mm spacers and longer mounting screws (M6x50mm
or M8x50mm) included in huddle kit to avoid interference with the ECM.)
B. Connect AC power cable found in Elo display accessory box.
C. Connect an ethernet cable to the ECM for internet (Recommended).
For wireless connection, install WiFi antennas.
3.
Install Conference Camera
A. Unpack Conference Camera from huddle kit box.
B. Choose one mounting location – top, bottom, or either side.
C. Remove the Elo Edge Connect port cover from chosen location.
D. Plug the conference camera into the Elo Edge Connect port. (Ensure the USB
connector on the camera aligns with the connector on the IDS display.)
E. Secure the camera to the display by inserting and tightening
the camera thumbscrews on both sides.
OKTOPUS
2 Lifetime Licenses
+ 5 Collaboration Licenses
OKTOPUS is an interactive presentation and collaboration software designed for
use with any interactive whiteboard, interactive projector and any interactive touch
screen flat panel display. Work over any content or application.
E27026D972659DDE
Registration instructions: www.qwizdomoktopus.com/elo
2x Active Stylus
Stylus Tray
Software License
with batteries
2x Passive Stylus
A
B
2
Camera Thumbscrews
4
What's
Needed
M6x50 M8x50 15mm Spacers
Cards
NOTE: Please refer to Elo Collaboration Solution Installation
Guide for detailed recommendations on mounting display,
camera, and conference table location.
F. Connect the 2.5mm barrel jack cable between the camera and the nearest
connection labeled "CAMERA" on the back of the IDS display.
G. For all except bottom mounting, ensure the image sensor is orientated so the
arrow points in the upward direction by rotating clockwise or counterclockwise
as needed. (For bottom mounting, the arrow should point down)
(NOTE: If bottom camera mounting is used, the stylus tray cannot be used (ignore following step 4)
D
G
4.
Install Stylus Tray
A. Unpack stylus tray from huddle kit box.
B. Remove bottom Elo Edge Connect
TM
port cover.
C. Secure the stylus tray to the display by inserting and tightening
the stylus tray thumb screws on both sides of the bracket.
D. Place stylus for use into tray. (Use active stylus for
PCAP displays and passive stylus for IR displays.)
E. Open side cover on display and power on.
Compatible Elo display, wall
mount or stand with 600x600 or
400x400 VESA mounting pattern,
small Phillips head screw driver
F
Stylus Tray Thumbscrews
E
Advertisement

Summary of Contents for Elo TouchSystems Huddle Kit
- Page 1 B. Connect AC power cable found in Elo display accessory box. C. Unpack ECM from huddle kit box. (Be sure to save the two license cards included.) D. Place the ECM over the guides on the rear of display and slide ECM back to seat the connector.
- Page 2 B. The green activity indicator will illuminate any time the webcam is in use. setup: This can be done with the onscreen touch keyboard or with USB C. Use license card saved from huddle kit box. C. If top or bottom mounted, slide the camera left/right and tilt as needed connected keyboard/mouse via the USB side port on the display.