
Related Manuals for Videofield XTO-IP

Summary of Contents for Videofield XTO-IP
- Page 1 XTO-IP ALARM PANEL INSTALLATION MANUAL DOC. - REF. 230-XTO-IP-AUS MODIF. DATE : NOVEMBER 2016 FIRMWARE VERSION : XLP.04.04.00.XXX AND LATER...
-
Page 2: Introduction
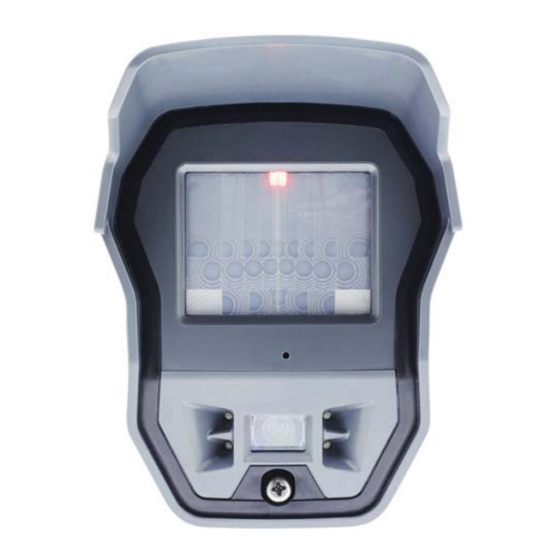
INTRODUCTION INSTALLATION MANUAL Description The XTO-iP is a fully wireless alarm system. It is powered by standalone Lithium batteries. This panel has been designed for outdoor installations, with its weatherproof casing and extended operating temperature range. ® With the Motion Viewers™ and Videofied range of products, the XTO-iP panel provides video verification in case of intrusion. -
Page 3: Table Of Contents
SUMMARY INSTALLATION MANUAL Introduction......................2 Summary........................3 1. XTO-iP panel setup......................4 1.1 SIM card installation......................4 1.2 Panel bracket mounting......................4 1.4 Powering and initialization......................5 1.5 Pairing the keypad........................6 1.6 Cover locking..........................6 2. XTO-iP panel programming..................... 3. XTO-iP features guide......................13 3.1 Get to access level 4......................13 3.2 How to Arm/Disarm the system.....................13... -
Page 4: Xto-Ip Panel Setup
1. XTO-IP PANEL SETUP INSTALLATION MANUAL 1.1 SIM card installation Before removing the front cover from its box, Put the SIM card on the plastic base (Take care to respect the right direction). DO NOT insert or remove the SIM card while the panel is powered. -
Page 5: Powering And Initialization
1. XTO-IP PANEL SETUP INSTALLATION MANUAL 1.3 Powering and initialization • The panel is powered either with 4 LSH20 Lithium batteries. • Always replace all 4 batteries at once. Mixing new and used batteries can severely damage the panel (risk of explosion). -
Page 6: Pairing The Keypad
1. XTO-IP PANEL SETUP INSTALLATION MANUAL 1.4 Pairing the remote keypad • Press the XTO programming button and release for the enrollment of a programming keypad. • Insert all LS14500 Lithium batteries into the keypad. • Do not mount the keypad. It will display one of the following screens: RSI (c) 2013 <=========XX=========>... -
Page 7: Xto-Ip Panel Programming
2. XTO-IP PANEL PROGRAMMING INSTALLATION MANUAL Keypad Display Actions and comments KEYPAD 1 RECORDED OK or YES The system can also be programmed in : french, italian, german, dutch, spanish, swedish, portuguese, danish, < - LANGUAGE : - > czech and polish. - Page 8 2. XTO-IP PANEL PROGRAMMING INSTALLATION MANUAL Keypad display Actions and comments You may name the installer code using the Alphanumeric CODE NAME : Keypad. If using automatic setting (called installer default list), enter the name of the list. OK or YES Warning : If the wrong installers list name is used it cannot be set later, the system must be defaulted.
- Page 9 2. XTO-IP PANEL PROGRAMMING INSTALLATION MANUAL Keypad display Actions and comments PERIODIC TEST Test Periodicity: 1 hour, 12 hours, 24 hours, 48 hours, 7 days or no tests. PERIODIC TEST : We suggest a 24 hours periodic test call. 24 HOURS...
- Page 10 2. XTO-IP PANEL PROGRAMMING INSTALLATION MANUAL SERVER ADDRESSES ? OK or YES IP1 ADDRESS DOMAIN NAME 1 PORT 1 The IP1 address, Domain name 1 and/or Port 1 are provided by the monitoring station. SERVER Leave Port details at 888 unless otherwise instructed.
- Page 11 2. XTO-IP PANEL PROGRAMMING INSTALLATION MANUAL 2G3G LEVEL ? Once the 2G3G test completed, the keypad will display OK or YES one of the following results : - A level between 0/5 and 5/5. TEST IN PROGRESS - A GPRS Error code (please see Chapter 6 : 2G3G errors END = OK/YES codes and contact your technical support).
- Page 12 2. XTO-IP PANEL PROGRAMMING INSTALLATION MANUAL Each device has a unique programming button or a RECORDING specific manipulation. Please refer to the Installation DEVICES Sheet for the device you would like to program. Please check the radio level of each device on its final location.
-
Page 13: Xto-Ip Features Guide
3. XTO-IP FEATURES GUIDE INSTALLATION MANUAL 3.1 Get to Access level 4 Tue 29/10 11:23 ACCESS LEVEL ACCESS LEVEL OK or YES LEVEL : 1 DISARMED LVL:1 To unlock and get access to the installer level 4, you need to successively enter TWO codes... -
Page 14: Arming And Siren Mode Configuration
3. XTO-IP FEATURES GUIDE INSTALLATION MANUAL 3.3 Arming and Siren Mode Configuration • Use the to go to menu : CONFIGURATION (LEVEL 4) > SPECIAL ARMING MODES > FULL ARM, SP1 or SP2 use direction arrows to select the arming mode you... -
Page 15: Manage Badges And Access Codes
3. XTO-IP FEATURES GUIDE INSTALLATION MANUAL 3.4 Manage badges and access codes Access Level Access Level Definition & Rights LVL 1 Standby Level LVL 2 Restricted USER level, where it is only possible to arm/disarm the system. USER level, where it is possible to arm/disarm the system, check the event log, test the devices. - Page 16 3. XTO-IP FEATURES GUIDE INSTALLATION MANUAL Enter a new end user Badge/Code Delete an end user Badge/Code ENTER A BADGES ACCESS CODES BADGE/CODE Press twice on the right arrow OK or YES ENTER A DELETING BADGE/CODE BADGES/CODES OK or YES...
-
Page 17: Delete The Keypad Or Any Other Device
3. XTO-IP FEATURES GUIDE INSTALLATION MANUAL 3.5 Delete the keypad or any other device ACCESS LEVEL CONFIGURATION OK or YES GENERAL AREAS AND PARAMETERS DEVICES OK or YES DEVICES OK or YES ADD A NEW DEVICE DEVICE CONFIGURATION OK or YES... -
Page 18: Read The Event Log
3. XTO-IP FEATURES GUIDE INSTALLATION MANUAL 3.6 Read the event log EVENT When user disarms the system, the OK or YES keypad indicates the last event. In case of the user needs to read the full SELECT LAST log file, use the keypad to go in EVENT... -
Page 19: Transmitted Events List
4. TRANSMITTED EVENTS LIST INSTALLATION MANUAL XTO-iP panel can be configured to enable or disable the transmission of events like alarms or defaults. The installer can modify the default sending settings for those events, although it will end the EN50131 standard compliance. -
Page 20: G3G Error Codes
Insufficient GPRS Network: When the panel is unable to find any signal, proceed to GPRS level test in another location on site. You can also find the network state or condition of use by directly contacting your local operator. XTO-IP Alarm panel... -
Page 21: Technical Specification And Security Notes
Bidirectional RF Radio type Integrated 2G3G Antenna Operating frequency Yes via MMCX connector External 2G3G antenna 920MHz - FHSS - XTO-iP 730 (Australia, South America) Video AES encryption algorithm Transmission security WMV or MPEG Video Format Radio jam detection Images per second...
Need help?
Do you have a question about the XTO-IP and is the answer not in the manual?
Questions and answers