Table of Contents
Advertisement
Quick Links
Advertisement
Table of Contents

Summary of Contents for GIGAMEDIA GGM CCKITAHD
- Page 1 GGM CCKITAHD Quick Guide KIT AHD...
-
Page 2: Table Of Contents
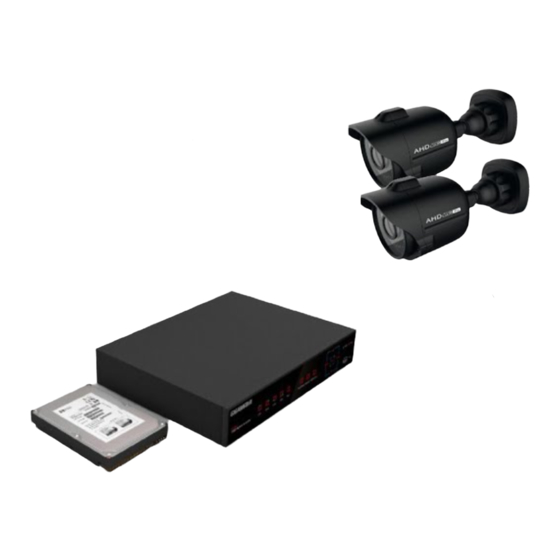
Step 1 - Overview Step 2 - Schematic Diagram Step 3 - Step by Step configuration with Wizard Wizard .................. HDD Management .............. Record Schedule ..............General System Configuration ........... Network ................Email Configuration ............DDNS Configuration ............Image Size ................Substream ................Playback ................Step 4 - Remote Access with WEB Browser & SmartPhone Web Browser (Internet Explorer) . - Page 3 Step 1 - Overview fRont VIEW REAR VIEW ACCESSoRIES GGM CCKITAHD USER MANUAL kit AHD USB Mouse Remote Power Supply User Manual x2 cameras AHD x2 18m Coax Cable Check your AHD DVR package it is included all the accessories Physical overview of the Digital Video Recorder www.gigamedia.net...
-
Page 4: Wizard
Step 2: Schematic diagram MONITOR INTERNET ROUTER HDMI OUTPUT OUTPUT COAX COAX COAX CAMERA POWER SUPPLY ALARM 220V CAMERA ACCESSORIES Step 3: Wizard System Initialization: please use « Wizard » tool to help you to configure each step of your new AHD Kit NB: After DVR startup is completed, the startup wizard will be displayed. -
Page 5: Hdd Management
STep by STep confIGurATIon Main window HDD MAnAGeMenT format HDD for the first use. note: Recording can only be performed when HDD is in “normal” state. www.gigamedia.net... -
Page 6: Record Schedule
Camera recorD ScHeDule Days Record, Motion Detection or Alarm in "Parameter" > "Video" > "Record schedule" You can set recording time and scheduled recording of DVR. You can select days and record period following event (Normal Record – Motion Record – Alarm Record) -
Page 7: General System Configuration
GenerAl SySTeM confIGurATIon System Settings check time, date, language video format: PAL (for Europe) Menu time format : Sets duration of a session. After this period unsolicited DVR you need to re-enter your username:admin and password (blank) Default. www.gigamedia.net... -
Page 8: Network
neTworK DHCP Function Take DHCP as an example. In this mode, the router automatically assigns IP ad- dress for DVR. After restarting DVR or DHCP server, the IP address obtained by DVR may be different. As a result, user shall check IP address and port number for each remote access of DVR. The operation procedure is as follows: 1. S elect DHCP, click Save and refresh DVR. Input Client Port and HTTP Port (the two values must not be the same). 2. Set obtained IP address of DVR and the mapping port. Refer to section 4.2.4.2. 3. Remotely visit DVR by IP address: http://Public network IP: Web port number (such as 00080) http:// Intranet IP: Web port number (such as 00080) (only available in the same LAN) Universal Plug and Play (UPnP) is a standard that uses Internet and Web protocols to enable devices such as DVR laptop… to be plugged into a network and automatically know about each other. With UPnP, when a user plugs a device into the network, the device will configure itself, acquire a tCP/IP address. -
Page 9: Email Configuration
This step allows you to configure your email address to receive alerts when there is motion detection or if you want to get the image from the DVR recorder. At this step it’s not necessary to fill this part. You can find more information how to configure it in the general manual. www.gigamedia.net... -
Page 10: Ddns Configuration
DDnS confIGurATIon < DDNS: After user applies for DDNS service, you could enable DDNS> function under any one network type mode (Static, DHCP and PPPoE). And you may remotely visit the NVR through domain name (http://domain name: Web port No.). When visiting DVR by using DDNS, user should make sure port and current IP can be normally connected in public network. Details settings, including server address, host, user, and password, should be consistent with NVR local setting. -
Page 11: Image Size
IMAGe SIze Number of images per second (frame per second) fps Select size of the vidéo Go to “Main Menu” > “Record” > “Mainstream” Mode: Support 960H and D1. Select a resolution, save and exit main menu. Then the system will automatically restart to take effect. Resolution (960H): Support three kinds of picture quality: WD1, WHD1, WCIF. Resolution (D1): Support three kinds of picture quality: D1, HD1, CIF. Note: In AHD series, the supported record resolution includes 960H and 720P FPS > PAL: 1--25f/s; Bitrate: Bitrate for local storage. User may select in the drop down list. Audio: Check the box to record channel audio during recording and there will be audio output during playing record. Un-check the box to disable recording audio and there will be no audio output during playing the record www.gigamedia.net... -
Page 12: Substream
SubSTreAM Go to “Main Menu” > “Parameter” > “Network” > “Substream” to enter into the interface Useful for remote access with your mobile phone. Substream selection ensure a smooth playing to adapt the bandwidth. Video: Substream switch. Select Enable to preview the substream in the client, If Disable is selected, the client can only choose mainstream preview. FPS: FPS for network transmission. User may select value in the drop-down list. Bitrate: Bitrate for network transmission. User may select value in the drop-down list. Audio: Click √ and audio will play during network transmission. Synchronous transmission. -
Page 13: Playback
Go to “Main Menu” > “Record Search” > “Record Search” Channel: Select the channel you want to search. Type: Select the type the playback record. There are two options, i.e. Normal and Alarm. Start Time/End Time: Select the specific period of time. The default setting is from 0:00 to 24:00. Playback Channel: Click a date and select corresponding channel in Playback Channel. www.gigamedia.net... -
Page 14: Step 4 - Remote Access With Web Browser & Smartphone Web Browser (Internet Explorer)
Playback: Select the desired year and month and click “Search”. If there are any records, a yellow corner mark which shows the recording at specific date will appear at the down-right corner of the date sheet. Select the date checkbox and select playback channel and click Playback to enter into the interface. Playback interface: You can use the Playback Control bar to operate the Fast Forward (X2, X4, X8 and X16), Rewind (X2, X4, X8 and X16), Slow play (1/2, 1/4 and 1/8 speed), Play, Pause/Frame. You can click or drag the volume control bar to adjust volume. -
Page 15: Login
How To reAcH you cAMerA wITH your browSer web (Ie 8.0) After ActiveX controls installation, please input user name and password, select Main Stream or Sub Stream (In general, select main stream for intranet and sub stream for outer net), and input web port number and select language in the interface. There is an option for opening all channel preview, select it to open all live pictures. IP ADDReSS DDNS URL loGIn Press Login to log in client and remotely visit DVR. The default password is blank and administrator is authorized to mo- dify the password. Set password as per introductions of user management in system setting. www.gigamedia.net... -
Page 16: Mobile Phone Access
Then you will be able to see your videos to your mobile phone. for more information please visit our website www.gigamedia.net to download the usermanual in full version please visit the section usermanual to download. If you have any questions please contact you reseller.
Need help?
Do you have a question about the GGM CCKITAHD and is the answer not in the manual?
Questions and answers