Table of Contents
Advertisement
Quick Links
Advertisement
Table of Contents

Summary of Contents for Loreda L510G
- Page 1 L510G Wireless Scouting Camera USER’S MANUAL...
-
Page 2: Table Of Contents
TABLE OF CONTENTS 1.General Information ............1 1.1Features ..................1 1.2Application................2 1.3Illustration ................2 2.Quick Start ................3 2.1Insert SIM Card..............3 2.2Load Batteries ................3 2.3Insert SD Card................4 2.4Powering on and Test Mode...........4 2.5Powering on and Live Mode ..........5 3.Advanced Settings ..............6 3.1Parameter Settings..............6 3.2File Format ................9 3.3Setup Camera Setting On PC ..........9 3.4Setup MMS Setting On PC ............11 3.5 Setup SMS Setting On PC ............13... -
Page 3: General Information
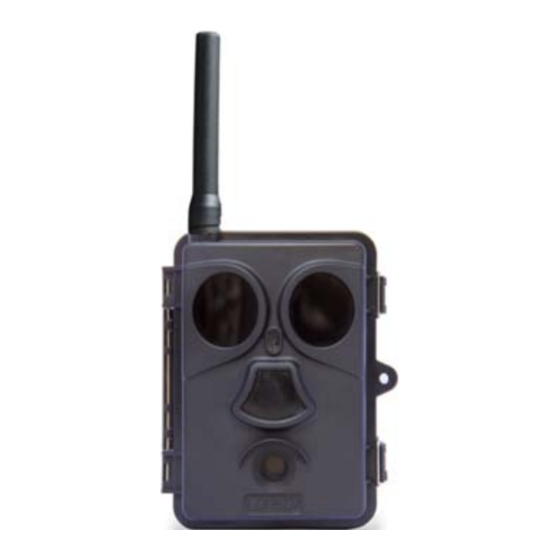
1.GENERAL INFORMATION Introduction The Loreda (Model: L510G) is Infrared Monitoring Camera (also called Scouting Camera, Trail Camera, etc.). The Loreda Camera is equipped with Infrared (IR) LED, Light Sensor, Passive Infrared (PIR) Sensor and Lens, which can record the objects in a region of interests... -
Page 4: Application
1.2 Application The Loreda Camera can be applied for security purpose, monitoring household, shops, schools, warehouses, offices, factories, public areas and recording unexpected intrusions. The Loreda Camera also can be applied for scientific research and hunting purpose, tracking and monitoring animals or plants. -
Page 5: Quick Start
Figure1.2 the bottom view The camera provides the following connections for external devices:USB 2.0 port, SD card slot,TV out jack,and external DC power jack,SIM card slot. To supply power, it is recommended to use eight new high-performance alkaline AA batteries or low self-discharge Ni-MH chargeable AA batteries. -
Page 6: Insert Sd Card
(optional, user provided). When both external power and batteries are connected, the camera will be powered by the external power works. 2.3Insert SD Card The Loreda camera does not come with internal memory,so it does not work without a SD(SecureDigital)memory card or SDHC(HighCapacity)card.Before inserting the SD card into the cardslots,please make sure the write-protect switch on the side of the SD card“off”(NOT in the“Lock”position).The supported memory... -
Page 7: Powering On And Live Mode
Try different distances and angles from the camera. By doing this test, you can find the best placement when mounting and aiming the Loreda camera. In general, you are recommended to place the camera 3 to 6 feet (1 to 2 meters) above the ground. -
Page 8: Advanced Settings
PIR area of the sensor directly. 3.ADVANCED SETTINGS The Loreda camera comes with preset manufacturer settings. You can change the settings to meet your requirements. Please make sure the camera is in the test mode. - Page 9 mode in standard 16:9 format. Press Enter to set up date and Set Clock Enter time. Select the number of photos taken in sequence per trigger 01 Photo, 02 Picture No. in Camera mode. Please also Photos, 03 Photos refer to the Interval parameter.
- Page 10 helpful in cold weather. Select On if you want the date Time Stamp On, Off & time imprinted in every photo. Select On if you only want the camera to work within a specified time period every day. For instance, if the Timer1 Off, On starting time is set at 8:30 and...
-
Page 11: File Format
Photos are saved with filenames like IMAG0001.JPG and videos like IMAG0001.AVI. 3.3 Setup Camera Setting on PC You can run the Loreda tools.exe file on the enclosed CD. You can also visit the national distributor’s website to download the program, or download from:www.iloreda.com... - Page 12 The following window prompts: Click on Camera Settingand you will see the following interface: Setup the camera parameters based on your need. Click on Select to choose the directory to save your settings, usually under the root directory of the SD card...
-
Page 13: Setup Mms Setting On Pc
The password can only be setup on the camera,not on the PC. 3.4 Setup MMS Setting On PC Run the Loreda tools.exe file on the enclosed CD,You can also visit the national distributor’s website to download the program, or download from: www.iloreda.com... - Page 14 Click on MMS Settingand you will see the following interface: First you need to choose MMS Setting,how you like to setup the MMS Setting--Auto or Customer.If you choose Auto,then you need to Choose...
-
Page 15: Setup Sms Setting On Pc
MMS Setting Successfully”, indicating the MMS function has been successfully setup 3.5 Setup SMS Setting On PC Run the Loreda tools.exe file on the enclosed CD.You can also visit the national distributor’s website to download the program, or download from: www.iloreda.com... - Page 16 Click on SMS Setting and you will see the following interface: you can input the phone number. Then Click on Selectto choose the directory to save the settings, usually under the root directory of the SD card (You need to insert the SD card in the SD card reader and plug it in your computer.) Then, click on Save a file named sms.dat will be created and saved in the directory you just...
-
Page 17: Setup Gprssetting On Pc
“1~2 Hour” indicates the interval time 1~2 hour to receive SMS,“Off” indicates the close of the SMS remote control. 3.6Setup GPRS SettingOn PC Run the Loreda tools.exe file on the enclosed CD,You can also visit the national distributor’s website to download the program, or download from: www.iloreda.com... - Page 18 If you choose Auto,then you need to Choose theSelect countryand the Mobile Phone Operator.If you choose Customer to manually input all the parameters APN/Account/Password),this parameter you can find from your mobile operator.Then write in your E-mail server/port/sender E-mail/Password and Recipients E-mail. SMS Control, the value ranges from “0n”...
-
Page 19: Sms Control
3.7 SMS Control When the camera is in ON mode, you can send text message “Lep80*1#end” to your camera’s SIM card number to get an on spot image or use our Android application tools. The Loredacamera SMS command list Note:All the SMS content starts with LEP(lep), ends with END(end). Order Function code Example... -
Page 20: Cautions
Mobile Operator name and the signal strength on the LCD. To allow the MMS function or GPRS function to perform, at least two bar is required. If a code, shows on the screen, it indicates something is wrong, missing, or going on. Specifically, SIM: No SIM card or installed incorrectly CSQ: No signals. -
Page 21: Firmware Upgrades
5. Firmware Upgrades The manufacturer reserves the right to upgrade the camera and the firmware. Follow the steps below to implement the upgrades: 1.Install batteries and the SD card. Back up SD card contents. 2. Format SD card on camera. Retrieve the SD card and plug it in your computer (SD card reader may needed). - Page 22 SD Card (8MB ~32GB) Memory Power Supply 6V DC power 8xAA battery; supply Stand-by Current 0.2mA Stand-by Time 3~6 Months(4xAA~8xAA) Auto Power Off Auto power off in 2 minutes while no keypad controlling Power 150mA (+800mA when 940 IR LED lights up) 150mA (+700mA when 850 IR LED lights up) Consumption Low Battery Alarm...
-
Page 23: Appendix Ii Package Contents
1~16 Times Playback Zoom In Time Stamp On /Off; Include serial no., temperature and moon phase On /Off; Time Lapse Programmable Timer1 Timer2 On /Off; Time Lapse Programmable Password 4-Digit Numbers Serial No. 4 digits and 26alphabets set by yourself Time Lapse 1 Second ~ 24 Hours Low-Battery SMS...
Need help?
Do you have a question about the L510G and is the answer not in the manual?
Questions and answers