Table of Contents
Advertisement
Quick Links
Advertisement
Table of Contents

Subscribe to Our Youtube Channel
Summary of Contents for IMT IQL Helios
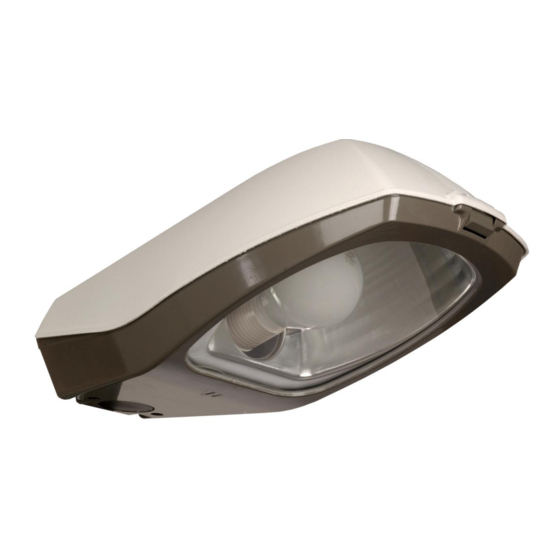
- Page 1 IQL® Helios Area-/Streetlight User Manual...
-
Page 2: Table Of Contents
Recycling..........................13 Contact details ........................13 EC Declaration of Conformity ....................14 Copyright © IMT B.V. All rights reserved. No part of this User Manual may be copied, redistributed, published or changed without the prior written permission of IMT B.V. -
Page 3: Safety
The lighting level of the light fitting depends on the temperature and is therefore not covered by the guarantee. If an IQL® Helios fitting fails within the warranty period, IMT B.V. will supply a new fitting with a comparable specification free of charge. Before the guarantee can be confirmed, a defective light fitting must be sent to IMT B.V. -
Page 4: Type Plate
User Manual IQL® Helios Area-/Streetlight 3. Type plate 3.1 Standard model The standard model light fitting has a type plate attached: TYPE PLATE This contains the following information: Type : Low temperature range IQL55-LT IQL85-LT : Normal temperature range IQL55 IQL85 Ambient temp. -
Page 5: Product Description
User Manual IQL® Helios Area-/Streetlight Type : Low temperature range IQL55-LT IQL85-LT : Normal temperature range IQL55 IQL85 Ambient temp. : Low temperature range -40°C up to 40°C : Normal temperature range -20°C up to 40°C Serial number Year of Manufacture Frequency : AC 50/60 : DC none... -
Page 6: Specifications
User Manual IQL® Helios Area-/Streetlight 5. Specifications 5.1 General Housing : Copper free aluminium Lens : Toughened glass Colour recognition : Ra>80 Ingress protection : IP66 Burning position : Universal (Re)ignition : Instant Power factor : >0,92 Connection IP66 : Standard-3 pole Terminal Block Connection EX Zone2 : Standard-12m flying lead Type RMcL H07RN-F 3x2.5mm²... -
Page 7: Installation
User Manual IQL® Helios Area-/Streetlight 6. Installation 6.1 Preparation Check that the light fitting will be installed in an environment that matches the ambient temperatures, gas group and temperature class (for Zone 2 and 22). This data is shown on the light fitting type plate. WARNING The installation of the light fitting in an environment that does not match the specified conditions can result in a dangerous situation. - Page 8 User Manual IQL® Helios Area-/Streetlight Take the light fitting out of the packaging. Inspect the light fitting for mechanical damage. Unscrew the metal screw to open the light fitting. Check if the bag that comes with the product contains the following fixing materials: 2 plastic covers 2 long M8 socket-head bolts.
- Page 9 User Manual IQL® Helios Area-/Streetlight Slide the long M8 socket-head bolts from underneath into the light fitting. Fasten the mast clamp by turning the socket-head bolts a few times into the clamp. Place the light fitting on the mast and tighten the socket-head bolts until the light fitting is completely fastened to the mast.
- Page 10 User Manual IQL® Helios Area-/Streetlight 10. Connect the incoming cable to the connecting block. 11. Fasten the incoming cable by clamping it tight under the strain relief. 12. Close the light fitting. Fasten the metal screw securely to lock the light fitting. For Vertical Mounting 13.
- Page 11 User Manual IQL® Helios Area-/Streetlight 14. Slide the long M8 socket-head bolts from underneath into the light fitting. 15. Fasten the mast clamp by turning the socket-head bolts a few times into the clamp. 16. Place the light fitting on the mast and tighten the socket-head bolts until the light fitting is completely fastened to the mast.
-
Page 12: Connections
User Manual IQL® Helios Area-/Streetlight 17. Connect the incoming cable to the connecting block. 18. Fasten the incoming cable by clamping it tight under the strain relief. 19. Close the light fitting. Fasten the metal screw securely to lock the light fitting. 6.3 Connections In the light fitting there is a standard connecting block, suitable for a single phase supply. -
Page 13: Use
Phone : +31 (0)88 – 12 69 100 : +31 (0)88 – 12 69 101 E-mail : sales@imt.eu For an up-to-date overview of all national and international contacts, visit our website: www.imt.eu. User Manual IQL® Helios Area-/Streetlight Version 4.6 201302... -
Page 14: Ec Declaration Of Conformity
User Manual IQL® Helios Area-/Streetlight EC Declaration of Conformity The undersigned, representing the company IMT B.V. Pascalweg 10a 4104 BG Culemborg The Netherlands Phone :+31 (0) 88 - 12 69 100 hereby declares that the product: IQL® Helios marked with Ex II 3 GD EEx nA II T4 T135°C IP66 or Ex II 3 GD EEx nA II T3 T160°C IP66 complies with the terms of the EC directive(s) including all applicable... - Page 15 User Manual IQL® Helios Area-/Streetlight User Manual IQL® Helios Area-/Streetlight Version 4.6 201302...
- Page 16 IMT B.V. Pascalweg 10a, 4104 BG Culemborg P.O. Box 88, 4100 AB Culemborg Tel: +31 (0)88 – 12 69 100, Fax +31 (0) 88 – 12 69 101 www.imt.eu, sales@imt.eu...
Need help?
Do you have a question about the IQL Helios and is the answer not in the manual?
Questions and answers