
Summary of Contents for HiSharp HS-HC4311
- Page 1 Thank you for purchasing our product. Please read this user’s manual before using the product. Change without notice 4/8/16 CH Analogue HD-Hybrid(Lite) DVR Quick Guide...
- Page 2 CAUTION Please read this user manual carefully to ensure that you can use the device correctly and safely We do not warrant all the content is correct. The contents of this manual are subject to change without notice This device should be operated only from the type of power source indicated on the marking label.
-
Page 3: Product Features
1. Product Features 1.1 Main Features Real-time surveillance High resolution VGA output, HDMI output and BNC output 2 way audio 3G Mobile surveillance(iPhone/ iPad/ Android) Compression with latest H.264 video compression, better video quality and lower compression rate. -
Page 4: Rear Panel Instructions
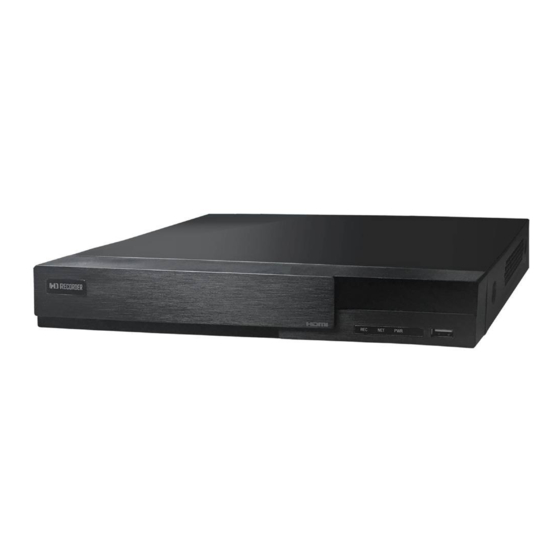
1.2 Rear Panel Instructions Type1: Rear Panel for 4 CH Rear Panel for 8 CH Name Descriptions DC12V DC12V Power Input. To connect external USB devices like USB mouse or USB storage device. Network Port. HDMI HDMI Port. Connect to high-definition display device. VGA Port. -
Page 5: Remote Controller (Optional)
1.3 Remote Controller (Optional) It uses two AAA size batteries. Open the battery cover of the Remote Controller. Place batteries. Please take care of the polarity (+ and -). Replace the battery cover. Remote Controller Button Function Switch off—to stop DVR. -
Page 6: Mouse Control
1.4 Mouse Control Live Preview & Playback interface In the live preview & playback interface, double click on any camera window to show the window in single screen mode; double click the window again to restore it to the previous size. In the live preview &... -
Page 7: Wizard Setup
2.3 Wizard setup You can quickly configure the NVR by wizard setup to make the NVR work normally. You must configure the wizard if you start the NVR for the first time (or click “Skip” to cancel the wizard next time). Click “Wizard Setup”... - Page 8 QR Code : You can scan the QR Code through mobile client which is installed in the mobile phone or PAD to log in the mobile client instantly. Add Camera : Click “Refresh” to refresh the list of online IP cameras which are in the same local network with to add the searched camera.
- Page 9 Disk Settings : You can view the disk number, disk capacity of the NVR and serial number, R&W status of the disk. Click “Formatting” to format the disk. Click “Next” to continue. Record Settings : Two record modes are available: auto and manual. Auto: Select one auto mode in the interface as shown below and then click “OK”...
-
Page 10: Main Interface Introduction
2.4 Main interface 2.4.1 Main interface introduction The buttons in area ① are introduced in the table below. Butto Meaning Start button. Click it to pop up area ③. Full screen button. Click it to show full screen; click it again to exit the full screen. Screen mode button.(according to individual models) Dwell button Click it to enable OSD;... -
Page 11: Setup Panel
Disk status button. Click it to view the disk status and RAID status. Network status button. Click it to view the network status. Information button. Click it to view system information. Introduction of area ②: Click “Camera” to view all the added cameras in the camera list. Select one camera window on the left side of the interface and then double click one camera in the list to preview the camera image in the selected window. -
Page 12: Camera Management
3. Camera Management 3.1 Add camera The network of the NVR should be set before adding IP camera. Refer to the pictures below. Click Add Camera in the top right corner of the preview window to pop up the “Add Camera” window as in the setup panel or shown below. -
Page 13: Live Preview
4. Live Preview 4.1 Preview interface You should add camera first after logging on to the system. Refer to the interface as shown below, drag one camera in the preview window to another window for camera window exchanging. Click the preview window to show the tool bar as shown in area ①; right click the preview window to show the menu list. -
Page 14: Record & Disk Management
The single channel amplification interface is as shown below. Press and drag the blue box to select the zoom in area. Click to zoom the image. Click the camera selection box to select other cameras for amplification. Click “Back” to return to the live preview interface. 5. -
Page 15: Disk Management
Video Encode: the available options will be H.265 and H.264 if the connected IP camera supports H.265, or the option will be H.264 only. Resolution: the higher the resolution is, the clearer the image is. FPS: the higher the frame rate is, the more fluency the video is. However, more storage room will be taken up. Bitrate: the higher the image quality you choose, the more bit rate will be required. -
Page 16: Playback Interface
6.2 Playback interface Click on the tool bar at the bottom of the live preview interface or click StartPlayback to go to the playback interface as shown below (click on the tool bar at the bottom of the live preview interface to set the default playback time). - Page 17 Introduction of area ②: Button Meaning Click it to go to record search interface. Click it to go to backup interface. Click it to go to live preview interface. Click on the playback window to show the tool bar as shown in area ③; right click on the window to show the menu list.
-
Page 18: Record Search & Playback
6.3 Record search & playback 6.3.1 Search & playback by time sliced image ① Click StartSearchBy Time-sliced Image to go to “By Time-sliced Image” tab. There are two view modes: by time and by camera. In the time view mode, a maximum of 64 camera thumbnails can be showed. If the camera thumbnail number is more than 64, the cameras will be listed directly by their camera name, not the thumbnail. -
Page 19: Search & Playback By Time
6.3.2 Search & playback by time ① Click StartSearchBy Time to go to “By Time” tab as shown below. ② Click on the bottom of the interface to add playback camera. A maximum of 16 cameras can be added for playback. Click “Modify” on the top right corner of the camera window to change the camera and click “Clear” to remove the camera. -
Page 20: Backup By Time
6.3.4 Search & playback by tag management Only if you add the tags can you play the record by tag search. Click StartPlayback to go to the playback interface and then click on the bottom of the camera window to add tag when you want to mark the playback time point of the selected camera. -
Page 21: Backup By Event
6.4.1 Backup by event ① Click StartBackupBy Event to go to “By Event” tab. ② Click to set the start time and end time on the left top of the interface. ③ Check the event types and cameras. ④ Click to search the record. -
Page 22: Appendix A _ Compatible Devices
APPENDIX A Compatible Devices 1. Compatible USB drive after test. Brand Capacity A-DATA 512MB, 1G, 2GB Transcend Kingston Toshiba SanDisk 2. Compatible external USB CD/DVD writers after test Brand Model GH24NS90 3. Compatible HDD Brand Model number Capacity 1600AAJS FW:00L7A0 160GB 2500AVVS FW:73M8B0 250GB... - Page 23 ST500DM002 (SATA3) FW:KC44 500GB ST3100528AS FW:CC38 ST31000524AS (SATA3) FW:JC4B ST2000DL003 (SATA3) FW:CC32, CC3C SEAGATE ST3000VX002 FW:CV12 ST3000VX000 FW:SV35 *ST6000VX0001 FW:VN02 HCS5C1050DLE630 FW:620DT01ABA050V 500GB TOSHIBA DT01ABA100 DT01ACA100 Power adapter should be requested more than 12V, 3A to support 6TB HDD. APPENDIX B_SPCIFICATION Model 16CH Compression format...
Need help?
Do you have a question about the HS-HC4311 and is the answer not in the manual?
Questions and answers