Advertisement
Quick Links
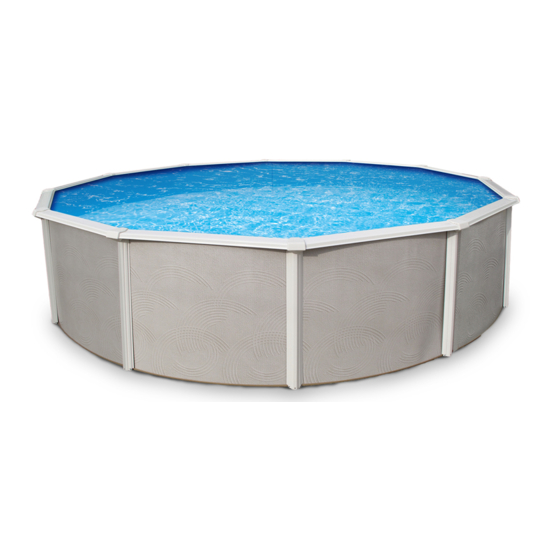
Resin Above Ground Pool Assembly & Installation
SIMPLICITY ROUND POOL INSTRUCTIONS
THIS POOL IS NOT DESIGNED FOR DIVING OR JUMPING.
DANGEROUS INJURY CAN RESULT-SHALLOW WATER!!!
Your pool is designed for years of pleasurable, safe family fun. But, when used
incorrectly, a swimming pool can be dangerous. To insure your pool is used
safely you must observe the following safety precautions:
Do not dive!-Do not jump!- No rough play!- No running or pushing!
Do not walk on the top rail. It can be slippery and is not a walkway.
Be sure to install all safety labels provided with your pool according to the
instructions.
Keep a safety rope 1/4" by 50' with a flotation buoy with an outside diameter of 15".
Have accessible in a prominent area by your pool.
Post near all entrances to pool area; a list of telephone numbers of the:
• Nearest available police
• Nearest available fire department
• Nearest available rescue unit
• 911 emergency number if available
Provide fencing or enclosure which is independent of the house as a closure
around the entire pool area. The fencing must be made of durable material, a
minimum of 4' in height from ground level and with closures with self-latching
locks, to make pool inaccessible to toddlers and uninvited guests. Make sure
W A R N I N G :
D
O NOT AFFIX
ANY OTHER PRODUCTS
MADE BY OTHERS
TO YOUR POOL
,
SUCH AS
BUT NOT LIMITED TO
DECKS AND SLIDES
W A R N I N G :
Follow All Safety and Maintenance Instructions
• Nearest ambulance service
• Nearest available hospital
• Nearest available physician
ENCLOSED IN FRAME CARTON IS SAFETY
ENVELOPE. THE SAFETY STICKERS MUST
BE INSTALLED AS PER FOLLOWING
INSTRUCTIONS. FAILURE TO PROPERLY
INSTALL WARNING LABELS WILL VOID
WARRANTY. FAILURE TO MOUNT THESE
SAFETY LABELS MAY SUBJECT YOU TO
SUBSTANTIAL LIABILITY IN CASE OF
INJURY.
THESE WARNINGS ARE NOT TO
,
BE REMOVED UNDER ANY
CIRCUMSTANCES! IF THEY
!
BECOME DISCOLORED OR FALL
OFF,
REPLACEMENTS WHICH WILL BE
SENT AT NO CHARGE.
gate is always closed. Be sure to follow local building code requirements for load
capacity and fencing if using an aftermarket or homebuilt deck. You must make
sure all fence and barriers are in working order so that pool is always protected.
Check with your local town for any special laws in your locale.
Never drink alcoholic beverages or use any intoxicants which could hinder your
judgment and reflexes.
Never use pool alone. All children must be supervised continuously.
Do not use pool if bottom is not clearly visible: At night, sufficient lighting must
be available. It is the pool owners sole responsibility to provide adequate
lighting for pool bottom, safety signs and walkways, which exceeds minimum
standards of the IES of North America.
Do not climb, stand or sit on any pool structure or the filter system. Components
such as the filtration system, pumps and heater must be positioned so as to
prevent them being used as a means of access to the pool by young children.
Be sure that all toys, chairs and tables or similar objects that a young child could
climb on be at least four feet (4') from pool.
Do not use pool during electrical or rain storms.
See available National Spa and Pool Institute (NSPI), publications for more tips on pool safety.
IMPORTANT NOTICE!
READ BEFORE INSTALLATION
PLEASE
REQUEST
P /N 95-0763 05/14
SIGN MUST BE PLACED
ON WALL NEXT TO ENTRY
TO POOL
S I G N T O B E P L A C E D O N
L I N E R A B O V E W A T E R L I N E
OPPOSITE ENTRY TO POOL
Advertisement

Summary of Contents for Simplicity PSMP
- Page 1 P /N 95-0763 05/14 Resin Above Ground Pool Assembly & Installation SIMPLICITY ROUND POOL INSTRUCTIONS W A R N I N G : THIS POOL IS NOT DESIGNED FOR DIVING OR JUMPING. DANGEROUS INJURY CAN RESULT-SHALLOW WATER!!! Follow All Safety and Maintenance Instructions Your pool is designed for years of pleasurable, safe family fun.
- Page 3 Above Ground Pool SAfety PleASe reAd before inStAllAtion Failure to heed these warnings can result in permanent injury, warning paralysis From a broken neck, electrocution or drowning. this pool is not designed For diving or jumping! dangerous injury can result, shallow water! your pool contains a large quantity of water, and is deep enough to present inherent dangers to life and health unless the follow- ing safety rules are strictly observed.
- Page 5 ROUND POOL INSTALLATION INSTRUCTIONS POOL AREA DIMENSIONS (POOL RADIUS PLUS ONE FOOT) 12’ ROUND 15’ ROUND POOL POOL 18’ ROUND 21’ ROUND 24’ ROUND POOL POOL POOL Radius means the measurement from the center point of the pool to the pool wall.
- Page 6 Simplicity Pool Code Round PSMP Pool Code Oval Part Number Description TOP LEDGE 12' Round 39193 TOP LEDGE SIMPLICITY 12' 55-7/16" 15' Round 39194 TOP LEDGE SIMPLICITY 15' 56-5/16" 18' Round 39195 TOP LEDGE SIMPLICITY 18' 56-3/8" 21' Round 39196 TOP LEDGE SIMPLICITY 21' 56-3/8"...
- Page 7 STEP 1: POOL LOCATION Do not locate pool over underground lines, septic tanks, under electrical lines, near hazardous structures, or out of local code restrictions. It is essential that the area selected for your pool has a level and firm base. Do not assemble your pool on asphalt, tar or oil base surfaces. Avoid areas with sharp objects, or ground treated with weed killer or other chemicals.
- Page 8 SIMPLICITY PARTS BREAKDOWN Once you have completed the ground preparation, you should open all the cartons of the pool to become familiar with all of its components. You should also refer to the breakdown sheet that is packed with your pool and make sure that you have the correct number of each component necessary to complete your pool.
-
Page 9: Step 4: Wall Installation
STEP 4: WALL INSTALLATION In this step, you will use the wall carton as a base to unravel the pool wall. Locate the area that you wish to put the skimmer and return so that you can start to unravel the wall from that point. Unravel the wall a little at a time, inserting into the bottom rails as you go. Do not unravel the entire wall at once, this makes the installation much more difficult. - Page 10 STEP 6: PREPARING THE COVE Using neutral alkalinity sifted earth, or fine sand without pebbles, build a 2” base over the entire pool area to protect the liner. DO NOT USE ANY SUBSTANCE WITH HIGH ALKALINE OR ACID CONTENT, ESPECIALLY MOSS, AS IT WILL CORRODE METAL PARTS! Next, using the sifted earth or fine sand, build a pool cove 6”...
- Page 11 STEP 10: LINER INSTALLATION If you opted to use the wall rims to help hold the wall up, then you will need to take them off, a few pieces at a time while installing the liner. You may find it easier to take off 3 or 4 at a time and replace them before taking off the next set, so there is some support for the wall.
-
Page 12: Additional Note
IMPORTANT INFORMATION: *Please fill out this sheet and keep it in your records for future reference. This information can be very helpful if the time ever comes that you need to make a warranty claim, change your liner, or need replacement parts for your swimming pool.
Need help?
Do you have a question about the PSMP and is the answer not in the manual?
Questions and answers