Table of Contents
Advertisement
Quick Links
Advertisement
Table of Contents

Related Manuals for ASTRO QAM BOX


Summary of Contents for ASTRO QAM BOX
- Page 1 Version 01-2013A...
-
Page 2: Table Of Contents
Network settings........................page 19 Checking individual processes - the system logbook..............page 20 Expert mode..........................page 21 Software update and configuration files..................page 25 Troubleshooting........................page 28 Maintenance and repair......................page 28 Signal flow diagramme......................page 29 Technical data...........................page 30 Seite 2 Betriebsanleitung QAM BOX - Version 01-2013A... -
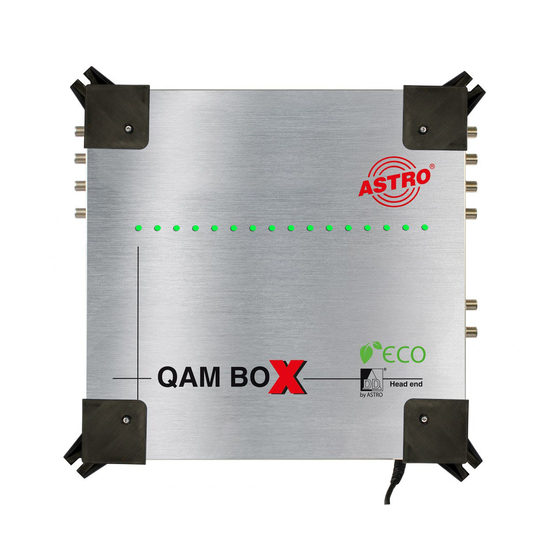
Page 3: Device Description
[16] Bus connection socket 2 Figure 1: QAM BOX - Terminal assignment The QAM BOX features a CE marking. This confirms that the product conforms to the relevant EC direc- tives and adheres to the requirements specified therein. Warranty conditions The general terms and conditions of ASTRO Strobel GmbH apply. -
Page 4: Description Of Performance
Description of performance Description of performance The QAM BOX compact headend is used for converting a DVB-S2 input signal into 16 independent QAM output channels, as well as 16 FM channels. To use the device properly, carefully read the following safety and operating instructions. - Page 5 The permitted ambient temperatures specified in the technical data must be complied with. The device may only be repaired by sending it to ASTRO along with a precise description of the fault. ...
- Page 6 Connect the RF output socket (see position [10], left) on the QAM BOX with a set-top box or a TV set with DVB-C tuner or with several tuners or set-top boxes by interconnecting the corresponding distributors and splitters.
- Page 7 Installing and connecting Connecting cascading QAM BOX modules You can cascade up to 4 QAM BOX modules. An example of a cascade circuit with 2 modules can be seen in figure 3 below: Figure 3: connecting several cascading QAM BOX modules In order to configure the device using the web browser interface, connect your network, or laptop/PC, to the RJ 45 socket on the QAM BOX (see position [14] in the figure at the left).
-
Page 8: First Steps Using The Web Browser Interface
If the circle is red, then a fault has occurred. Only one user can be logged into the user interface of the QAM BOX at a time. The current user is displayed in the left-hand column, below the menu. - Page 9 You will now see the input screen from figure 6. Figure 6: User administration You can create up to four users for the user interface of the QAM BOX. When the device is in its delivery state, three users exist: ...
- Page 10 PIDs: packet identifier of the station selected Frequency / level: set output frequency and level reduction Status: OK (no errors) or error message Dynamic RDS: current radio data service (if available) Seite 10 Betriebsanleitung QAM BOX - Version 01-2013A...
-
Page 11: Configuring Input Properties
Configuring input properties Setting SAT inputs To configure the SAT inputs for the QAM BOX, click on the entry Input settings in the menu at the left. You can now see the input screen shown in figure 8: Figure 8: Configuring SAT inputs Selecting the external unit Start by selecting the preferred LNC type from the drop-down list. -
Page 12: Configuring Output Properties
10: Figure 10: Configuring QAM channels You can make the settings for the 16 QAM channels in the “QAM Channels” table (see figure 11, be- low). Figure 11: Setting output properties Seite 12 Betriebsanleitung QAM BOX - Version 01-2013A... - Page 13 ON-ID: enter the required ON-ID (decimal) in the input field. Save the changes by clicking on the “Submit” button. Delete any settings entered previously by clicking on the “Reset Form” button. Betriebsanleitung QAM BOX - Version 01-2013A Seite 13...
- Page 14 13: Figure 13: Setting FM channels You can make the settings for the 16 radio stations in the “FM Channels” table (see figure 14, below). Figure 14: Setting FM channels (excerpt) Seite 14 Betriebsanleitung QAM BOX - Version 01-2013A...
- Page 15 RDS: enter the required PID in the input field. Once you have selected the preferred option, click on “Submit” to save the selection. Click on the “Reset Form” button to delete the values which were entered beforehand. Betriebsanleitung QAM BOX - Version 01-2013A Seite 15...
- Page 16 Activate static generation if no music ID is provided in the transport stream. To do this, click either the radio button “speech” or “music”. If data for music identification is provided in the transport stream, then the transport stream data will be processed with priority. Seite 16 Betriebsanleitung QAM BOX - Version 01-2013A...
-
Page 17: Nit Processing
Enter the network ID and the network name in the respective input field here. Once you have selected the preferred option, click on “Submit” to save the selection. Click on the “Reset Form” button to delete the values which were entered beforehand. Betriebsanleitung QAM BOX - Version 01-2013A Seite 17... -
Page 18: Sorting Programmes - The Lcn Table
Add external transport streams Should you wish to integrate other devices, made by other manufacturers, in your system in addition to the QAM BOX, then you can add the transport stream for these devices manually. The following op- tions are provided here: ... -
Page 19: Network Settings
DNS: name server; input required when e.g. updates are to be deployed using the FTP server (“ftp.astro-firmware.de”). Input fields shown in grey can only be edited when you are logged in as Admin- istrator. Betriebsanleitung QAM BOX - Version 01-2013A Seite 19... - Page 20 Once you have clicked the “Load factory settings” button, all settings made up to this point will be deleted, except for the network and user settings! Click on “Restart QAM BOX” to perform a reboot. Checking individual processes - the system log To have the system log displayed, click on “System Log”...
- Page 21 (with information about the user account and the time at which deletion occurred.) You can also download the following log files: System log (in CSV format) Debug log (in CSV format) Betriebsanleitung QAM BOX - Version 01-2013A Seite 21...
-
Page 22: Expert Mode
C/N: signal to noise ratio of the input signal Power: power of the input signal at the front end Data transmission by the QAM channels Figure 23: SAT input channel statistics (excerpt) Seite 22 Betriebsanleitung QAM BOX - Version 01-2013A... - Page 23 When you click the menu item, the following overview will appear: Figure 24: Active alarm table The table provides information about the error messages which have been issued. The “Message” col- umn shows the error message in plain text. Betriebsanleitung QAM BOX - Version 01-2013A Seite 23...
- Page 24 SNMP authentication failure trap: activate the radio button “on” to switch on the trap in the event of access using a false community. Activate the radio button “off” to deactivate this. Seite 24 Betriebsanleitung QAM BOX - Version 01-2013A...
-
Page 25: Software Update And Configuration Files
Once you have clicked the “Load factory default settings” button, all settings made up to this point will be deleted, except for the network and user settings! Click on “Force reboot of QAM BOX” to perform a reboot. Firmware update from a local storage location... - Page 26 The following files are available for download: IP configuration (XML format) System status (XML format) Local stream info (XML format) Simply click on the corresponding file link to download the file. Seite 26 Betriebsanleitung QAM BOX - Version 01-2013A...
- Page 27 Figure 30: Firmware update via (T)FTP You can perform a variety of actions via (T)FTP using the table “Firmware update and configuration via server”. To configure the QAM BOX for these actions, you must enter values for the following proper- ties: ...
- Page 28 “Tftpd32” is described in the following. Figure 31: Example view of the QAM BOX update folder with update files and “tftpd32” programme. You can file and launch the “tftpd32” programme directly in the folder in which the update files for the QAM BOX are found (see figure 31, above).
- Page 29 Entering a user name and a password is not required. You must now select the option “Update” in the line File . Start the update by clicking on the “Submit” button. Betriebsanleitung QAM BOX - Version 01-2013A Seite 29...
-
Page 30: Troubleshooting
Check whether the signal cable is connected correctly, and that there are no breaks or short circuits in the connectors. If the problem cannot be resolved, please contact the ASTRO customer service. Maintenance and repair The device must not be opened other than for repair purposes. Repairs may only be carried out at the factory or at workshops, or by persons, authorised by ASTRO Strobel GmbH. -
Page 31: Technical Data
80...96 Common data Power consumption 62 incl. LNB-supply Supply Voltage V~/Hz 230 / 50 Dimensions (W x H x D) 305 x 289 x 63 Ambient temperature °C 0 … +50 Betriebsanleitung QAM BOX - Version 01-2013A Seite 31... - Page 32 Internet: www.astro-kom.de Due care was taken to ensure the accuracy of all the information contained in this documentation. The ASTRO company cannot be made liable for any damage that occurs in connection with the use of this manual. Betriebsanleitung QAM BOX - Version 01-2013A...
Need help?
Do you have a question about the QAM BOX and is the answer not in the manual?
Questions and answers