
Summary of Contents for ProTechTrader PDM-711
- Page 1 User Guide ProTechTrader LARGE SCREEN DIGITAL MULTIMETER PDM-711 Please read this manual before using the multimeter. Latest manual and more can be found on https://www.ProTechTrader.com - 1 - © 2019 https://www.ProTechTrader.com...
- Page 2 The Meter is suitable for dry location use only. Turn the Meter power off when it is not in use and take out the battery when not using for a long time to avoid battery leakage and damage - 2 - © 2019 https://www.ProTechTrader.com...
-
Page 3: Technical Specifications
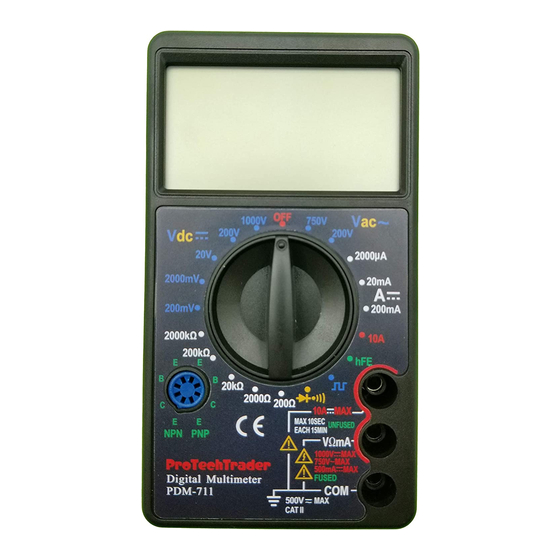
RANGE RESOLUTION ACCURACY 200V 100mV ±(2.0% of rdg +10D) 750V RESPONSE: Average responding, calibrated in rms of a sine wave. FREQUENCY RANGE: 45Hz ~ 450Hz OVERLOAD PROTECTION: 1000V DC or 750V rms for all ranges. - 3 - © 2019 https://www.ProTechTrader.com... -
Page 4: Audible Continuity
RESISTANCE RANGE RESOLUTION ACCURACY 200Ω 0.1Ω ±(1.0% of rdg +10D) 2000Ω 1Ω 20KΩ 10Ω ±(1.0% of rdg +4D) 200KΩ 100Ω 2000KΩ 1KΩ MAXIMUM OPEN CIRCUIT VOLTAGE: 3.0V. OVERLOAD PROTECTION: 15 seconds maxi- mum 220Vrms. - 4 - © 2019 https://www.ProTechTrader.com... - Page 5 Connect test leads to device circuit being measured. Turn on power of the device circuit being measured voltage value will appear on Digital Display along with the voltage polarity. - 5 - © 2019 https://www.ProTechTrader.com...
- Page 6 4. Read current value on Digital Display. Please Note: The “10A” function is designed for intermittent only. Maximum contact time of the test leads with the circuit is 10 seconds, with a minimum 10-minute intermission time between tests. - 6 - © 2019 https://www.ProTechTrader.com...
-
Page 7: Diode Measurement
4. The forward voltage drop in mV will be displayed. If the diode is reversed, figure “1” will be shown. - 7 - © 2019 https://www.ProTechTrader.com... -
Page 8: Transistor (Hfe)
1. Red lead to “VΩmA”, Black lead to “COM”. 2. Set RANGE to “ ” position. 3. Connect test leads to two points of circuit to be tested. If the resistance is lower than 30Ω±20Ω, the buzzer will sound. - 8 - © 2019 https://www.ProTechTrader.com... -
Page 9: Warranty
This warranty does not cover consumable items such as batteries or fuses. If the defect has been caused by a misuse or abnormal operation conditions the warranty will be void. - 9 - © 2019 https://www.ProTechTrader.com... -
Page 10: General Specifications
Be careful to observe the proper polarity. Package Contents ➢ Digital Multimeter ➢ User Guide ➢ Set of test leads ➢ 9-volt battery (6F22) factory installed - 10 - © 2019 https://www.ProTechTrader.com...
Need help?
Do you have a question about the PDM-711 and is the answer not in the manual?
Questions and answers