Advertisement
Quick Links
1
Charging your FitCheck
USB-C
charging cable
Ensure your FitCheck
is fully charged before use.
®
Charging can be done via the USB-C port on the
side of the device.
*Always use USB-C cable supplied
4
Attach FitCheck
device
®
Position FitCheck
over the face of the filter and
®
turn clockwise until device locks into position.
7
LED indicator - Pass
A green light illuminates on the LED indicator
for a passed test
Quick start guide
2
Attach optional LED extender
®
Attach the optional LED extender into the
USB-C port if the light on the device is not
visible for indication.
5
Attach optional filter button
Position closure button on the face of the filters
and twist clockwise to lock into position.
8
LED indicator - Failed
A red light blinks on the LED indicator for
a failed check. Wait until the LED indicator flashes
purple signalling for a retest of the fit check.
FC6110
3
Turn on FitCheck
device
®
Press and hold power button until green light
flashes then release.
Press and hold power button to turn device off.
6
Don mask and perform fit check
Press and hold the optional filter button to seal
device (or cover filter with hand), draw a breath until
the flashing purple LED turns solid, at which point
hold your breath static for up to 10 seconds and
wait for the result.
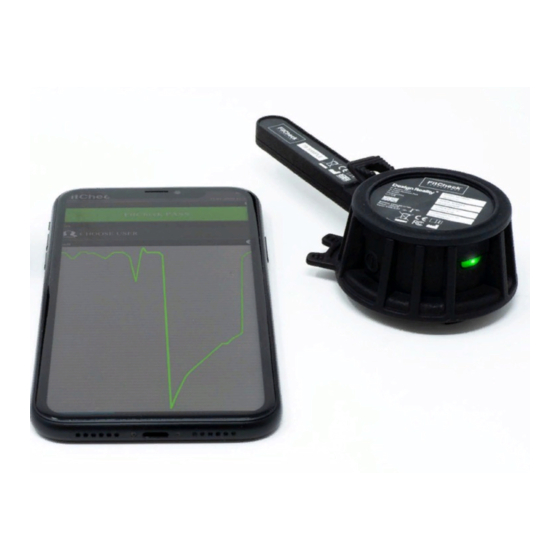
Using the
FitCheck
®
mobile app
>
Continues overleaf >
Advertisement

Summary of Contents for FitCheck Technology FC6110
- Page 1 FC6110 Quick start guide Charging your FitCheck Attach optional LED extender Turn on FitCheck device ® ® USB-C charging cable Ensure your FitCheck is fully charged before use. Attach the optional LED extender into the Press and hold power button until green light ®...
- Page 2 FC6110 Using the FitCheck mobile app ® Install the FitCheck Turn on your FitCheck ® ® Connect to your device Turn on Bluetooth ® Turn on Location Services Download and install the FitCheck ® on your device. Press and hold power button until green light Available for IOS, Android, PC and can be flashes then release.
Need help?
Do you have a question about the FC6110 and is the answer not in the manual?
Questions and answers