Table of Contents
Advertisement
Quick Links
Advertisement
Table of Contents

Subscribe to Our Youtube Channel
Summary of Contents for BlueFlyVario Bluetooth USB v12.2
-
Page 1: Annex A - Technical Description Of Settings
BlueFlyVario Hardware Settings Manual v1.7 - Jun 2019... -
Page 2: Table Of Contents
- Jun 2019 www.blueflyvario.com Contents Introduction ............................3 Hardware Settings ........................... 3 Overview ............................. 3 General Settings ..........................4 Auto Power Off ........................... 4 Output Modes ............................. 5 Audio Thresholds ..........................7 Audio Buzzer ............................8 Beep Cadence ............................. 8 Audio Tone ............................ -
Page 3: Introduction
A number of models of the BlueFlyVario are available. See www.blueflyvario.com for details. This manual describes the settings which are stored on the BlueFlyVario, how to set them, and what they control. These settings are known as the hardware settings Hardware Settings... -
Page 4: General Settings
Auto Power Off From v10 the BlueFlyVario models incorporate a button for soft power on/off instead of the slide switch used on previous models. If the vario is not moved vertically for a period of time then it will shutdown. -
Page 5: Output Modes
Output Modes From version 7 the BlueFlyVario can output pressure and vario data in a number of modes. This makes the vario compatible with a wider range of applications. outputMode (default = 0) - Sets the output mode. The available output modes are: ... - Page 6 (default = 1). Sets the frequency of output sentences from the BlueFlyVario. The BlueFlyVario hardware runs on a 20ms cycle (50 cycles per second). If outputFrequency is set to 1 then the hardware will send a sentence on each cycle. If set to 2 it will send a sentence every second cycle and so on (if set to 50 is will send a sentence every 50th cycle, i.e.
-
Page 7: Audio Thresholds
Audio Thresholds The sound on the BlueFlyVario hardware switches on and off based on the measured vertical speed. The settings liftThreshold, liftOffThreshold, sinkThreshold and sinkOffThreshold control when the sound comes on and off. The graph below describes how this works and what the defaults are. It is ok to set the on and off thresholds to the same value, but you will get funny results if the off threshold is higher than the on threshold. -
Page 8: Audio Buzzer
- Jun 2019 www.blueflyvario.com Audio Buzzer From version 10 (firmware version 10.m04) there is an experimental Audio Buzzer that can be used to indicate light lift. The audio buzzer provides a fast beeping indication. If useAudioBuzzer is true then it will start when the rate of climb is buzzerThreshold m/s below the liftThreshold. -
Page 9: Audio Tone
Note that in the most recent versions of the BlueFlyVario (from v7 onwards), the Audio Frequency cannot be played below 130Hz. If the combination of the settings and the measured vertical speed results in a calculated audio frequency below 130Hz the resulting sound will be clamped to 130Hz. -
Page 10: Volume
Volume The BlueFlyVario uses an electromagnetic transducer. These devices are driven by a square wave from a microcontroller pin (using the inbuilt PWM module of the microcontroller). Using the trick described in the graph below the volume is controlled without needing a variable resistor. Think of the transducer diaphragm being 'kicked' by a high pulse. -
Page 11: Battery
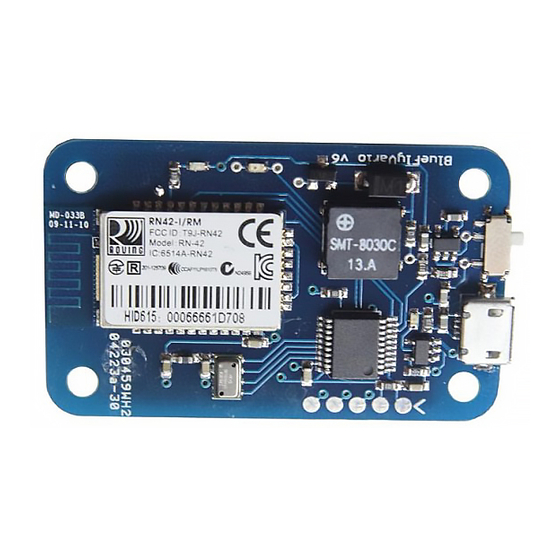
A serial port on the Microcontroller (UART 2) is used to output data from the vario and send commands to it. For Bluetooth versions of the BlueFlyVario the serial port is connected to the onboard RN-42 Bluetooth Adapter (or RN4677/RN4678 from v11 hardware). Bluetooth drivers on... - Page 12 - Jun 2019 www.blueflyvario.com host devices set up a virtual serial port so the data transfer is seamless. For the BlueFlyVario_TTL the UART Tx and Rx pins are directly exposed. The settings for the primary serial port are: Baud Rate:...
-
Page 13: Serial Commands For Settings
Integer Values section of Annex A. The integer value is converted on the BlueFlyVario in a number of different ways depending on the Type and Factor associated with the setting in the following way:... - Page 14 - Jun 2019 www.blueflyvario.com microcontroller plus pressure sensor consumes about 0.05mA in sleep mode, but the GPS still consumes about 1.5mA. To wake from sleep mode without a power cycle you just send any character to the module on U2. This will then force a hot reboot, and you are back to the power on state, including the GPS.
-
Page 15: Second Serial Port
In this way the BlueFlyVario effectively multiplexes the GPS data with the standard output controlled by the outputMode. This allows the BlueFlyVario to output a single stream of data which can be read by XCSoar or other applications. -
Page 16: Expansion Ports
U1 received characters with the pressure output. Expansion ports On version 11 you can expand the BlueFlyVario by adding additional hardware. BlueFly_v11_Shield_GPS The BlueFly_v11_Shield_GPS adds a PA6H GPS on UART1 (U1) of the microcontroller. The GPS shield has a few extra components to smooth the power supply to the GPS and provide the PA6H LED output. -
Page 17: Bluefly_V11_Shield_Gps+Airspeed
- Jun 2019 www.blueflyvario.com The BlueFly needs a special hardware setting adjusted. To adjust usePitot send $BUP 1* to the BlueFly via the normal manner (or tick the box in the BFVDesktop application). This makes the BlueFly read this pitot sensor each cycle via I2C and adjust the sent data appropriately. -
Page 18: Reset Hardware Defaults
- Jun 2019 www.blueflyvario.com Reset Hardware Defaults If you really screw up the settings, and for some reason you cannot fix them through the serial connection, then it is possible to reset the hardware settings to their default values using the procedure shown below. - Page 19 - Jun 2019 www.blueflyvario.com The procedure is similar for v11 hardware, but instead you need to short SCL to Ground. On v12 hardware you need to short SCL to Ground as well, but it is in a different spot.
-
Page 20: Firmware Upgrades
Firmware Upgrades From version 10 the BlueFlyVario models include a bootloader so you can upgrade the firmware. The firmware is the chunk of code on the microprocessor which makes the Bluefly wield its magic. Normally you need a special microcontroller programmer to update the firmware, however with the bootloader you can do it over a serial connection without the special programmer. - Page 21 - Jun 2019 www.blueflyvario.com V10 hardware V11 and V12 hardware You will also need to establish a serial connection. You can test your serial connection using the BFV Desktop application or a terminal emulator like Realterm: Bluetooth version: you should add the vario as a device to the PC (you might need to use code 1234 to pair it via the Devices and Setting menu, it depends on your Bluetooth adapter).
- Page 22 - Jun 2019 www.blueflyvario.com Port: Whatever serial port you plan to use based on the one you determined in Step 2. Write flash: Checked Flow control: None Step 4 - Start up the Bluefly in bootloader mode You will need to short the pads as described in step 2 then power on the Bluefly module.
- Page 23 - Jun 2019 www.blueflyvario.com Step 5 - Program the device Press the Write button in the ds30loader application. The application should connect to the Bluefly and start programming. It takes about 20 seconds. When programming is complete the Bluefly will start like normal with the new firmware. You can connect it to the BFV Desktop application to confirm the new version is uploaded.
- Page 24 A - 1 Annex A - Technical Description of Settings Integer Values Converted Values Name Code Type Factor Message Default Default Version Value Value Value Value Value Value Check to enable hardware audio when connected. useAudioWhenConnected boolean FALSE TRUE FALSE Check to enable hardware audio when disconnected.
- Page 25 The volume of beeps -> 0.1 is only about 1/2 as loud as 1.0. volume double 1000 1000 1000 0.001 The output mode -> 0- BlueFlyVario(default), 1- LK8EX1, 2-LX, 3-FlyNet, 4- Nothing, 5-BFVCustom, 6- outputMode BFVExtendedCustom.
- Page 26 A - 3 Integer Values Converted Values Name Code Type Factor Message Default Default Version Value Value Value Value Value Value The output frequency divisor -> 1-every 20ms ... 50-every 20msx50=1000ms outputFrequency QNH (in Pascals), used for hardware output alt for some output modes - (default outputQNH int_offset 80000...
- Page 27 A - 4 Integer Values Converted Values Name Code Type Factor Message Default Default Version Value Value Value Value Value Value How far you have to move in dm to reset the idle timeout heightSensitivityDm 65535 10000 Idle timeout heightSeconds 65535 10000 Check to use the...
- Page 28 A - 5 Integer Values Converted Values Name Code Type Factor Message Default Default Version Value Value Value Value Value Value If true the startup and shutdown beeps will not sound. quietStart 12.m23 boolean FALSE TRUE FALSE...
Need help?
Do you have a question about the Bluetooth USB v12.2 and is the answer not in the manual?
Questions and answers