Table of Contents
Advertisement
Quick Links
Quick Start Guide
The company names and product names appearing in this manual are
trademarks or registered trademarks of their respective holders.
For exemptions, refer to "Notes on Usage" available on the au homepage.
August 2020, Edition 1.1
Sold by: KDDI CORPORATION,
OKINAWA CELLULAR TELEPHONE COMPANY
Manufactured by: SHARP CORPORATION
Advertisement
Table of Contents

Related Manuals for AU Speed Wi-Fi 5G X01


Summary of Contents for AU Speed Wi-Fi 5G X01
- Page 1 Quick Start Guide The company names and product names appearing in this manual are trademarks or registered trademarks of their respective holders. For exemptions, refer to “Notes on Usage” available on the au homepage. August 2020, Edition 1.1 Sold by: KDDI CORPORATION, OKINAWA CELLULAR TELEPHONE COMPANY Manufactured by: SHARP CORPORATION...
-
Page 2: Packaged Items
Preface Thank you for buying the “Speed Wi-Fi 5G X01” (simply called “the product” from here on). Before using the product, read the “Quick Start Guide” (this manual), and “Notes on Usage”, carefully for proper use. Packaged Items Before using the product, make sure that you have all the following packaged items with the product. -
Page 3: About Descriptions
◎ In this manual, descriptions are based on the screen display and operations of the product with au Nano IC Card 04 LE installed. ◎ Illustrations and screens shown in this manual may look different from those on the actual product. In some cases, minor details or a part of a screen may be omitted. -
Page 4: What You Can Do With This Product
◎ In this manual, “au Nano IC Card 04 LE” is abbreviated to “au IC Card”. ◎ Company names and product names described in this manual are trademarks or registered trademarks of their respective companies. This manual may also omit marks such as ™ and ®. - Page 5 Connecting with USB Cable (sample) You can connect this product to a PC with a USB cable (sample) for data communication. Additionally, you can also use the USB connection at the ® same time as Wi-Fi connections. Wi-Fi ® Wireless base station Wi-Fi ®...
- Page 6 Connecting with a LAN Cable (Commercially Available) You can perform data communication by connecting the product to a PC or other device using a LAN cable (commercially available). You can also use the ® wired LAN connection at the same time as wireless LAN (Wi-Fi ) connections.
- Page 7 Support for au World Service Using the au World Service, you can use your products that are used in Japan overseas as well. This product can be used on either UMTS or LTE networks depending on your destination.
- Page 8 ◎ Various discount services as well as data communication charges/ discount services available within Japan cannot be used overseas. ◎ Consumption tax is not added to usage fees for international services. Setting Communication Mode/ Performance Communication Mode You can use the product to perform data communication with wireless base station via 5G, LTE or UMTS systems.
- Page 9 Performance Setting You can make settings for the balance of the product's communication speed and the electric power consumption. Swipe left on home screen → [Settings] → [Performance Settings] Performance Set a performance to use. • If you set “Communication Mode” to “5G/LTE (Auto)”, Performance is automatically changed to “High Performance”.
-
Page 10: About The Manuals
About the Manuals ■ “Quick Start Guide” (this manual) and “Notes on Usage” The “Quick Start Guide” (this manual) and “Notes on Usage” available on the au homepage describe information and precautions required for the first time use. ttps://www.au.com/english/support/manual/) ■ “Full Instruction Manual” (Japanese) You can check “取扱説明書... -
Page 11: Part Names And Functions
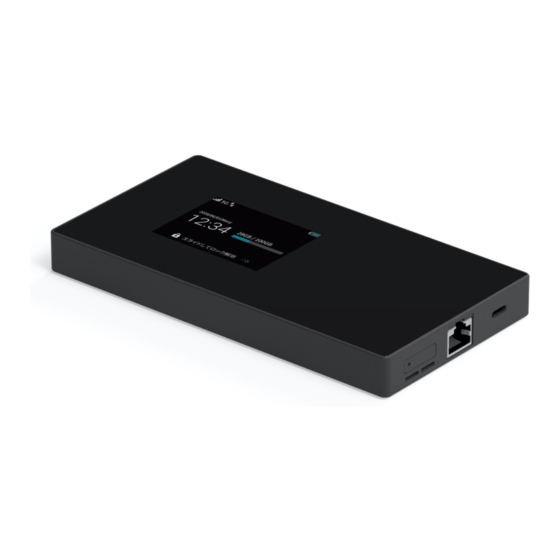
SIM eject pin (sample) when the power to the product is on. C f Power key Turn the screen on/off. Hold down to turn the power on/off and to reboot. D au IC Card tray E Ethernet port Use when connecting LAN cables (commercially available). - Page 12 ◎ The antenna is built into the product. Do not cover the antenna with your hand during use. Doing so may impact signal quality. au IC Card ◎ Pulling out or applying excessive force on the au IC Card tray may cause damage. IMEI plate ◎...
- Page 13 “Inserting the au IC Card” (zP. 15).) B Turn the display side down, hook the tab on the rear of the au IC Card tray (side without text), and pull out the IMEI plate. (Do not fully pull out the IMEI plate.)
- Page 14 Main Unit Keys and Buttons Use keys and buttons on the main unit to carry out the following operations. ■ Power key Power on f (hold down for at least 2 seconds). f (hold down for at least 2 seconds) → [Power Power off Off].
- Page 15 • Before inserting/removing the au IC Card, turn off the product . • Do not forcefully insert or remove. ◎ An error message will be displayed if the au IC Card is not correctly inserted, or if the au IC Card has a malfunction.
- Page 16 Insert the tip of the SIM eject pin (sample) into the au IC Card tray hole. Push the tool firmly straight in until the au IC Card tray comes out. Pushing this other than straight in may cause damage or malfunction.
- Page 17 Check the direction of the au IC Card, and place it securely in the au IC Card tray. Take care so that the au IC Card does not come out of the IC Card tray. Inserting the tray with the card not properly seated within may result in damage.
- Page 18 IC Card tray. Inserting/removing the au IC Card tray ◎ Do not insert the au IC Card into the product directly. Place the au IC Card in the au IC Card tray, and then insert the whole tray into the product.
- Page 19 Using the SIM eject pin (sample), pull out the au IC Card tray. When pulling this out, take care that the au IC Card does not come out of the IC Card tray and get lost. Remove the au IC Card from the au IC Card tray.
- Page 20 ◎ If the charging lamp flashes in red, force the power off (zP. 22) and turn the product on again. If the lamp continues to flash, stop charging the internal battery and contact an au shop or the Repair and Delivery Support Center.
- Page 21 Charging with the Specified AC Adapter This explains connecting the TypeC Common AC Adapter 02 (sold separately) and charging the product. For details on the specified AC adapter (sold separately), refer to the “取扱説明書 詳細版” (Full Instruction Manual) (Japanese). Insert the TypeC Common AC Adapter 02 (sold separately) power plug into an 100V AC outlet.
- Page 22 When charging is completed, pull out the USB Type-C plug of the TypeC Common AC Adapter 02 (sold separately) straight from the external connection jack of the product. Remove the power plug of the TypeC Common AC Adapter 02 from the outlet. ◎...
-
Page 23: Turning The Power On/Off
◎ Charging over USB may take longer than when using the specified AC adapter (sold separately). ◎ If the USB cable (sample) is disconnected from the PC during data communications, data communications will be interrupted which may cause a malfunction or loss of data. Ensure care is taken. ◎... -
Page 24: Configuring Initial Settings
◎ Note that settings and other content may be deleted if the power is turned off forcibly. Do not use this except when the product cannot be operated. Locking/Unlocking the Screen The product will turn off if you either press f, or do not operate the product for a set period of time. - Page 25 最大通信量 (Max Data Set for the data usage limit that you use this Usage) month. • Tap “TB”/“GB”/“MB” to set a unit. 自動リセット日 Set the date when data usage is reset (毎月) (Auto Reset automatically. Date) 強制通信停止を許可 Stop performing communication when you (Allow Communication set it to “ON”...
- Page 26 [Wi-Fiスリープ設定] (Wi-Fi Sleep Mode) スリープ設定 (Sleep Set whether to use the sleep mode. Mode) オフまでの時間 ® Set the time until the Wi-Fi function turns (Timeout) “OFF” automatically while “スリープ設定” (Sleep Mode) is set to “ON”. at the top left of the screen. [クイック起動] (Fast Boot) Select for the [クイック起動] (Fast Boot)
-
Page 27: Switching The Display Language To English
Switching the Display Language to English On the home screen → [設定] (Settings). [Language Setting]. [English]. Resetting to Factory Defaults You can restore the product to its factory default settings. ■ Resetting the Product to Factory Defaults With the product powered on, insert the tip of the SIM eject pin (sample) into the RESET button hole. -
Page 28: Using The Touch Panel
Using the Touch Panel The product uses a touch panel, operated with your finger. • In the following cases, the touch panel may not work even if you touch it. These may also cause a malfunction. ・ Operation with a gloved finger ・... -
Page 29: Screen Display
Screen Display The following information is shown on the home screen. A Status icon display area B Wi-Fi Guide ® Connect devices supporting wireless LAN (Wi-Fi ) to the product by following the instructions on the screen. • For details, refer to “Connecting via Wireless LAN (Wi-Fi ®... - Page 30 G Settings Configure settings for each function of the product. H Power Saving Setting Configure settings for saving the power. I About Device Check information about the product. ◎ Data usage amounts are counted by the product main unit, and are to be used as a guide.
- Page 31 Icons The status icon display area displays status icons to show product status, including signal status and remaining battery capacity. ■ Main Status Icons Icon Overview Signal strength (received signal) : Level : Searching • A small “R” is displayed at the upper left of the signal mark during international roaming.
- Page 32 In this product, communication status and information regarding failures are notified using messages. Label Description Please insert the SIM card. Displayed when there is no au IC Card inserted. Enter PUK code. Displayed when the PIN code is locked. Reach to max PUK retry.
-
Page 33: Basic Operation
Basic Operation ■ To Return to the Previous Screen at the top left of the screen. ■ To Return to the Home Screen at the top right of the screen. - Page 34 ■ To Select Items Tap the items to select. are displayed, tap to select.
- Page 35 are displayed, tap to turn this “OFF”, and tap turn this “ON”. ■ Enter Numbers The number keyboard is displayed depending on the entry field. A Entry field Numbers can be entered B Keyboard Keyboard for entering numbers. C Delete key Delete the number.
- Page 36 ® Connecting via Wireless LAN (Wi-Fi ® Using Wireless LAN (Wi-Fi ® This product is compliant with IEEE802.11a/b/g/n/ac/ax wireless LAN (Wi-Fi ® ® and supports wireless LAN (Wi-Fi ) connection with wireless LAN (Wi-Fi devices (PCs, smartphones, tablets, etc.) for data communications. ®...
- Page 37 Using 5 GHz This product is legally required by the Radio Law to include DFS functionality ® in order to prevent radio interference in the wireless LAN (Wi-Fi ) 5-GHz band. ® The wireless LAN (Wi-Fi ) 5-GHz frequency band used by the product is also used by weather radars and other radio equipment, therefore depending where it is used, the product may interfere with these.
- Page 38 ■ Use on this product On the home screen → [Wi-Fi Guide] → [WPS]. [Start WPS].
- Page 39 ■ Use on wireless devices supporting wireless LAN (Wi-Fi ® Push the WPS button. • Operating methods will differ depending on the device supporting ® wireless LAN (Wi-Fi ). For details, refer to the instruction manual for your ® device supporting wireless LAN (Wi-Fi •...
- Page 40 [Manual Connection] . • The SSID, password, and security (encryption mode) of the product will be displayed. • If using “SSID B”, turn “Enabled” to “ON”. ■ Use on wireless devices supporting wireless LAN (Wi-Fi ® Open the connection settings screen and search for the access point.
- Page 41 ■ 無線LAN初期設定 (Wireless LAN Initialization) sticker (Japanese) To connect the product to devices (PCs, smartphones, tablets, etc.) ® ® supporting wireless LAN (Wi-Fi ) (below: Wi-Fi devices) via wireless LAN ® (Wi-Fi ), entry of the network name (SSID) and the security key (password) is required.
- Page 42 Connecting by Using QR Code ® You can automatically connect devices supporting wireless LAN (Wi-Fi ) to this product by reading the QR code displayed on this product with the camera on the connecting device. Supported operating systems are Android™ 10 or later, and iOS 11 or later. This example describes the procedure for Android 10.
- Page 43 Read the QR code displayed on the product with the camera → Follow the instructions on the screen. The device will be connected to the product. ◎ As for the model of Android 9 Pie and earlier, the QR code reader installed on your Android™...
- Page 44 Communicating via a connected LAN cable (commercially available) You can use the product as a wired router (compatible with 2.5GBASE-T). You can connect it to the Internet via wired LAN connection by connecting the product and an Ethernet port installed device such as your PC with a LAN cable (commercially available).
-
Page 45: Setting Tool
◎ The wired LAN function of the product will be stopped if the communication with connected devices using a LAN cable (commercially available) is not be performed for a set period of time. If you reconnect the cable after the wired LAN function is stopped, press f to turn the screen on. -
Page 46: About Device
About Device You can check information about the product, such as the phone number of the au IC Card inserted in the product and the IMEI information (international mobile equipment identity number). Swipe left on home screen → [About Device]. -
Page 47: Updating Software
Updating Software This product supports updates to its software. To start update, use one of the following methods. ■ Updating the Software Automatically The product will update its software automatically when it receives update information. Swipe left on home screen → [Settings] → [Software Update] →... - Page 48 • When software update is required, you will be notified of this on the au website and through other means. For details, contact an au shop or Customer Center (call toll-free 157). • You are recommended to back up your setting contents before performing an update.
-
Page 49: Troubleshooting
• Is the signal strong enough? “OUT” is displayed • Are you outside of the service area? • Is the correct au IC Card inserted? • Is the signal strong enough? “5G”is not displayed/ • Is your hand off the area around the 5G/4G... - Page 50 If this happens Check this • Has “Screen Lock” been set? Operations are not • Turn the power off, and turn it on again. possible on the keys/ • Is the power on? touch panel • Are you operating the product while wearing Operations on the touch panel are unreliable gloves?
-
Page 51: After Sales Service
◎ When repairing, we may use recycled parts that fulfill our quality standards. ◎ The au product that you have been using, and that has been collected by the replacement mobile phone delivery service will, after refurbishment and repair, be used as a replacement terminal. - Page 52 Warranty in a safe location. ■ Repair and Delivery Support In order that you can use the au device with peace of mind for a long period of time, au provides an after-sales service called “Repair and Delivery Support”...
- Page 53 ■ au IC Card The au IC Card is lent to you by au. In case of loss or damage, the card will be replaced at your expense. When malfunction is suspected, or in case of theft or loss, contact an au shop or Toyota store.
-
Page 54: Regulatory Information
1 Takumi-cho, Sakai-ku, Sakai-shi, Osaka 590-8522, Japan • Description of accessories USB cable For charging, peripherals, etc. nano IC card au Nano IC Card 04 LE/non-au Nano IC Cards non-au Nano IC Cards can be used after SIM-unlocking the device. - Page 55 • Frequency range of supported bands in EU Tx 1922.4 to 1977.6 MHz WCDMA FDD Ⅰ Rx 2112.4 to 2167.6 MHz Tx 882.4 to 912.6 MHz WCDMA FDD Ⅷ Rx 927.4 to 957.6 MHz Tx 1922.5 to 1977.5 MHz LTE Band 1 Rx 2112.5 to 2167.5 MHz Tx 1710.7 to 1784.3 MHz LTE Band 3...
- Page 56 The battery is embedded inside the product. Avoid removing the embedded battery since this may cause overheating or bursting. Do not dispose of the product with ordinary refuse. Take the product to an au Shop, or follow the local disposal regulations.
-
Page 57: Fcc Notice
The guidelines use a unit of measurement known as the Specific Absorption Rate, or SAR.The SAR limit for mobile devices is 2 W/kg and the highest SAR value for this device when worn on the body is 1.90 W/kg*. For body-worn operation, this mobile device has been tested and meets the RF exposure guidelines when used with an accessory containing no metal and positioning the device a minimum of 5 mm from the body. - Page 58 ■ Information to User This equipment has been tested and found to comply with the limits of a Class B digital device, pursuant to Part 15 of the FCC Rules. These limits are designed to provide reasonable protection against harmful interference in a residential installation.
- Page 59 ■ FCC RF Exposure Information Your device is a radio transmitter and receiver. It is designed and manufactured not to exceed the emission limits for exposure to radio frequency (RF) energy set by the Federal Communications Commission of the U.S. Government. The guidelines are based on standards that were developed by independent scientific organizations through periodic and thorough evaluation of scientific studies.
-
Page 60: Dear Customers
Thank you for buying the Speed Wi-Fi 5G X01. We would like to announce the following change made to the content in Quick Start Guide of the Speed Wi-Fi 5G X01. ■ Changes in Edition 1.1 • “Setting Communication Mode/Performance” - “Performance Setting”... - Page 61 スリープ設定 (Sleep Set whether to use the sleep mode. Mode) オフまでの時間 ® Set the time until the Wi-Fi function (Timeout) turns “OFF” automatically while “ス リープ設定” (Sleep Mode) is set to “ON”. at the top left of the screen. [次へ] (Next) ■...
- Page 62 • “Screen Display” (P.28, P.29) Change the home screen. • “Screen Display” - “Icons” - “Main Status Icons” (P.30) old) Icon Overview “Wi-Fi Mode” indicator New) Icon Overview “Wi-Fi Mode” indicator • “Connecting via Wireless LAN (Wi-Fi ® )” - “Using Wireless ®...
- Page 63 • “Connecting via Wireless LAN (Wi-Fi ® )” - “Connecting to the Device by Searching for the Access Point” Step No. (P.39) • The SSID, password, and security (encryption mode) of the old) product will be displayed. New) • The SSID, password, and security (encryption mode) of the product will be displayed.
- Page 64 For inquiries, call: Customer Center For general information (7 days a week / toll free) Business hours: 9:00 to 20:00 From au mobile phones: From non-au mobile phones / general subscriber phones: 0077-7-111 area code not required In case above numbers are not available, call toll-free: 0120‑977‑033 0120‑977‑699 (except Okinawa) (Okinawa) In case of theft, loss, or malfunction (7 days a week / toll free) Business hours: 24 hours From au mobile phones: From non-au mobile phones / general subscriber phones: 0077-7-113 area code not required In case above numbers are not available, call toll-free: 0120‑925‑314 Corporate Customer Center (For corporate contractors) For general information (toll free) Business hours: 9:00 to 19:00 (Weekday), 9:00 to 18:00 (Saturday, Sunday, Holiday) *Except during the year change period From au mobile phones: From non-au mobile phones / general subscriber phones: 0077-7041 0120-925-041 Repair and Delivery Support Center For theft, loss, or malfunction (toll free) Business hours: 9:00 to 20:00 (7 days a week) From au mobile phones / non-au mobile phones / general subscriber phones: 0120-925-919 Cell phone and PHS operators collect and recycle unused ...
Need help?
Do you have a question about the Speed Wi-Fi 5G X01 and is the answer not in the manual?
Questions and answers