Advertisement
Quick Links
Advertisement

Summary of Contents for Canadian Tire 37-1398-2
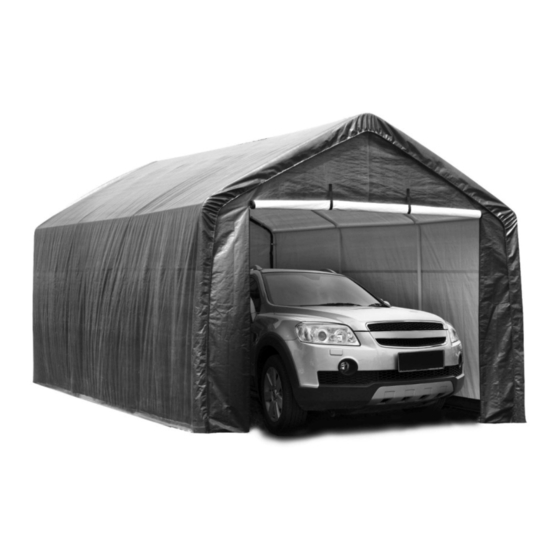
- Page 1 AUTO STORAGE SHELTER INSTRUCTION MANUAL 37-1398-2 10' x 17' x 9' 6" (3 x 5.2 x 2.9 m) 8-Leg Questions? If you have a question or if there are missing parts, please call: 1-866-567-4089 Monday-Saturday 7:00 a.m.-8:00 p.m. EST Please read instructions fully before beginning assembly.
- Page 2 TABLE OF CONTENTS SAFETY INSTRUCTIONS........3 PARTS LIST............4 ASSEMBLY............4-12 LIMITED WARRANTY...........13 - 2 -...
-
Page 3: Safety Instructions
SAFETY INSTRUCTIONS READ THIS PAGE FIRST! ! WARNING! The cover is made of 3-layer polyethylene. Please do not use open flames and heated elements inside or in close proximity to the product (including all types of stoves, gas heaters, gas lanterns, citronella torches, mosquito coils, etc). -
Page 4: Parts List
ASSEMBLY Please read instructions fully before beginning assembly. Note: It is suggested that you have at least one person help you during assembly as some of the steps require heavy lifting. Step 1: Unpack and check the contents of the box. Make sure that you have all the parts described in the below parts list. - Page 5 FRAME ASSEMBLY OVERVIEW Tools (not included with the shelter) required to assemble shelter: 1-Slot screwdriver 1-Rubber mallet (to be used to ensure all pipes are fully inserted). - 5 -...
- Page 6 Step 2: Lay out all the roof assembly parts as shown in Diagram B. Note: Detail C shows the directions of each connector in use. After being installed, the welded socket for cross rail must be below the bend. Step 3: Roof Peak Assembly Note: It is suggested that you have at least one person help you from this point forward during assembly as some of the steps require heavy lifting.
- Page 7 (#3), 3-Way Top Connectors (#5-1) and 4-Way Top Connectors (#6-1). Then complete one side by inserting Rafter Poles (#2) into the Connectors (#5-1 & #6-1), then repeat procedure for the opposite side. Be sure that all pipes insert fully together. Use a rubber mallet or wood dowel when necessary.
- Page 8 Diagram G. D. Repeat step C above for the other side of the structure. See Diagram H. Step 5: Anchor Shelter Note: Make sure the 8 legs are square before anchoring. Base Fastening Stakes (#23) must be used to anchor the shelter. Four fastening stakes are provided with the shelter.
- Page 9 the shelter. Using a small length pipe or a wooden dowel insert it through the eye of the fastening stake.Applying downward pressure and using the pipe or dowel for leverage, twist the fastening stake into the ground until only 3”(7.62 cm) of the stake remains above ground surface.
- Page 10 RATCHET ASSEMBLY INSTRUCTION TIGHTENING Open the Ratchet as shown in the picture below and pass the end of the strapping through the slot of the ratchet spool; pull excess strapping through spool. Then pump ratchet handle - 10 -...
- Page 11 repeatedly to draw strapping tight (Caution: excessive tightening can cause damage to straps and/or anchor point). Tighten ratchet to make final adjustments to cover. Tighten ratchet to make final adjustments. The shelter is now ready for use. Note: Please check periodically and tighten the Ratchet Tie Down as needed. Monthly inspection recommended.
- Page 12 The left picture shows what it looks like after the end panel is tightened. Step 7: Installing Roof Tarp and Lower Cross Rails Note: Please fix the ratchet before installing Roof Tarp. Using the Ropes (#21) for roof tarp assembly. Lay out the Roof Tarp (#18), makeing sure the pockets with black straps should be positioned so they will be located at the shelter front and back ends when assembly is completed.
- Page 13 the back and door panel. Ensure the overhang is approximately equal at each of the ends. If it needs to be adjusted both people pulling together from the same end of the structure to adjust the estimated amount simultaneously or the roof tarp may become twisted. Once satisfied with the placement insert the remaining Cross Rail (#4) through the interior pockets of the roof tarp.
-
Page 14: Limited Warranty
LIMITED WARRANTY This product is guaranteed for 1 year from the date of original retail purchase against defects in materials and workmanship. Subject to the conditions and limitations described below, this product, if returned to us with proof of purchase within the stated warranty period and if covered under this warranty, will be repaired or replaced (with the same model or one of equal value or specification), at our option.
Need help?
Do you have a question about the 37-1398-2 and is the answer not in the manual?
Questions and answers