Table of Contents
Advertisement
Quick Links
- 1 Your Bounti Bp-20/20T/25T/50T/85T at a Glance
- 2 Connecting Your Product to Computer
- 3 How to Install Driver, Utiltiy & User Manual from Wepmyshop
- 4 Download Data Base / Header-Footer from Utility from Computer
- 5 How to Operate
- 6 Using Special Features
- 7 Trouble Shooting
- 8 Report Uploader (for Bp85T/25T Only)
- Download this manual
Advertisement
Table of Contents

Subscribe to Our Youtube Channel
Related Manuals for WeP BOUNTI BP20BOUNTI BP20T


Summary of Contents for WeP BOUNTI BP20BOUNTI BP20T
- Page 1 USER GUIDE BOUNTI BP20/20T/25T/50T/85T Version 1.1.3...
- Page 2 Dear Customer, Congratulations ! You are now a proud owner of BOUNTI BP-20/20T/25T/50T/85T Billing has never been more of a pleasure, designed at the cutting edge of technology BP-20/20T/25T/50T/85T is easy to operate, effortless to maintain with low running costs. Enjoy our fantastic service spread across the country through well networked Authorised Service Providers.
-
Page 3: Table Of Contents
CONTENTS Page # YOUR BOUNTI BP-20/20T/25T/50T/85T AT A GLANCE Features LET'S GET STARTED Unpacking the Product Site Planning Guidelines Power Conditioning Equipment SAFETY PRECAUTIONS OPERATIONS Connecting the Power Supply Connecting your product to Computer Operation of product in Battery Mode Installing Paper Roll How to install Driver, Utiltiy &... -
Page 4: Your Bounti Bp-20/20T/25T/50T/85T At A Glance
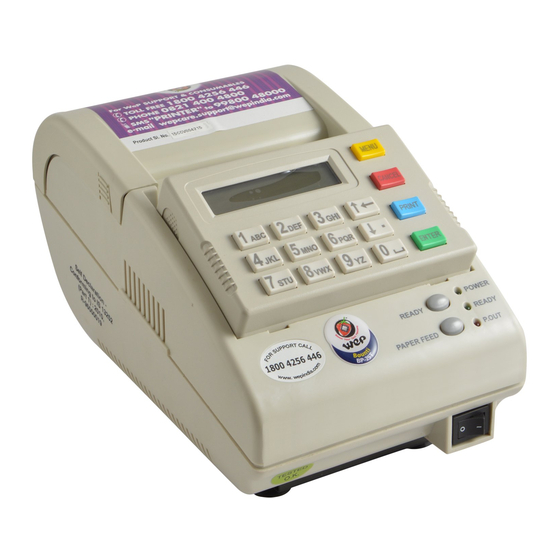
1.0 YOUR BOUNTI BP-20/20T/25T/50T/85T AT A GLANCE Key Pad Ready Switch Paper Feed Switch ON/OFF Switch Front Panel Adaptor Serial Interface Cable Cable Interface 1.1 Features For BP 85T/25T only LCD Module : Displays all transactional entries & data keyed in. Key Pad : It contains alphanumeric and function keys required for item entries, modification and search items in data base. - Page 5 • Download Items, Header/Footer (Shop name, address etc) to printer from utility. • Entering new Items/Header or Footer through Panel. • Search mode for the items, through the panel. • Modify price/TAX/discount of existing item. • Automatic TAX & discount calculation. •...
-
Page 6: Let's Get Started
LET'S GET STARTED 2.1 Unpacking your BOUNTI BP20/20T/25T/50T/85T As you unpack the BOUNTI BP20/20T/25T/50T/85T , check that you have all the parts shown below and that none have been damaged during transportation. BOUNTI BP20/20T/25T/50T/85T 2. Paper roll ( Stationery ) 3. -
Page 7: Operations
4.0 OPERATIONS 4.1 Connecting the Power Supply This product is being equipped with an external Power Adaptor, which works under the following conditions. • Nominal Voltage : 220 VAC • Voltage range : 150 to 270 VAC • Frequency : 47 to 53 Hz CAUTION: Use of an incorrect power supply may cause fire or electrical shock Adaptor Serial Interface... -
Page 8: Installing Paper Roll
4.4 Installing Paper Roll Open the paper cover as shown in below figure. Groove Shaft Paper cover Paper Roll Coated side Paper cover Cup Holder Remove the Groove shaft from Cup holder. Hold the paper roll in hand and place it into cup holder using groove shaft. - Page 9 4.5 How to install Driver, Utiltiy & user manual from Wepmyshop Step 1: Go to following link on browser; For 85 T: https://www.wepmyshop.com/wep-bp-85t-with-batterysmall-all-in-one-billing-printer For 25 T: https://www.wepmyshop.com/wep-bp-25t-with-battery Step 2: Scroll down to Product file option & download the files; Step 1: Open browser and search for www.wepmyshop.com Step 2: Scroll to Retail Billing Solutions>Retail Billing Printers>Thermal.
-
Page 10: How To Install Driver, Utiltiy & User Manual From Wepmyshop
How to install Driver, Utiltiy & user manual from Wepmyshop Step 3: Select the product whose driver/Utility/manual you want to download. Step 4: Scroll down to Product file option & download the files;... -
Page 11: Download Data Base / Header-Footer From Utility From Computer
4.6 Download Data Base / Header-Footer from Utility from Computer • Connect Serial interface cable. • Switch ON the Printer holding the READY button. Display shows: READY TO PROGRAM • Both READY and POWER LED will be glowing. • Ensure BP series driver installed and should be selected as default. •... -
Page 12: How To Operate
4.8 How to Operate ? - Billing Options Billing Option 1 : Billing by quantity option • Enter the item number, item name will be displayed next to the number ITEM NO:1 RICE and press ENTER to proceed • If you want to modify the item number before pressing ENTER (backspace). - Page 13 Billing Option 2 : Rupee Billing option • Enter the item number, item name will be displayed next to the number ITEM NO:1 and press ENTER to proceed RICE • If you want to modify the item number before pressing ENTER (backspace).
- Page 14 Browsing Through Bill • Browsing through the Items in bill is possible before printing the bill • Press up arrow while item number is ready to accept. ITEM NO TOTAL:100.50 • If any Item is present in current bill, the Items will be displayed COCONUT OIL 1.500 Lt 30.00 •...
- Page 15 KOT / Resturent Billing • When KOT and UDF is enabled (UDF Name, Eg. Table No.) • Panel will display TABLE NO: • Enter the Table number you want to give kitchen order tocken (KOT) (eg. 5) • Press ENTER to select item no. •...
- Page 16 • Press 4 to edit & then Press ENTER • Cursor will be blinking on the item you have selected Pk 10 • Press CANCEL to delete that particular item from the KOT list. • Panel will display ARE YOU SURE ENTER/CANCEL •...
- Page 17 MENU STRUCTURE For BP 20 & BP20T Menu Options are given below SETTINGS REPORTS Set Time & Date Detailed Reports Change Password Bill wise Report Common Password Current day Admin Password Previous day Round Off Day wise Report No Round Off Void bill Report Round Off to 50p Current day...
- Page 18 MENU STRUCTURE For BP 50T Menu Options are given below Round Off REPORTS No Round Off Detailed Reports Bill wise Report Round Off To 50p Current day Round Off To 25p Previous day Round Off To 1Re Day wise Report Discount Option Void bill Report No Discount...
- Page 19 MENU STRUCTURE FOR BP 25T/BP 85T Menu Options are given below No Discount REPORTS Item Wise Disc % Detailed Reports Post Tax Disc % Item Bill Report Post Tax Disc Rs Current day Pre Tax Disc % Previous day Bill Format Returned Items Current day Price Change...
- Page 20 Printing Bill wise Report • From menu, select “BILL WISE REPORT” BILL WISE REPORT NEXT ↓ PREV ↑ • Press ENTER ↑ ↓ • Select the current or previous day using up or down arrows. • Press ENTER to print current or previous day Bill wise sales report. Printing day wise report •...
- Page 21 Printing Stock Report • From menu, select “STOCK REPORT” option (Refer Menu structure for more details). STOCK REPORT NEXT ↓ PREV ↑ • Press ENTER to print STOCK REPORT. Note: Stock Report will not print for item which is having zero stock . Printing User Bill Report •...
- Page 22 Printing UDF Item Report From menu select “UDF item report” option • (Refer Menu structure for more details). Panel will display • UDF ITEM REPORT NEXT ↓ PREV ↑ Press ENTER Select the current or previous day using up↑or down ↓ arrows. •...
- Page 23 Printing Yearly report • From menu, select “YEARLY REPORT” option (Refer Menu structure for more details). YEARLY REPORT NEXT ↓ PREV ↑ • Press ENTER • Panel will display ENTER YEAR (YY) • Enter the Year like “YY” • Press ENTER to print Yearly sales report. Note : Total amount in reports are excluding TAX/TAX &...
- Page 24 • Press ENTER • Panel will display CURRENT DAY PREVIOUS DAY NEXT ↓ PREV ↑ NEXT ↓ PREV ↑ ↑ ↓ • Select the current or previous day using up or down arrows. • Press ENTER • Panel will display START - : •...
- Page 25 •Modify TAX% and press ENTER Panel will display DISCOUNT % 10.00 • Modify the discount % & press ENTER • Panel will display NEXT ITEM/EXIT? (ENTER/CANCEL) Press ENTER to modify next item & follow the above steps or Press CANCEL to exit from"EDIT DATA BASE".
- Page 26 PRINT DATABASE NEXT ↓ PREV ↑ • Press ENTER to print all the items stored in the Database. Note : Database printing will have rate printing as per rate slabs configured recently. STOCK UPDATE • From menu Select "STOCK UPDATE" option (Refer Menu structure for more details).
- Page 27 • Panel will display 50.00 Kg NEW QTY- • Enter the quantity for replacing existing stock and press ENTER to continue • To save the stock replacement, press MENU or CANCEL • Panel will display SAVE - ENTER EXIT - CANCEL •...
- Page 28 Set Time & Date • Select SET TIME & DATE from Menu (Refer Menu structure for more details). SET TIME & DATE NEXT ↓ PREV ↑ • Press ENTER • Panel will display TIME:( Hr:Min ) 01:38 • Modify Time using number keys and press ENTER to accept the time •...
- Page 29 Round off selection • From menu, select “ROUND OFF ” option (Refer Menu structure for more details). ROUND OFF NEXT ↓ PREV ↑ • Press ENTER • Panel will display NO ROUND OFF NEXT ↓ PREV ↑ ↓ ↑ Select any one of the following options by using arrows keys.
- Page 30 Cash Reception • From menu, select “CASH RECEPTION ” option (Refer Menu structure for more details). • Panel will display CASH RECEPTION NEXT ↓ PREV ↑ • Press ENTER • "ENABLE' or " DISABLE" can be selected by pressing up arrow or down arrow ( ) keys, ENABLE DISABLE...
- Page 31 Bill Number Type • From menu, select “BILL No. TYPE ” option (Refer Menu structure for more details). • Panel will display BILL NO TYPE NEXT ↓ PREV ↑ • Press ENTER • Panel will display SELECT CONTINUOUS NEXT ↓ PREV ↑ ↑...
- Page 32 UDF Field • From menu, select “UDF FIELD” option (Refer Menu structure for more details). UDF FIELD NEXT ↓ PREV ↑ • Press ENTER • "ENABLE' or " DISABLE" can be selected by pressing up arrow or down arrow ( ) keys, ENABLE DISABLE...
- Page 33 Print User Name From menu select “PRINT USER NAME” option (Refer Menu structure). PRINT USER NAME NEXT ↓ PREV ↑ • Press ENTER • Panel will display • “ENABLE” or “DISABLE” can be selected by pressing up arrow or down arrow ( or ) keys.
- Page 34 ● Select the enable and disable using arrows.. ● After selecting the Enable /Disable option press the ENTER Note:- Reverse tax can be enable after restore defaults. Base price print option: ● From menu select “Base price print” option (Refer Menu structure for more details). ●...
- Page 35 Press ENTER ● Panel will display ENABLE NEXT ↓ PREV ↓ ● Select the enable and disable using arrows. ● After selecting the Enable/Disable option press the ENTER to enable or disable . the bill save when billing. Return Billing: (BP-25T only) ●...
- Page 36 • Press ENTER to continue or press CANCEL to save rate(s) slab & exit. Note : * KOT can be enabled only if UDF is enabled. Restore Defaults • From menu, select “RESTORE DEFAULTS ” option (Refer Menu structure for more details). •...
- Page 37 WAITING FOR COMMAND...… • Press CANCEL to exit from upload mode. Note: Uploading of report from Bounti BP 85 to PC is possible through any of the com ports and the following settings are required. 1. The default printer port: Serial port 4.
- Page 38 Type the password and press ENTER • Panel will display CONFIRM PASSWORD • Type the password once again and press ENTER to accept the new password. • Panel will display CONFIG NEXT USR ENTER / CANCEL; • If you want to configure next user press ENTER or press CANCEL to save the user configuration and exit Header/Footer •...
- Page 39 Note 1: * In header, maximum 40 character per line and 10 lines are allowed (in normal font). *In footer, maximum 40 character per line and 5 lines are allowed (in normal font). Note 2: The different font enhancement can be selected for each and every lines of header/footer. Check for drive “CHECK FOR DRIVE”...
- Page 40 • BILL FORMAT STOCK NEXT ↓ PREV ↑ NEXT ↓ PREV ↑ ITEM DATABASE NEXT ↓ PREV ↑ • Press ENTER to continue. NOTE: Before using the above options, USB device should contain the file from User utility for respective format like stock, Bill format and Item database. Duplicate Bill Printing •...
-
Page 41: Do's & Don'ts
• Type “0” and then press ENTER to enter into calculator mode, • Panel will display TOTAL:0 • Basic functions of calculator like Addition, Subtraction, Multiplication and Division can be selected by MENU Key. Note: • In calculator operation, negative sign related calculation cannot be done. •... -
Page 42: Don'ts
Only use the power cord supplied along with the product. • When connecting or disconnecting the plug, always hold the plug and not the cord. • Always use genuine WeP spare parts only. 5.2 Don'ts • Don't keep the Product near sources of electrical interference like loud speakers, cordless phones, etc., which might induce noise on your... -
Page 44: Technical Specification
TECHNICAL SPECIFICATIONS PRINT Printing method Thermal line dot method (BP 20 Printing Speed 50 mm/sec & BP 20T) 40 mm/sec (BP 50T & BP 85T) Resolution 203 DPI Character Size Small Font: 12 x 25 dots (W x H dots) Big Font: 16 x 30 dots Printing width 48 mm... -
Page 45: Instructions To Use The Usb To Serial Port Converter
5. Genius (slower compared to other models) 3. Logitech K200 Supported Barcode Scanners BP 85T 1. MALACRITY 2806 7. TVS-CCD30 2. POSIFELX CD-3860 8. Wep Scania 9. Honeywell-MS5145 3. Y J3300 hand-held Laser scanner 4. TVSE BS-L101 10. TVSE BS-L101 PLATINA PLUS 5. TVSE BS-C101 STAR 11. -
Page 46: Usb To Serial Converter Configuration Procedure
11.0 USB-to-Serial Converter Configuration Procedure 1. Connect the USB to Serial converter to computer. 2. When user connects the USB to Serial Converter it will ask for install the driver. 3. Install the USB to Serial Converter driver by using driver CD provided with the product. -
Page 47: Report Uploader (For Bp85T/25T Only)
13.0 Report Uploader Now open the Report Uploader utility if installed otherwise install the Report Uploader utility and open it. Now click on the Settings button the below Port Settings window is displayed as shown in the figure & set the serial port to the COM port number to which the USB to Serial Comm port is set. -
Page 48: Appendix
DAY WISE REPORT (DW0123.WEP) VOID BILL REPORT (VB0123.WEP) ITEM WISE REPORT (IW0123.WEP) STOCK REPORT (SR0123.WEP) USER BILL REPORT (UB0123.WEP) TAX REPORT (VW0123.WEP) DPT BILL REPORT (Reprint report) (RP0123.WEP) UDFITEMWISE REPORT (IU0123.WEP) Summary Reports MONTHLY REPORT (MR0123.WEP) YEARLY REPORT (YR0123.WEP) RATE WISE REPORT (RW0123.WEP) UDF WISE REPORT (UW0123.WEP) -
Page 49: New Features Of Bp20/ Bp20T/Bp50T/Bp85T
New features of BP20 / BP20T / BP50T / BP85T How to use the new features of BP20/ BP20T / BP50T 1. Erase database option Menu Item database Erase database. 2. Enable / Disable Rupee symbol By enabling Rupee symbol, Rupee symbol prints in Bill and Item wise report. Menu Settings Bill format Rupee symbol Enable. - Page 50 6. If Reverse Tax is set then MRP or Base Price setting Menu Settings Bill format Base price print Enabled Now it will give actual price of item excluding tax. 7. Service tax amount should not get added to Total TAX value (TAX/Service tax amount separation) Menu Settings Bill format Other charge Enter in %...
- Page 51 ADD On Sheet of BP-85T ADD On Sheet of BP-85T 1. Payment Mode: Menu> Setting> Bill Format> Payment Mode> Enable/Disable. (Refer Menu structure for more details) Payment Mode NEXT PREV Press ENTER “ENABLE” or “DISABLE” can be selected by pressing Up arrow or ↓...
- Page 52 ENABLE DISABLE NEXT PREV NEXT PREV Display will show BILL SAVE OPTION ENABLED ↓ NOTE: In Billing mode to save Bill press Down( ) arrow key. Display will show BILL SAVE WITH OUT PRINT (ENTER/CANCEL) Press ENTER Display will show BILL NO SAVE 3.
- Page 53 3. Weighing Scale and 4 Digit Qty. Supporting weighing Scale machine 5. Eagle 1. Point digi (Bench type and Platform type) 6. Prince 2. Contech (CT series, CJ series and CP series) 7. Phoenix 3. Essae Teraoka 8. Giritronics 4. Sansui Connect the weighing scale through serial cable select Baud rate settings>...
- Page 54 Display shows QTY: ENTER RATE: NOTE: IN ONE BILL 40 ITEMS CAN BE BILL. 7. Item wise Service Tax Menu> Item Database> Add new Item> Item Name> Item Quantity type Item rate1> Item Rate 2> Item Rate 3> TAX %> SER TAX% In the SER TAX% entry mode, Service tax in %age per item can be added or edited.
- Page 55 PRESS ENTER FULL BILL NEXT PREV PRESS ENTER ENABLE NEXT PREV PRESS ENTER DW FULL BILL PRINTING ENABLED NOTE: ONLY FULL BILL WILL BE IN DOUBLE WIDTH. 9.Two Copy Bill Menu> Setting> Bill Format> Two Copy Bill >Enable/Disable. (Refer Menu structure for more details) (Refer Menu structure for more details) SELECT THE TWO COPY BILL display shows TWO COPY BILL...
- Page 56 ITEM NAMEscan through scanner item will show automatically NOTE: Currently supported Barcodes 7. TVS-CCD30 1. MALACRITY 2806 2. POSIFELX CD-3860 8. Wep Scania 3. Y J3300 hand-held Laser scanner 9. Honeywell-MS5145 4. TVSE BS-L101 10. TVSE BS-L101 PLATINA PLUS 5. TVSE BS-C101 STAR 11.
- Page 57 3. Logo Image height can be variable, max is 326 pixels. 4. Maximum Logo Image size is 17.8 Kb. NOTE: LOGO can be add with the help of utility. In every Bill Logo will print in Bill. 12.0% Tax report Make sure for item one is billing it must have 0% TAX.
- Page 58 Previous Day report will be print Note: Other Charges Name can be change (25 Character can be given) 1. Payment mode report. Menu>Reports> Summary Reports> Payment Mode Report (Refer Menu structure for more details) PAYMENT REPORT NEXT PREV PRESS ENTER CURRENT DAY NEXT PREV...
- Page 59 WeP Solutions Ltd. Basappa Complex, 40/A, Lavelle Road, Bangalore - 560 001. India Tel: +91 80 66112000 / 01 visit us at : www.wepindia.com E-mail : enquiry@wepindia.com...
Need help?
Do you have a question about the BOUNTI BP20BOUNTI BP20T and is the answer not in the manual?
Questions and answers