Advertisement
Quick Links
Advertisement

Related Manuals for Singer Instruments PhenoBooth

Summary of Contents for Singer Instruments PhenoBooth
- Page 1 USER GUIDE v1.5...
- Page 2 · Keep your hands clear while the input tray is moving. Catching your hands in the input tray may cause injury. · Make sure the PhenoSuite and PhenoBooth light settings match. When capturing an image in PhenoSuite, be sure to match the settings on the PhenoBooth’s blackout slider.
- Page 3 The PhenoBooth can image standard SBS plates, Petri dishes and Singer PlusPlates. USER GUIDE Follow these instructions to get the most out of the PhenoBooth. This guide outlines getting started and general operation, as well as PhenoSuite tutorials for each package.
- Page 5 OUT OF THE BOX Find out what comes with the PhenoBooth. We’ll take you through the steps involved in unboxing and assembling ready for the exciting world of colony imaging! singerinstruments.com...
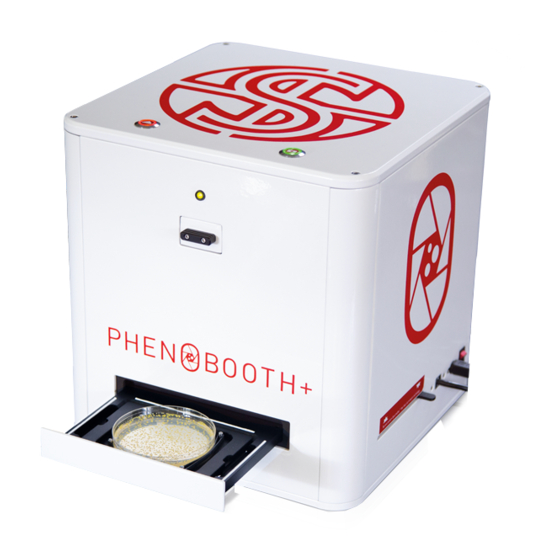
- Page 6 ANATOMY & FEATURES PHENOBOOTH Input tray Capture function button function button Filter tray Power switch Power socket USB 3.0 socket Input tray Feedback light Blackout screen...
- Page 7 PHENOSUITE Menu bar Stage selection Plate information Progress bar Plug-in tools General tools Last task completed Plate preview Current plate Plug-ins Plug-in information singerinstruments.com...
-
Page 8: Minimum Requirements
4. After installation, PhenoSuite will start automatically and ask for organisation name and licence code 5. Enter the organisation name and licence code that came with your PhenoBooth packing documents and click Activate 6. After activation PhenoSuite will automatically download and install dependencies... - Page 9 · HEAVY: May require 2 people. · Insert power supply and turn on the power switch. · Insert the USB cable into the PhenoBooth USB 3.0 · WARNING: Make sure the arrow diagram is on top socket and to the your computer.
-
Page 11: Let's Start
LET’S START! I’m ready to start! Here is a quick run-through of how to use the PhenoBooth and get started with PhenoSuite — it’s all very simple! singerinstruments.com... - Page 12 PHENOBOOTH OPERATION · Press the input tray function button to open the · Remove the lid from your plate and place the plate input tray. into the input tray. · WARNING: Ensure plate is nestled correctly to avoid a hardware crash.
- Page 13 PHENOSUITE OPERATION - NEW PROJECT · Open PhenoSuite and select New Project. Select the type of project you want to create from the icons. Icons will vary depending on which PhenoSuite packages you have purchased. Your chosen project type is highlighted in red. ·...
- Page 14 · Select the desired method from the plug-in panel on the right of the screen. · If using a PhenoBooth, click on that tab and enter the plate information. Select your desired light settings. Also select whether the plate is a control or experiment.
- Page 15 · If using existing images, click the Image Import tab. Here you can select which run the plate images will be associated. If this is your first run then Run 1 will be the only option. See p.50 to add new runs. ·...
- Page 17 COLONY COUNTING PROJECT Colony Counting is the basic package included with PhenoSuite. There are 4 stages in the Colony Counting package: Image Acquisition, Pre- processing, Detection and Filtering. singerinstruments.com...
- Page 18 COLONY COUNTING - PRE-PROCESSING · Once you’ve acquired your images using the steps on p.14, select which image to process first. If using the batch process option, this plate’s settings will be applied to the rest of the plates in the run. ·...
- Page 19 COLONY COUNTING - DETECTION · In order to generate colony information, the background needs to be removed. · Click the Background Subtraction plug-in tab and you will see a preview of the default subtraction. · Use the slider to adjust the filter intensity if necessary. ·...
- Page 20 COLONY COUNTING - FILTERING · Detected colonies are highlighted with a red circle. turns these highlights on or off. · You can use the filter options to set maximum and minimum sizes for colony detection, discarding items that are too large or small to be colonies. Click the Update button to apply.
- Page 21 COLONY COUNTING - FILTERING · Hover over a colony to see it’s size, circularity and colour properties in the Colony Info plug-in tab. singerinstruments.com...
- Page 23 SGA PROJECT The SGA package includes all the plug-ins you need for Synthetic Genetic Array analysis, such as size and circularity filters, plate normalisation, gene mapping, control / experiment comparison and heat map visualisation. There are 6 stages in the SGA package: Image Acquisition, Pre- processing, Detection, Filtering, Analysis and Visualisation.
- Page 24 SGA - PRE-PROCESSING · Once you’ve acquired your images using the steps on p.14, select which image to process first. If using the batch process option, this plate’s settings will be applied to the rest of the plates in the run. ·...
- Page 25 SGA - DETECTION · In order to generate colony information, the background needs to be removed. · Click the Background Subtraction plug-in tab and you will see a preview of the default subtraction. · Use the slider to adjust the filter intensity if necessary. ·...
- Page 26 SGA - FILTERING · Detected colonies are highlighted with a red circle. turns these highlights on or off. · You can use the filter options in the Size Filter plug-in tab to set maximum and minimum sizes for colony detection, discarding items that are too large or small to be colonies.
- Page 27 SGA - ANALYSIS · To analyse colony growth difference between your current plate and it’s control/ experiment plate, select the Growth tab and click Analyse. · Now when you place the cursor over a colony, the growth information for the control and experiment plate will be compared.
- Page 28 SGA - VISUALISATION · To see a heat map of colony growth, select the Heat Map tab, choose to generate maps for all plate images or manually selected images, then click Visualise. · Boom! You can now see growth heat maps for your selected plates. ·...
- Page 29 singerinstruments.com...
- Page 31 RCP PROJECT The RCP package allows you to select individual colonies and export their coordinated to be picked using the Singer ROTOR. This section will guide you through the RCP package for selection as well as the ROTOR software steps for picking. There are 5 stages in the RCP package: Image Acquisition, Pre- processing, Detection, Filtering and Stinger Export.
- Page 32 RCP - PRE-PROCESSING & DETECTION · In the Crop plug-in, select Guided Select. · Press Crop to crop the image to the guides. · Move to Filtering. · Select the Background Subtraction plug-in to remove the background. · Use the preview window to view colonies. Move the filter bar if necessary to adjust the filter intensity.
- Page 33 RCP - FILTERING · Use the Maximum and Minimum Sliders in the Sizer Filter plug-in tab to select colonies of a certain size. In this example we have selected colonies between 10- 39 pixels. · Press Update to apply the size range. Selected colonies are highlighted in red. ·...
- Page 34 RCP - STINGER EXPORT · Use the Stinger plugin to export colony locations for picking. · Select the density you want the colonies arrayed in (96, 383, 1536 or 6144), select the file location and then press Export. · The file will need to be saved to a USB stick so it can be transferred to the ROTOR HDA.
- Page 35 Now head over to the ROTOR HDA. Please make sure The Stinger single colony picker is installed. singerinstruments.com...
- Page 36 ROTOR HDA / THE STINGER · Turn on the ROTOR and ensure that The Stinger is installed. · On the ROTOR start-up screen you will be asked to select an operation mode. Select the Programming /Stinger option. · Select the option labelled Stinger. ·...
- Page 37 · This screen will appear if no USB memory stick is inserted. Insert your USB memory stick now. · Once your USB memory stick has been inserted, all .csv files in the root directory are displayed. Memory stick Files available ·...
- Page 38 · The final confirmation screen will appear. Click on the tabs to change advanced options if necessary. · Select OK to start program. · Live program information will be updated throughout the operation. · Program: resume, pause, stop / abort. SOURCE PLATE TARGET PLATE...
- Page 39 singerinstruments.com...
-
Page 41: Best Practice
BEST PRACTICE We want you to have a trouble-free time with your PhenoBooth so we’ve assembled some handy hints, tips and troubleshooting answers to keep you on the straight and narrow. singerinstruments.com... - Page 42 ZOOM PERCENTAGE. Selects zoom percentage of current plate. PLUG-IN TOOLS PHENOBOOTH CAPTURE. AUTO SELECT CROP AREA. Capture a plate image using the Automatically detects the area of PhenoBooth. the plate to be cropped based on default values.
-
Page 43: Lighting Options
NOTIFICATIONS CONNECT PHENOBOOTH. CONNECTION PROBLEM. There PhenoBooth needs to be is a problem with the PhenoBooth connected. connection. Try reconnecting the USB 3.0 cable less slowly, see p.2. LIGHTING TIMED OUT. If left TRAY CRASH. The input tray has for too long the lighting goes on crashed. - Page 44 FEEDBACK LIGHT GREEN. All okay FLASHING RED FAST. Tray crash, awaiting eject button from user to re-home tray position. RED / GREEN ALTERNATING. No USB connection to PC detected.
- Page 45 BATCH PROCESSING · Using the same settings for all plate images in a run will not only increase the speed of analysis but also ensure consistent and reliable information. A good time to batch process all of your plates is after all filtering and measuring has taken place.
- Page 46 EXPORT · Export options are found in the Export tab. You can choose to export all plates or manually selected plates, and choose processed images or original images. · Image formats available are: .bmp, .jpeg, .png or .tiff. · The export includes: plate image, heat map image and text files containing all colony information.
- Page 47 HISTORY PLUG-IN · If you want to undo the last change you made, simply click the undo button · If you want to go back further then use the History plug-in. Open the History plug-in tab and select the process you want to revert back to. The list is in chronological order with the most recent process at the top.
- Page 48 · To add a new run, simply click Add Run in the Plate Preview section on the left of the screen. · When acquiring images, whether capturing using a PhenoBooth or importing existing images, you’ll be asked to select which run you want your images to be filed under.
- Page 49 CHANGE HEAT MAP COLOURS · Not everyone sees colours in the same way. That’s why PhenoSuite heat maps have 9 different colour blindness options. To change your colour settings press Alt+P or go to File>Options in the top left menu. ·...
- Page 50 · Remove filter tray fully. · Place the desired filter into the end filter slot. · The PhenoBooth accepts standard 25mm circular filters with a maximum height of 5mm. · Reinsert the filter tray fully until you feel the click.
- Page 51 NOTES singerinstruments.com...
- Page 52 NOTES...
- Page 53 NOTES singerinstruments.com...
- Page 54 Roadwater, Watchet, Somerset. TA23 0RE +44 (0)1984 640226 (tel) +44 (0)1984 641166 (fax) contact@singerinstruments.com singerinstruments.com SCAN TO VISIT WEBSITE FOR MORE HELPFUL TIPS AND TUTORIALS!
Need help?
Do you have a question about the PhenoBooth and is the answer not in the manual?
Questions and answers