Advertisement
Quick Links
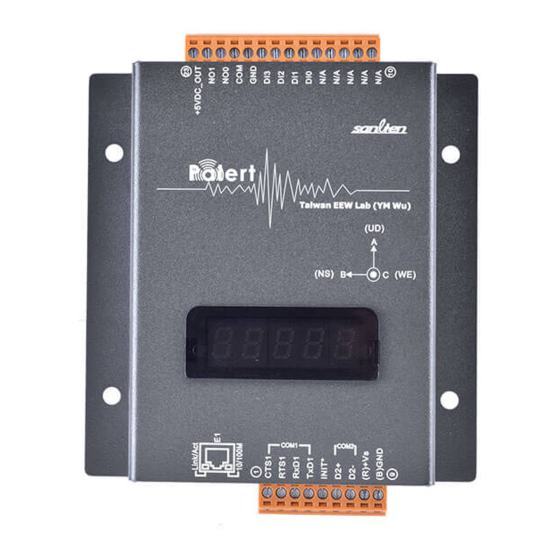
P-alert Earthquake
P-wave Detector
Hardware System Installation Instruction
•Version 1.01 2015/03.18
•Automation Division, San Lien Technology Crop.
•3F, No.190, Sec. 2, Zhongxing Rd., Xindian Dist.,
New Taipei City, 23146 Taiwan.
•TEL:886-2-86659813 FAX:886-2-86659814
Advertisement

Related Manuals for Sanlien P-alert

Summary of Contents for Sanlien P-alert
- Page 1 P-alert Earthquake P-wave Detector Hardware System Installation Instruction •Version 1.01 2015/03.18 •Automation Division, San Lien Technology Crop. •3F, No.190, Sec. 2, Zhongxing Rd., Xindian Dist., New Taipei City, 23146 Taiwan. •TEL:886-2-86659813 FAX:886-2-86659814...
- Page 2 Install PALERT Hardware Basic Environment Required: 1. Power: 110 v indoor power 2. Ethernet : RJ45 port with IP address attached 3. Sturdy Building (ex: Wall, Beam, column) Installation Items Required: 1. PALERT 2. DC24V Adaptor 3. RJ45 Ethernet Cable (There jumper cable network can connect PC with PALERT directly, or you must go through HUB) 4.
- Page 5 Installation steps: 1. Find the north direction of the installed room. the PALERT b-axis will be aligned that direction.
- Page 6 2. Select the wall (column) that PALERT wants to fixed on it. To determine the true seismic wave, suggest the wall installed should be concrete or SRC material. Sturdy wall can makes seismic wave performance better!!
- Page 7 3. Using bubble level meter measure the leveling of PALERT frame fixed place.
- Page 8 4. Marking 4 dots with pen through frame hole and drill the 4 holes at that dots by automation screw driver.
- Page 9 5. Hit plastic (metal) anchor screws into the drilled hole, than locked the PALERT frame on the wall with common screw. (see as next page)
- Page 10 Outsides the wall: Insides the wall : The sequence form inner to outer wall are plastic anchor screw, wall, common screw.
- Page 11 5. Screwing the SHCS screw between the back board and the frame. Frame Back Board...
- Page 12 5. Locking the PALERT on the back board with the M4 screws.
- Page 13 6. Connect the power and Ethernet cable and then finished the PALERT hardware installation.
Need help?
Do you have a question about the P-alert and is the answer not in the manual?
Questions and answers