Table of Contents
Advertisement
Advertisement
Table of Contents

Related Manuals for AML ez1073pre

Summary of Contents for AML ez1073pre
- Page 1 Mic Amplifier - Assembly manual [“Colourbook” Issue 1c]...
- Page 2 “Colourbook” Contents. Section 1 - “Colourbook” assembly guide Section 2 - Setup and Calibration Section 3 - Schematics diagrams and PCB Overlays Section 4 - Parts List...
- Page 3 “Colourbook” revision history Revision 1 - initial release Revision 1a: Parts list correction of rotary switch type Better PCB prep instructions Correction to heatsink fitting instructions Clarification of sub card identification Removal of protective coating from chassis Revision 1b: Change to knob fitting instruction - now uses ring nut...
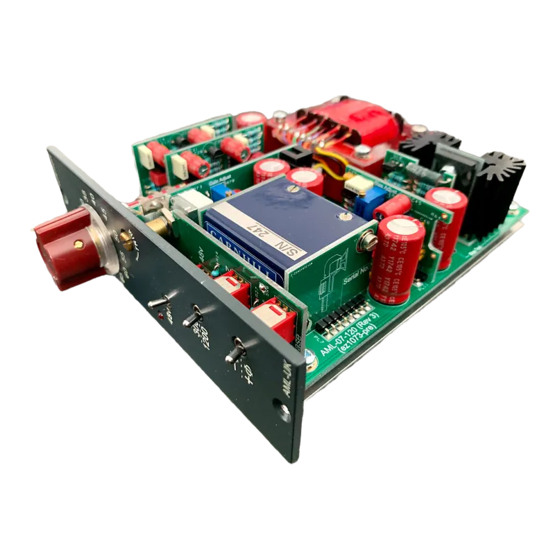
- Page 4 PCB Preparation Surge Control PCB Output Stage PCB Carefully snap apart the 10 PCB’s into individual boards and trim or file off any excess tabs. Ensure that the 2 areas highlighted are filed / trimmed completely flat Gain Stage 2 PCB Input Transformer PCB 1 Trim Pot PCB Switch PCB...
- Page 5 Output Termination Place a “blob” of solder across the two pads (SW6) for 600 Ohm termination Switch PCB...
- Page 6 Diodes D2, D3, D4 & D5 = 1N4007...
- Page 7 Resistors R24 = 1R0 R25 = 2R2 R21 = 5R6 R23 = 10R...
- Page 8 Resistors R19 = 82R R20 & R22 = 100R R10 = 120R R9 = 330R...
- Page 9 Resistors R39 & R52 = 390R R34, R47, R65, R69 & R71 = 470R R8 = 510R R27 = 620R...
- Page 10 Resistors R1 = 1k0 R59 = 1k2 R26, R35 & R48 = 1k5 R16, R40, & R53 = 1k8...
- Page 11 Resistors R17 & R60 = 2k0 R38, R51 & R56 = 2k2 R13 & R14 = 2k7 R11, R12 & R18 = 3k3...
- Page 12 Resistors R2 & R15 = 3k9 R3 = 4k3 R31, R44 & R74 = 5k1...
- Page 13 Resistors R28, R36, R49 & R68 = 10k R7 = 12k R37 & R50 = 15k R6 & R63 = 18k...
- Page 14 Resistors R32, R45 & R61 = 33k R72 = 39k R33 & R46 = 47k R41 & R54 = 51k...
- Page 15 Resistors R55 & R66 = 56k R30, R43 & R57 = 68k R29 & R42 = 120k R4 & R5 = 6k81 / 0.1%...
- Page 16 Resistors R67 = 47R / 3Watt R62 & R64 = Omitted (leave empty)
- Page 17 Ceramic C11 = 47pF Capacitors C17 & C28 = 100pF C1 = 180pF C12, C13 & C39 = 220pF...
- Page 18 Ceramic C46 = 330pF Capacitors C5, C8, C16, C20, C30, C32, C47 & C48 = 100nF CL1 & CL2 = 100pF 3 Terminal L/C Network F1 & F2 = Ferrite Bead...
- Page 19 Film C18 & C29 = 680pF Capacitors C24 & C36 = 1n0F C15 & C27 = 1n5F C41 = 4n7F...
- Page 20 Film C14 = 10nF Capacitors C9 = 100nF and Relay RL1 = 24 Volt DPCO relay C10 = 330nF...
- Page 21 Not orientations of positive terminals Electrolytic C19, C21, C23, C25, C31, C33, C35, C37, C40 & C50 = 22uF / 63v (10) differ Capacitors C22, C34, C43, C44 & C45 = 100uF / 25v C26, C38 & C49 = 470uF / 16v C42 = Omit (nothing fitted) (1)
- Page 22 Trimmers and Molex R58 & R70 = 5k0 (2) - Side adjust style Molex KK Series - 8 way Tab towards output transformer...
- Page 23 Headers J4 = 10 Way Box Header Fit a jumper between pins 3 & 4 of header J4 as shown PL 28 = 2 Pin header Do NOT fit a jumper to PL28...
- Page 24 Small Signal Transistors Q2, Q3, Q4, Q5, Q6, Q7, Q8, Q9 & Q10 = BC550C (NOTE ORIENTATIONS)
- Page 25 Pot and switches Important: The toggle switches are SW2, SW3, SW4 = 2 Position DPDT (on-on) surprisingly sensitive to heat... solder one pin on each switch and then SW1 = GR-03-001 (1) - 12 position, 1 pole, 3 gang allow to cool before continuing. R73 = 2 gang 10kA Make sure that the toggle switches are seated perfectly so that they are...
- Page 26 Fit pin headers to PCBs 1 x 8-way & 1 x 10-way (Switch PCB) Assembly Tip: 1 x 4-way & 1 x 2-way (Trim Pot PCB) Use a jumper (like that fitted to J4) to hold the header in 1 x 4-way (Surge Control PCB) place...
- Page 27 Transistor and Regulator Q1 = TIP3055 Transistor U1 = MC7808 Regulator HS1 = Heatsink MC8708 TIP3055 + TO247 insulator + TO220 insulator + heathink insulator PCB (bush not required) (with bush) Check Vertical Solder fully Insert heatsink through Tack in place first then check insulator PCB Heatsink Insulator they are vertical before...
- Page 28 Input Transformer Assembly and Fitting (VTB9045) Original brass screws Longer steel screws...
- Page 29 Switch PCB Fitting Assembly Tip: Solder only a couple of pins Insert switch PCB until you have fitted the trim pot PCB (next page)... just in into main PCB case it needs a little nudge ensuring that it is to get them alligned. perpendicular and solder in place.
- Page 30 Trim Pot PCB Fitting Assembly Tip: The bush of the pot slots Insert Trim Pot PCB into the top of the switch into main PCB ensuring that it is perpendicular and solder in place. After Soldering the trim pot PCB to the main PCB, fit the pot nut until it JUST TOUCHES the front of the switch pcb, the apply solder...
- Page 31 Amplifiers and surge Assembly Tip: Gain stage 1 & 2 are identical control PCB Fitting however they have different Insert the amplifiers component idents. and surge control PCBs PL18 & PL19 are on Gain Stage 1 into main PCB PL20 & PL21 are on Gain Stage 2 ensuring that it is perpendicular and solder in place.
- Page 32 Large C2, C3, C4, C6 & C7= 1000uF / 35v All positive terminals towards left Electrolytic Capacitors...
- Page 33 Rotary Switch Adjustment Pin Fit pin in position shown then apply the self adhesive silver washer over the pin holes to stop the pin coming out. [Discard the nut and shakeproof washer]. **** Make sure the spindle is in the position shown before fitting pins **** [0 clicks up from factory setting] Fit pin at “12 O’clock”...
- Page 34 48v LED installation Fit the 48v indicator LED to the solder side of the PCB such that the base of the LED aligns with the front edge of the PCB. “Flat” of LED BACK OF PCB Long Leg gn front edge of LED base..with edge of PCB...
- Page 35 Chassis Assembly 1] Remove the protective plastic coating from the chassis. 2] Secure faceplate to chassis with 2 x M3 Nyloc Nuts 2 x M3 Nyloc nut Secure PCB to chassis with 5 x M3x8 Sems screws...
- Page 36 Install the ring nut for the rotary switch. (Tighten the 2 screws using a small screwdriver - do not over-tighten) [The shakeproof washer is not required]. ez1073-pre ez1073-pre 20 25 30 20 25 30 Rotate the switch shaft fully counter-clockwise... 1200 1200 AML-UK AML-UK...
- Page 37 Output Transformer Assembly and Fitting VERY IMPORTANT: T2 = VTB2569 (1) Assembly Tip: Do NOT tighten the screws very tight... It is usually easier to plug in use a thread locking adhesive applied to the molex connector before screwing the transformer in the end of the screw.
- Page 38 Calibration / Setup 1 ] Before powering up the module, turn the “Bias Adjust” trimmer R58 fully counter-clockwise (about 10 turns) 2 ] Power up module, measure the DC voltage between bias test points TP1 & TP2 [It should typically measure about 40-50 mV (after relay clicks)] 3 ] Slowly turn the “Bias Adjust”...
- Page 39 Gain Stage Sub Assembly V Ref Neg Agnd Output Stage Sub Assembly Agnd V Ref Neg Audio Maintenance Limited E-Mail: service@audiomaintenance.com Title ez1073-pre Number AML-07-120 Date 9th Nov. 2017 Drawn by C Adshead File AML-07-120 - rev3 Sheet 1 of 1...
- Page 40 VTB9045 Gain Adjust...
- Page 43 Regulator Resistor 0.25W 3k3 R11-12, R18 7808 Resistor 0.25W 2k7 R13-14 Resistor 0.25W 1k8 R16, R40, R53 Resistor 0.25W 2k0 R17, R60 Capacitors Resistor 0.25W 82R Cap Plate 0.1 Pitch 180pF Resistor 0.25W 100R R20, R22 Cap Pol 0.2 (12.5mm Daimeter) 1000uF/35v C2-4, C6-7 Resistor 0.25W 5R6 Cap Plate 0.1 Pitch...
Need help?
Do you have a question about the ez1073pre and is the answer not in the manual?
Questions and answers