Advertisement
Quick Links
Advertisement

Related Manuals for AML ezP-1A

Summary of Contents for AML ezP-1A
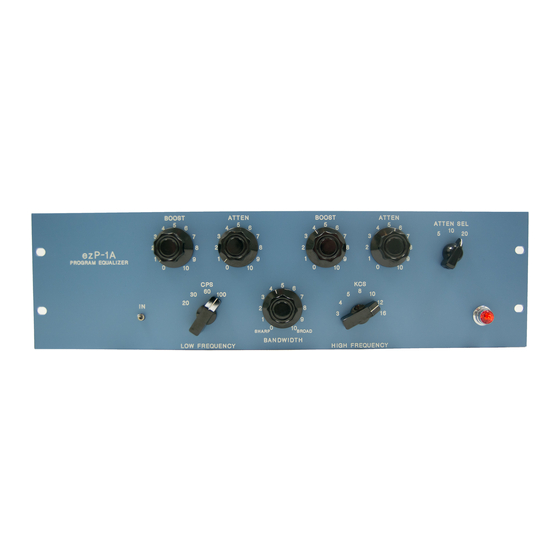
- Page 1 Passive Program Equalizer - Assembly manual [“Colourbook” Issue 1a]...
- Page 2 Warning! This kit has the potential to be connected to, or generate, high voltages and currents, and high localized temperatures that could cause injury or death to the assembler, operator or end user. This kit is solely intended as study material for aesthetic and educational purposes. However, should the assembled kit be accidentally or deliberately connected to a source of mains electrical power, potentially lethal voltages and currents could exist within the assembled unit. This kit must only be assembled by a suitably experienced and qualified electrical or electronic engineer under proper supervision and with suitable safety precautions in place.
- Page 3 “Colourbook” Contents. Section 1 - “Colourbook” assembly guide Section 2 - Schematics diagrams and PCB Overlays Section 3 - Parts List...
- Page 4 “Colourbook” revision history Revisions 1 to 1a; Updated to Revision 4 Gain stage PCB (Gain adjustment trimmer added)
- Page 5 Diodes and Zeners D1, D2, D3 & D4 = 1N4007 ZD1 = 15v Zener ZD2 = 160v Zener ZD3 = 180v Zener AML-07-102 (Rev 4) VTB2425 ezP-1A / ezMEQ5 (PSU/Gain Stage) Yellow Green Violet Blue Grey Orange Pink 115v 230v...
- Page 6 Resistors R37, R44 & R47 = 0R R31, R32 & R35 = 1R0 R41 = 10R AML-07-102 (Rev 4) VTB2425 ezP-1A / ezMEQ5 (PSU/Gain Stage) Yellow Green Violet Blue Grey Orange Pink 115v 230v Blue/Yellow Brown White Danger - Lethal voltages may exist for...
- Page 7 Resistors R10, R15 & R39 = 360R R1, R3, R11, R45 & R46 = 620R R14, R38 & R42 = 1k0 AML-07-102 (Rev 4) VTB2425 ezP-1A / ezMEQ5 (PSU/Gain Stage) Yellow Green Violet Blue Grey Orange Pink 115v 230v Blue/Yellow...
- Page 8 Resistors R9 & R12 = 2k0 R16, R17, R23 & R24 = 2k2 R8 & R13 = 2k7 R2 = 43k AML-07-102 (Rev 4) VTB2425 ezP-1A / ezMEQ5 (PSU/Gain Stage) Yellow Green Violet Blue Grey Orange Pink 115v 230v Blue/Yellow...
- Page 9 R18 & R43 = 47k R20 & R40 = 62k R4, R5, R6, R7, R21, R25, R28, R29, R33 & R34 = 100k (10) R27 & R30 = 120k AML-07-102 (Rev 4) VTB2425 ezP-1A / ezMEQ5 (PSU/Gain Stage) Yellow Green Violet Blue Grey...
- Page 10 Resistors R26 & R36 = 150k R19 & R22 = 1M0 F1 & F2 = Ferrite Bead AML-07-102 (Rev 4) VTB2425 ezP-1A / ezMEQ5 (PSU/Gain Stage) Yellow Green Violet Blue Grey Orange Pink 115v 230v Blue/Yellow Brown White Danger - Lethal voltages may exist for...
-
Page 11: Ceramic Capacitors
Ceramic C5 = 22pF Capacitors C2 = 47pF C1, C3 = 220pF C4 = 680pF C23 = 100nF AML-07-102 (Rev 4) VTB2425 ezP-1A / ezMEQ5 (PSU/Gain Stage) Yellow Green Violet Blue Grey Orange Pink 115v 230v Blue/Yellow Brown White Danger - Lethal voltages may exist for... - Page 12 Film C9 = 3n3F Capacitors C17 & C18 = 100nF and Trimmer C21 & C24 = 1uF VR1 = 500R Top Adjust Trimmer AML-07-102 (Rev 4) VTB2425 ezP-1A / ezMEQ5 (PSU/Gain Stage) Yellow Green Violet Blue Grey Orange Pink 115v...
- Page 13 C13 & C20 = 100nF / 400v Capacitors C6 & C7 = 270nF / 250v & Transistors CL 1 & CL2 = 100pF C/L Network Q2 & Q3 = KSP44 AML-07-102 (Rev 4) VTB2425 ezP-1A / ezMEQ5 (PSU/Gain Stage) Yellow Green Violet Blue Grey Orange...
- Page 14 PL1 = 12 Way PL2 = 5 Way PL3 = 3 Way Latch PL4 = 2 Way 24v Lamp Terminals = 0.25in spade terminal AML-07-102 (Rev 4) VTB2425 ezP-1A / ezMEQ5 (PSU/Gain Stage) Yellow Green Violet Blue Grey Orange Latch towards rear...
- Page 15 Valve Sockets V1 & V2 = 9 Pin Valve Socket BR1 & BR2 = KBSP08 Bridge Rectifier Positive terminal to the left (it has a longer lead) AML-07-102 (Rev 4) VTB2425 ezP-1A / ezMEQ5 (PSU/Gain Stage) Yellow Green Violet Blue...
- Page 16 After fitting, select the appropriate voltage. Slide to Left = 110v/120v operation Slide to Right = 220v/240v operation FS2 = 250mA Anti-surge Fuse (32mm x 6.3mm) AML-07-102 (Rev 4) VTB2425 ezP-1A / ezMEQ5 (PSU/Gain Stage) Yellow ***Note orientation*** Green Violet...
- Page 17 Large Capacitors C14, C19 & C22 = 1000uF / 16v Positive terminals towards left C11 & C12 = 47uF / 450v Positive terminals towards left AML-07-102 (Rev 4) VTB2425 ezP-1A / ezMEQ5 (PSU/Gain Stage) Yellow Green Violet Blue Grey Orange...
- Page 18 2 x 500mA Anti-surge (20mm x 5mm) For 110v operation use 2 x 1000mA Anti-surge (20mm x 5mm) Bend over pins M3 x 10mm Pan Head (2) AML-07-102 (Rev 4) VTB2425 ezP-1A / ezMEQ5 (PSU/Gain Stage) Yellow Green Violet Blue Grey...
- Page 19 *** Note orientation **** Check Vertical Tack in place first then check they are vertical before Solder fully soldering completely. Tack in place. AML-07-102 (Rev 4) VTB2425 ezP-1A / ezMEQ5 (PSU/Gain Stage) Yellow *** Note orientation *** Green Violet Blue Grey Orange...
- Page 20 AML-07-102 (Rev 4) VTB2425 ezP-1A / ezMEQ5 (PSU/Gain Stage) Yellow Green Violet Blue Grey Orange...
- Page 21 If possible, lift the transformer about 2mm above the PCB when soldering so that there is a small gap between the transformer and PCB. This will make the transformer easier to remove if there is a fault. AML-07-102 (Rev 4) VTB2425 ezP-1A / ezMEQ5 (PSU/Gain Stage) Yellow Green Violet...
-
Page 22: Output Transformer
J1 = Female XLR and XLR’s J3 = Male XLR Push Hard ! M3 x 4mm unthreaded spacer T3 = VTB2425 M3 x 30mm Pan head screw AML-07-102 (Rev 4) VTB2425 ezP-1A / ezMEQ5 (PSU/Gain Stage) Yellow Green Violet Blue Grey Orange Pink... -
Page 23: Mains Transformer
V1 = ECC83 / 12ax7 M4 Shakeproof Washer Do not overtighten the M4 screw at this stage. V2 = ECC82 / 12au7 M4 x 16mm Pan head screw AML-07-102 (Rev 4) VTB2425 ezP-1A / ezMEQ5 (PSU/Gain Stage) Yellow Green Violet Blue Grey... - Page 24 Blue Violet Green Yellow Build Date: Built By: Orange AML-07-095 (Rev 3) - Part 1 of 2 S/N: ezP-1A Passive Filter / Controls Not for commercial use Brown Build Date: AML-07-095 (Rev 3) - Part 2 of 2 Built By:...
- Page 25 Blue Violet Green Yellow Build Date: Built By: Orange AML-07-095 (Rev 3) - Part 1 of 2 S/N: ezP-1A Passive Filter / Controls Not for commercial use Brown Build Date: AML-07-095 (Rev 3) - Part 2 of 2 Built By:...
- Page 26 Blue Violet Green Yellow Build Date: Built By: Orange AML-07-095 (Rev 3) - Part 1 of 2 S/N: ezP-1A Passive Filter / Controls Not for commercial use Brown Build Date: AML-07-095 (Rev 3) - Part 2 of 2 Built By:...
- Page 27 Blue Violet Green Yellow Build Date: Built By: Orange AML-07-095 (Rev 3) - Part 1 of 2 S/N: ezP-1A Passive Filter / Controls Not for commercial use Brown Build Date: AML-07-095 (Rev 3) - Part 2 of 2 Built By:...
- Page 28 Green Build Date: Yellow Yellow Built By: Orange Orange AML-07-095 (Rev 3) - Part 1 of 2 S/N: ezP-1A Passive Filter / Controls Not for commercial use Brown Build Date: AML-07-095 (Rev 3) - Part 2 of 2 Built By:...
- Page 29 Green Yellow Yellow Build Date: Built By: Orange Orange AML-07-095 (Rev 3) - Part 1 of 2 S/N: ezP-1A Passive Filter / Controls Not for commercial use Brown Build Date: AML-07-095 (Rev 3) - Part 2 of 2 Built By:...
- Page 30 Green Yellow Yellow Build Date: Built By: Orange Orange AML-07-095 (Rev 3) - Part 1 of 2 S/N: ezP-1A Passive Filter / Controls Not for commercial use Brown Build Date: AML-07-095 (Rev 3) - Part 2 of 2 Built By:...
- Page 31 Rotary Switch Adjustment Pins Fit pins in positions shown then apply the self adhesive silver washers over the pin holes to stop the pins coming out. **** Make sure the spindles are in the position shown before fitting pins **** [Just in case they have been accidentally rotated during switch fitting] HF Freq pins at...
-
Page 32: Chassis Assembly
Chassis assembly Fit the 4 angle brackets to the front and rear panels using 1 x flat washer and 1 x plain nut (provided). At this stage just fit them “finger tight”. M4 Plain Nut Attach the earth cable to the captive stud on the rear panel M4 Plain Nut using 2 x M4 Shakeproof washers... - Page 33 Chassis assembly Fit the Main PCB into the chassis and secure with one M3 x 10 SEMS screw. Just fit the screw loosely at this stage. Secure the XLRs to the rear panel using the 4 screws provided. Do not overtighten. (Push the XLR’s firmly against the rear panel while installing screws) Secure the IEC inlet to the rear panel using the 2 x M3 x 10mm screws and 2 x M3 Nyloc nuts provided.
- Page 34 Chassis assembly Solder the lamp cable to the lamp holder Install the 24v lamp Install the lamp assembly into the front panel. Fit the faceplate to the rear panel / side panels using 9 of the chassis screws provided. Lay the assembly on a flat surface and tighten all the screws, then tighten the nuts which secure the angle brackets to the front and rear panels.
- Page 35 Chassis assembly Insert the ribbon cable from the lower faceplate PCB into the main PCB. Place a shakeproof pot washer on each of the pots and a shakeproof switch washer on the rotary switch. Install the upper front panel PCB and secure with the pot/switch nuts. Insert the ribbon cable from the upper faceplate PCB into the lower faceplate PCB.
- Page 36 Orange TP10 Chassis Ground TP11 +325v TP16 Analogue Ground Heater Feed Audio Maintenance Limited E-Mail: service@audiomaintenance.com Title Pultec Gain Stage Number Heater Return AML-07-102 Date 24th Sept 2015 Drawn by C Adshead File AML-07-102 - rev4 Sheet 1 of 2...
- Page 37 (above heater offset) TP14 +19v DC Heater Feed Heater Return TP15 Analogue Ground Audio Maintenance Limited E-Mail: service@audiomaintenance.com Title Pultec Gain Stage - PSU Number AML-07-102 Date 24th Sept 2015 Drawn by C Adshead File AML-07-102 - rev4 Sheet 2 of 2...
- Page 40 AML-07-102 (Rev 4) VTB2425 ezP-1A / ezMEQ5 (PSU/Gain Stage) Yellow Green Violet Blue Grey Orange Pink 115v 230v Blue/Yellow Brown White Danger - Lethal voltages may exist for VTT2426 several minutes after power is switched off ! Gain Adjust 12ax7 / ecc83...
- Page 43 Blue Violet Green Build Date: Yellow Built By: Orange AML-07-095 (Rev 3) - Part 1 of 2 S/N: ezP-1A Passive Filter / Controls Not for commercial use Brown Build Date: AML-07-095 (Rev 3) - Part 2 of 2 Built By:...
- Page 46 Calbration Adjusting VR1 allows you to better match the levels of 2 units Put a balanced 0dBu 1Khz tone into the completed unit Adjust VR1 until you get exactly 0dBu at the output [The full trim range is only about 2dB so you will not notice much change if you are trying to adjust while listening]...
Need help?
Do you have a question about the ezP-1A and is the answer not in the manual?
Questions and answers