Table of Contents
Advertisement
Quick Links
Advertisement
Table of Contents

Related Manuals for BIOS LIVING Glider Plus

Summary of Contents for BIOS LIVING Glider Plus
- Page 1 ROLLATOR Plus INSTRUCTIONS 56092 Plus www.biosmedical.com...
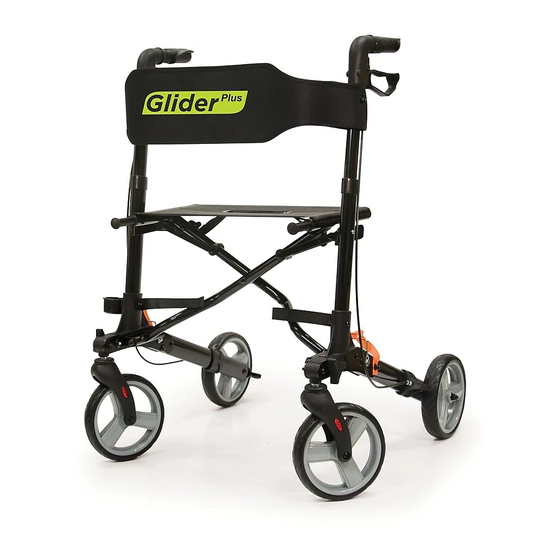
- Page 2 The Glider rollator comes with a removable shoulder bag, cane holder, safety light, travel bag, locking brakes, and a seat with padded backrest. The handles are adjustable in height and the rollator folds easily for transport or storage. Please read these instructions before assembly or use of this rollator, and please keep the manual in a safe place.
- Page 3 (8) Keep your hands away from the folding mechanism to prevent any risk of pinching (9) Seek the advice / recommendations of a medical professional to determine if the rollator is suitable for your needs (10) Use caution when lifting and carrying the rollator DO NOT: (1) Use the rollator as an aid to transport a person, it is not designed as a complete wheelchair...
- Page 4 Unfold the front wheels and secure in place using the fastening knobs as shown in Figure 2. Fastening Knob Figure 2 Fold out the rear legs as shown below and secure the legs in place with the rear folding pins as shown in Figure 3. Step 1 Step 2 Step 3...
- Page 5 ADJUSTING THE HEIGHT The Right Fit Make sure your rollator is completely open before you walk with it and ensure the rollator is locked in place and the frame is rigid. It is important that you adjust your rollator to a height that is high enough to hold it comfortably.
- Page 6 Brake Adjustment: Turn the adjustment screw counter- Locking Nut clockwise to increase the tension then lock the adjustment by turning the locking nut clockwise while holding the adjustment screw stationary (See Figure 6). Adjustment Screw IMPORTANT: If brake adjustment is made to allow for Figure 6 light pressure when braking, this could effect the brake when put in the locked position.
- Page 7 Close the rollator. Remove the rear folding pins and fold in the wheels Figure 9 as shown in Figure 9. To store the rollator in the travel bag, reduce the height of the handles to the smallest height and then follow steps 1-2 above. Remove the fastening knobs and fold the front wheels in.
- Page 8 Thermor Ltd. Repair Department 16975 Leslie Street Newmarket, ON L3Y 9A1 www.biosmedical.com...
Need help?
Do you have a question about the Glider Plus and is the answer not in the manual?
Questions and answers