Advertisement
Quick Links
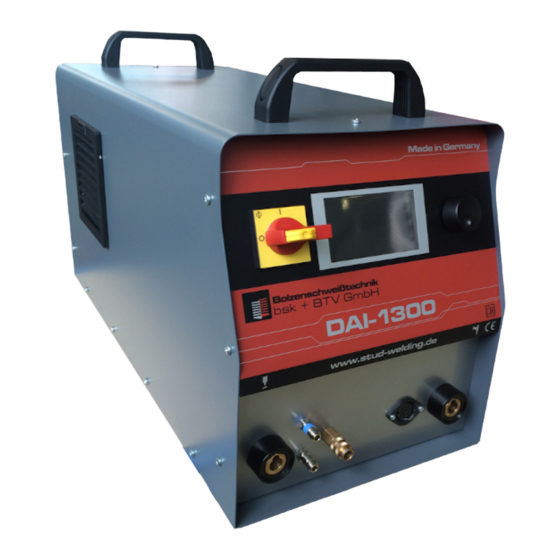
DAI-1300
Quick-Installation manual
Hotline
Mo to Fr 08:00 o´clock AM to 04:00 o´clock PM
For technical questions, especially about the device / gun please have ready in advance:
Type of machine and serial number
______________________________________________________
Error description
_________________________________________________________________________________
Please observe the detailed operating instructions for equipment and guns!
knowledge of stud welding equipment and their components necessary. Stud welding work may
be performed only by persons who have reached the age of 18. Observe all the necessary safety
instructions.
Front panel:
Power switch
Pressure-air connectors for automatic welding-gun
(optional, only with automatic welding-gun)
Socket ground-cable
Setting-up operation Inverter
- Switch position power-switch to „0"
- 32A CEE - plug into the appropriate receptacle connect (Fuse: screwgate 25 AT / attention: no
curcuit-braker
breaker);
- Control-cable, ground-cable and welding-gun cable connecting to inverter and secure against
twisting;
- fix
the two locking pliers of the ground cable ideally evenly diagonally attach far from the
weld on the workpiece to reduce magnetic blow.
In case of protection-gas application:
Connect gas on the rear side
with a suitable hose to the pressure reducer a protective gas
bottle and adjust the flow rate of gas to 4-6 l / min (recommended for steel and stainless steel
mixed gas 82% Ar / 18% CO2). Caution: Gas bottle against falling over!
Set up welding-gun(s)
Note: Inverter switch on (switch to "I") and switch to
"Lift test" (function "test" in set-menu "DAI-1300")
disconnect ground cable from the Inverter!
Welding-gun DA-10M / GAP-M
select chuck (stud-holder) according the used welding-
-
element;
adjust stud-holder (see figure left);
-
insert stud-holder in welding-gun;
-
overlap
tighten and fixed with socket-wrench SW17.
4 – 5mm
-
print 06/2015_Rev.2
Bolzenschweißtechnik bsk + BTV GmbH_Daimlerstraße 25 _ 74252 Massenbachhausen _ www.stud-welding.de
Tel +49(0)7138 / 810970 _ Fax +49(0)7138 / 8109729 _ Email info@stud-welding.de
phone: +49(0)7138-81097-0
info@stud-welding.de
There are
backside with gas-connector:
Rotary switch
Graphik-Display
Socket welding current cable
7-pin socket control cable
connector
Gas-connector für welding-gun
or
page 1 von 4
DAI-1300
Quick-Installation manual
Welding-guns DA-12M / DA-19M / DA-22M / DA-25M
select chuck (stud-holder) according the used welding-
-
element;
Screw the chuck on the double nipple
-
Tighten the chuck with open-end wrench SW17
-
(Attention: counter with a spanner on the double
nipple!)
Place the corresponding tripod (gas or ceramic tripod)
-
on the gun and fix it
Ceramic tripod (does not apply to DA-10M / GAP-M)
Insert suitable ceramic ring holder in base plate and secure
-
using a 2.5 mm socket wrench
Insert stud into the stud holder as far as it will go
-
Insert appropriate cermanic ring into ceramic ring holder
-
while slightly turning it
Overlap
Adjust excess length (overlap, see table page 4) of stud or
-
stroke distance according to figure and table by adjusting
the tripod correspondingly and then tightening the locking
screw.
Align the base plate using the socket scews so that the stud
-
and the ceramic ring is centered and the stud does not
touch the ceramic ring when lifted. Otherwise it might inhibit
the insertion
Check the excess length and the free movement of the
-
motion system by manually pushing the stud in against the
spring in the gun. Or you can use the built-in lift test function
by actuating the gun in the air.
Lift-adjustment (does not apply to DA-10M and DA-12M):
DA-19M...DA-25M: therefore cap unscrew and with the
-
setting scale (see brass-scale from 2mm...6mm at the gun)
adjust the correct lift of the welded stud (it depends in
graphics page 4).
GAP-M: First adjustment of zero-lift with the setting screw
-
at the top of the gun, than adjustment of correct lift
regarding table page 4.
Guns are now ready to use!
Setting-up operation Inverter
After switching on (mains switch to "I") and self-test of the
inverter, the actual values of welding current, welding
time and arcing voltage be on the top line of the display in
the main menu appears in the line below the corresponding
desired values by default. The values for welding current
and welding time can be infinitely adjusted by pressing the
rotary control on the respective field.
Schweißstrom: 0A...1000A
Schweißzeit: 0ms...1500ms
print 06/2015_Rev.2
Bolzenschweißtechnik bsk + BTV GmbH_Daimlerstraße 25 _ 74252 Massenbachhausen _ www.stud-welding.de
Tel +49(0)7138 / 810970 _ Fax +49(0)7138 / 8109729 _ Email info@stud-welding.de
page 2 von 4
Advertisement

Summary of Contents for bsk + BTV DAI-1300
- Page 1 06/2015_Rev.2 page 2 von 4 Bolzenschweißtechnik bsk + BTV GmbH_Daimlerstraße 25 _ 74252 Massenbachhausen _ www.stud-welding.de Bolzenschweißtechnik bsk + BTV GmbH_Daimlerstraße 25 _ 74252 Massenbachhausen _ www.stud-welding.de Tel +49(0)7138 / 810970 _ Fax +49(0)7138 / 8109729 _ Email info@stud-welding.de...
- Page 2 06/2015_Rev.2 page 4 von 4 Bolzenschweißtechnik bsk + BTV GmbH_Daimlerstraße 25 _ 74252 Massenbachhausen _ www.stud-welding.de Bolzenschweißtechnik bsk + BTV GmbH_Daimlerstraße 25 _ 74252 Massenbachhausen _ www.stud-welding.de Tel +49(0)7138 / 810970 _ Fax +49(0)7138 / 8109729 _ Email info@stud-welding.de...
Need help?
Do you have a question about the DAI-1300 and is the answer not in the manual?
Questions and answers