Advertisement
Thank you for your support of URayCoder video encoder and video decoder.
This quick user manual is for you to use the device quickly. If you need more information
about video encoder, please refer to another detailed user manual.
This manual is universal. If you have purchased an encoder with other interfaces (such as
SDI, VGA, etc), you can also use this manual.
If you need user manual in PDF format, you can open the USB flash drive to get it. By the
way, the video guidance is also included in the USB flash drive.
Since it is a professional product, and Amazon customer service is not familiar with this
product, if you encounter any technical problems when using the device, or encounter
document requirements(such as new firmware, SDK, APP etc), please contact us via the
following contact information, we will arrange professional engineers to provide you with
technical service.
Email:
linda@szuray.com
Skype:
.linda_go@yeah.net
Whatsapp:
+86 135 9028 3020
Preface
Advertisement
Table of Contents

Subscribe to Our Youtube Channel
Summary of Contents for URayTech URayCoder
- Page 1 Preface Thank you for your support of URayCoder video encoder and video decoder. This quick user manual is for you to use the device quickly. If you need more information about video encoder, please refer to another detailed user manual.
-
Page 2: Table Of Contents
Table Of Contents Reset·········································································································1 Log in to the Control Panel············································································ 1 2.1. Windows Operating System·································································1 2.2. MAC Operating System······································································ 6 WIFI Connection························································································ 12 Preview Video Stream·················································································14 Adjust Output Video Audio Quality································································· 16 Online Live Streaming················································································· 17 6.1. YouTube Live Streaming····································································17 6.2. -
Page 3: Reset
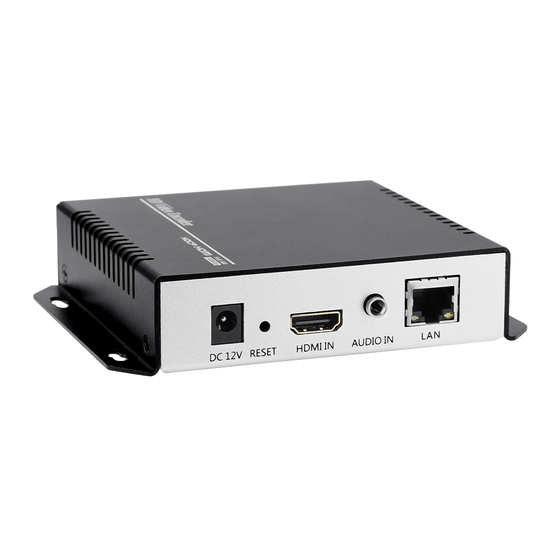
1. Reset There is a ‘‘RESET’’ hole on the front end of video encoder, which is used for conducting initialization reset to the encoder. After turning on the power of the device, insert a pin into the hole, then press the reset button and hold it down for about 8 seconds until you see all three indicator light(VIDEO, LAN, POWER) go out All parameters will be initialized. - Page 4 Step 3. Click ''Ethernet'' or ‘‘WIFI’’ If you connect the PC(or laptop) to the router via WIFI, ‘‘WIFI’’ is displayed in here. Step 4. Click ''Details'' 2...
- Page 5 You can check the IP address and default gateway of the PC(or laptop) in <Network Connection Status>. For example, the IP address of my PC(or laptop) is 192.168.0.111, and the gateway of of my PC(laptop) is 192.168.0.1. Remember the IP address and the gateway of your PC(laptop), it will be used in step 10. Step 5.
- Page 6 Step 7. Select ''Use the following IP address'' Step 8. Change the IP address and default gateway of PC(laptop), and then click ''OK'' You can set the IP address to 192.168.1.30 and the default gateway to 192.168.1.1. In order for the IP settings to take effect, please remember to click ‘’OK’’ in the window of <Local Area Connection Properties>.
- Page 7 Usually, the language of the control panel is English. If Chinese is displayed, you can change the language in the upper right corner of control panel. Please select ‘‘英文’’. Now the video encoder can be used in local area network(LAN). In order to use it in a wide area network(WAN), we need to change the IP address of video encoder.
-
Page 8: Mac Operating System
Step 11. Click ''Reboot'' to restart the video encoder Step 12. Select ''Obtain an IP address automatically'', and then click ''OK'' Please remember the new IP address of the video encoder. In order for the IP settings to take effect, please remember to click ‘‘OK’’ in the window of <Local Area Connection Properties>. - Page 9 Step 4. Click ‘‘Advanced’’ Step 5. Click ‘‘TCP /IP’’ You can check the IP address and default gateway of the MAC here. For example, the IP address of my MAC is 192.168.0.112, and the gateway of my PC(laptop) is 192.168.0.1. Remember the IP address and default gateway of your MAC, it will be used in step 10.
- Page 10 Step 6. Select ‘’Manually’’ in the setting of ‘’Configure IPV4’’ Step 7. Change the IP address of MAC, and click ''OK''. You can set the IP address to 192.168.1.30 and the default gateway to 192.168.1.1. 8...
- Page 11 Step 8. Click ‘‘Apply’’ in the window of <Network> Step 9. Log in to the control panel of video encoder 192.168.1.168 The default ID and password is ''admin''. If you cannot log in to the control panel, please reset the device. (Refer to chapter 1) 9...
- Page 12 Usually, the language of the control panel is English. If Chinese is displayed, you can change the language in the upper right corner of control panel. Please select ‘‘英文’’. Now the video encoder can be used in local area network(LAN). In order to use it in a wide area network(WAN), we need to change the IP address of video encoder.
- Page 13 Step 11. Click ''Reboot'' to restart the video encoder Step 12. Select ‘‘Using DHCP’’ in the setting of ‘‘Configure IPV4’’, and click ''OK''. Step 13. Click ‘‘Apply’’ in the window of <Network> 11...
-
Page 14: Wifi Connection
Step 14. Log in to the new IP address of video encoder 3. WIFI Connection This chapter applies to all models with WIFI function. If your video encoder doesn’t have WIFI function, you can ignore this chapter. Step 1. Connect the WIFI antenna to the video encoder. Step 2. - Page 15 Step 5. Enter the name and password of the WIFI in ‘‘WIFI Essid’’ and ‘‘WIFI Password’’. WIFI Essid: The name of the WIFI selected in the WIFI list. WIFI Password: The password of the WIFI selected in the WIFI list. Step 6.
-
Page 16: Preview Video Stream
4. Preview Video Stream You can download the VLC software in Google and then use VLC to preview video stream. This is how to preview video stream. Step 1: Open VLC media player, click ‘‘Media’’, and then click ‘‘Open Network Stream’’. Step 2: Enter the URL of video stream and click ‘‘Play’’. - Page 17 Currently, you can only preview the URL of video streaming in local area network(LAN), because 192.168.1.168 is the IP address of local area network. If you want to preview the URL of video stream in wide area network(WAN), please refer to Chapter 7. 15...
-
Page 18: Adjust Output Video Audio Quality
5. Adjust Output Video Audio Quality Adjust the video audio quality of the output stream by setting the following parameters. • Bitrate: You can adjust the bitrate of the video stream from 32 to 32000. If the bitrate value is set too high and the network bandwidth(upload bandwidth) is not insufficient, the output video will play not smoothly;... -
Page 19: Online Live Streaming
• Audio Sampling Rate: You can set the output sampling rate to be the same as the input sampling rate. (Input sampling rate is displayed in ‘‘Input Status’’) 6. Online Live Streaming 6.1 YouTube Live Streaming(RTMP) Step 1. Visit website https://www.youtube.com/live_dashboard Step 2. - Page 20 Step 4. Configure the setting of ‘'DNS1'' and ‘'DNS2'' and ‘'Gateway'', then click ''Apply'' Enter the gateway of the router to the setting of the ’’DNS1’’ and ‘‘DNS2’’ and ‘‘Gateway’’. You can find the gateway of the router in step 4 of chapter 2.1 or step 5 of chapter 2.2. Step 5.
- Page 21 If it still shows ‘‘Not Connected’’ after completing the above steps, please refresh the web page. Meanwhile, please check for the following issues. 1) . Make sure that the video and audio are input to the video encoder. You can check the input status in ‘‘Status’’.
-
Page 22: Facebook Live Streaming
3) . Please contact us for assistance. Our engineer will help you solve the problem. 6.2 Facebook Live Streaming(RTMPS) Step 1. Visit website https://www.facebook.com/live/create Step 2. Log in to Facebook account, and then click ‘‘Creat Live Stream’’ Step 3. Find ''Stream Key'' Step 4. - Page 23 For example, my Stream Key is 2668468800146330?s_bl=1&s_sc=2668470016812875&s_sw=0&s_vt=api-s&a=Abw1q8 di5Ml5fc7v. Therefore, I need to enter the following RTMPS information of Facebook into the setting of ''RTMP(S) /RTSP PUSH URL''. rtmps://live-api-s.facebook.com:443/rtmp/2668468800146330?s_bl=1&s_sc=266847001 6812875&s_sw=0&s_vt=api-s&a=Abw1q8di5Ml5fc7v Step 5. Configure the setting of ‘'DNS1'' and ‘'DNS2'' and ‘'Gateway'', then click ''Apply'' Enter the gateway of the router to the setting of the ’’DNS1’’...
- Page 24 If it still shows ‘‘Not Connected’’ after completing the above steps, please refresh the web page. Meanwhile, please check for the following issues. Make sure that the video and audio are input to the video encoder. You can check the input status in ‘‘Status’’. If the value of ‘‘Collected Video Frames’’ or ‘‘Collected Audio Frames’’...
-
Page 25: Push Stream To The Streaming Server
Stream Key of Wowza is hdmi, the user ID of Wowza is URayTech, and the password of Wowza is 12345678. Therefore, I need to enter the following RTMP information of Wowza into the setting of ''RTMP(S) /RTSP PUSH URL''. - Page 26 Step 4. Click ''Reboot'' to restart the video encoder Step 5. Check if the video encoder is connected to the streaming server. If it shows ‘‘Connected’’, it means the video encoder is connected to the streaming server. If it still shows ‘‘Not Connected’’ after completing the above steps, please refresh the web page.
-
Page 27: Port Mapping
If you purchased an encoder with 4G function, when you only use WIFI mode or Ethernet port mode instead of 4G mode, please select ‘‘disable’’ in 4G setting. Otherwise, unable to start live streaming. Please contact us for assistance. Our engineer will help you solve the problem. 7. -
Page 28: Contact
"DDNS". Please contact your network operator to check whether your network has a public IP address. 8. Contact Us Since this product is a professional product, and Amazon customer service is not familiar with it, if you encounter any technical problems when using the device, or encounter document requirements(such as new firmware, SDK, APP etc), please contact us via the following contact information, we will arrange professional engineers to provide you with technical service.
Need help?
Do you have a question about the URayCoder and is the answer not in the manual?
Questions and answers