Table of Contents
Advertisement
Quick Links
Advertisement
Table of Contents

Summary of Contents for QCA Spas TheraSauna Classic Series
- Page 3 ●●● Dear Customer, Congratulations on your purchase of the TheraSauna Classic, the new generation of Health Sauna. We are confident that you will enjoy many benefits of using your TheraSauna Classic for many years to come. Carefully and thoroughly read this manual in its entirety before using your TheraSauna Classic for the first time.
-
Page 4: Table Of Contents
●●●Table of Contents ●●● CONDITIONS OF USE ........................ 4 General Technical Characteristics ........................... 4 ●●● PACKAGING AND INDIVIDUAL PANEL INFORMATION ............... 4 Parts List ................................5 ●●● INSTALLATION INFORMATION & ASSEMBLY ................6 Assembly Instructions ............................7 (1) LOCATION OF SAUNA ............................7 (2) PLACING BOTTOM PANEL .......................... - Page 5 (15) DOORKNOB INSTALLATION ........................... 12 (16) Operating the LED Light ..........................12 ●●● DIGITAL CONTROL OPERATING INSTRUCTIONS ..............13 ●●● SETTING UP THE CORNER MODEL ..................14 ●●● TOP PANEL DIAGRAMS ......................16 ●●● ENJOYING YOUR SAUNA......................18 ●●● MAINTENANCE ........................19 ●●●...
-
Page 6: Conditions Of Use
●●● Conditions of Use 1. Outside Ambient Air Conditions for Optimal Operation from +5℃ ~+ 40℃ (+41℉ ~+104℉) 2. Relative humidity ≤ 85% 3. Depression: 700~1060 hpa 4. Main supply: 120V 5. Frequency: 60Hz±1 General Technical Characteristics 1. Functions processed by microprocessors 2. -
Page 7: Parts List
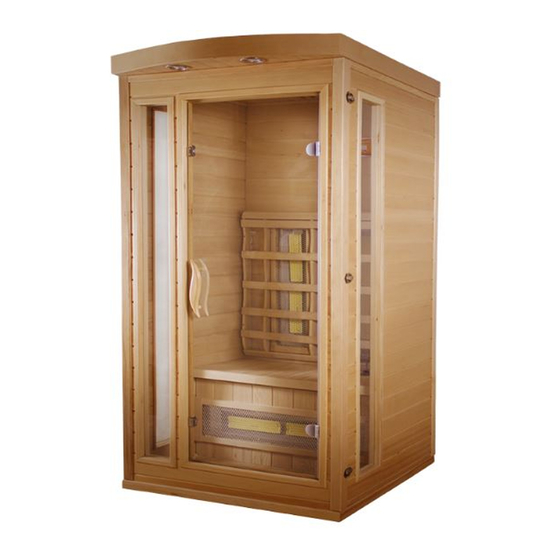
NOTE: PLEASE DO NOT MIX PACKAGE (MEANS PARTS FROM DIFFERENT BOXES CAN NOT BE INSTALLED TOGETHER, OR EXCHANGED). Parts List Front Panel Left Side Panel Bottom Panel Right Side Panel Top Panel Bench Panel Back Panel Bench Heater Panel Accessory Box Below are pictures of individual panels for the 2-person model. -
Page 8: Installation Information & Assembly
1. Left Side Panel 2. Digital control panel 3. Front Panel 4. Bottom Panel 5. Bench Heater Panel 6. Bench Panel 7. Right Side Panel 8. Back Panel 9. Top Panel 10. CD player 11. Light 12. Cup holder ●●● Installation Information &... -
Page 9: Assembly Instructions
Assembly Instructions Assembly of the sauna requires at least 2 adults to complete. Please read the instructions thoroughly before and during assembly to ensure proper installation of the unit. If you encounter any problems or have questions during assembly, please feel free to call our Customer Service Department or local dealers. (1) LOCATION OF SAUNA When determining a location for your sauna, please keep in mind the following: 1. -
Page 10: Connecting Side Panels
(4) CONNECTING SIDE PANELS Connect the Side Panels to the Bottom Panels by lining up buckles and fastening them. 1. Each Side Panel has a white label to identify which side it is. The panel with "LEFT PANEL" label should be placed on the left side when facing the sauna from the front. (5) INSTALLING BENCH HEATER PANEL Slide down the Bench Heater Panel by lining up its sides with the Vertical Guides on each Side Panel. -
Page 11: Installing Bench Panel
(7) INSTALLING BENCH PANEL Install the Bench Panel by sliding it over the Horizontal Guides on each Side Panel. Be careful not to scratch the Side Panels when doing so. Make sure to position the Bench so that the "BACK" sticker is facing back, the smooth and finished sides of the Bench are facing up and forward. -
Page 12: Placing Top Panel
(10) PLACING TOP PANEL 1. Open Sliding Doors located on the Top Panel. 2. Put the Top Panel on the assembled panels. 3. The Top Panel must be positioned so that the Cables on the Top Panel are in the front-left corner, right above the stereo. -
Page 13: Connect The Control Wire Of The Control Panel
(12) CONNECT THE CONTROL WIRE OF THE CONTROL PANEL Plug in roof to power pack: • Plug in the 4 back wall heaters to the control pack • Plug in the front wall heater to the control pack • Insert the Therma Couple through the holes in the blocks, shown circled in red Control Panel Cord: •... -
Page 14: Installing Cup Holder
Note: The light button must be on to operate the stereo. (14) INSTALLING CUP HOLDER Attach cup holders in the fore left corner and the fore right corner (when sitting in the sauna). (15) DOORKNOB INSTALLATION 1. Align the Outside Doorknob against 2 holes on the outside of the door, hold it at an angle against the door. -
Page 15: Digital Control Operating Instructions
●●● Digital Control Operating Instructions Digital Keypad Start Up & Adjustments Note: If you experience power failure, sauna will return to factory default settings, which are 135℉ and 60 minutes, you will have to reset your settings. On powering up the sauna, the panel will display sauna internal temperature. -
Page 16: Setting Up The Corner Model
●●● Setting Up the Corner Model 1. Place the bottom panel on the ground. 2. Connect the left back panel to the bottom panel by lining up the back panel on the groove of the bottom panel. Align buckles on both panels and fasten them, if applicable. 3. - Page 17 5. Install the right heater bench first by sliding it over the horizontal bench guides. And then install the left heater bench. Continue to install right and left benches. Be careful not to scratch the adjacent panels when sliding in the bench. Push the benches all the way in until they touch the back panel and are securely in place.
-
Page 18: Top Panel Diagrams
●●● Top Panel Diagrams The following pictures are the top panel of the sauna: The solid cycles are the nail holes on the top panel of the sauna, need knocking in nails (Size: 4-M4X30). NOTE: one person models do not have nail holes on the saunas 1 Person Model Top Panel: 2 Person Model Top Panel:... - Page 19 3 Person Corner Model Top Panel:...
-
Page 20: Enjoying Your Sauna
●●● Enjoying your Sauna INSTRUCTIONS FOR USE Review all health and safety instructions. If in doubt as to the advisability of using your infrared sauna, consult with your physician. If you feel light -headed or heat-exhausted during a session, exit the sauna immediately. -
Page 21: Maintenance
7. Be sure to towel off excess sweat during your session to help the body to perspire more freely. 8. To help relieve sore and tense muscles, massage the affected areas while in sauna to help heal faster. 9. Shaving your face or legs with a razor while profusely sweating in a sauna yields an incredibly smooth result without the use of gels or foams. -
Page 22: Warnings
●●● Warnings This appliance is not intended for use by persons (including children) with reduced physical, sensory or mental capabilities, or lack of experience and knowledge, unless they have been given supervision or instruction concerning use of the appliance by a person responsible for their safety. Children should be supervised to ensure that they do not play with the appliance! Safety Instructions •... -
Page 23: Limited Warranty
●●● Limited Warranty (See Warranty Guide for Complete Details) We warrant the sauna to be free of defects in material and workmanship. 1. Heaters: Lifetime Warranty with a $50 handling fee per incident 2. Workmanship: 12 months 3. Control: 36 months 4. - Page 25 TheraSauna Classic Manual 11.10.16...
- Page 26 This file was downloaded from the site mans.io Instruction manuals and user guides Samsung Pioneer Alpine Dell Sharp Sony Philips Epson Netgear...
Need help?
Do you have a question about the TheraSauna Classic Series and is the answer not in the manual?
Questions and answers