Advertisement
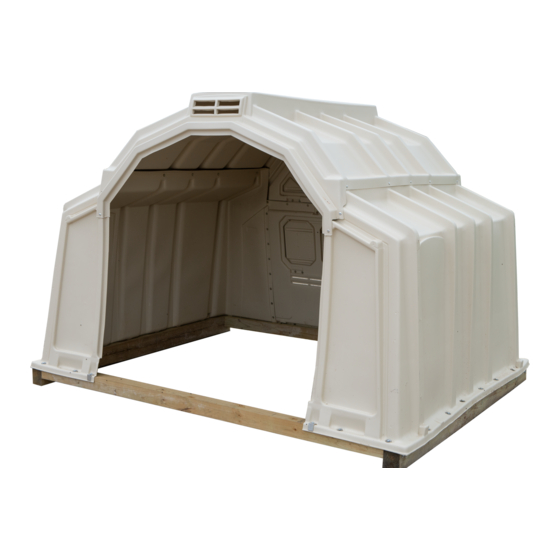
Thank you for buying a Calf-Tel MultiMax Hutch. We recommend that you:
First assemble the timber base
Then assemble the MultiMax hutch
Finally attach the hutch to the base.
If possible, we suggest you leave the panels for a
day or two after delivery to regain their natural
shape before assembling them.
1.
Equipment
You will need:
Drill with 5.5 mm and 8mm bit
5/16 socket and spanner, 11mm and 17mm sockets
Cross head screwdriver
A helper
2.
Assemble the timber base
a) To assemble the base you will need:
The bag of timber base fixings
Two pieces of side timber (A)
Two pieces of front / back timber (B)
b) Lay the timber components out on a flat area with skids on the side pieces
uppermost as shown in the diagram below.
c) Mark out and pre-drill one 8mm hole per corner as indicated by the arrows.
d) Slide one washer onto each bolt & insert one bolt per corner into pre-drilled
holes.
e) Position L brackets against front & sides as indicated in the diagram.
f) Attach L brackets to timber with screws provided.
g) Lift & flip assembled base such that skids are underneath and adjacent to the
ground.
The timbers abut at corners as
shown; upper surfaces of base to be
flush ready for hutch to be lowered
on.
MultiMax
Assembly Instructions
(if using power tools do
not over-tension)
A
B
Advertisement
Table of Contents

Subscribe to Our Youtube Channel
Summary of Contents for Intershape Calf-Tel MultiMax
- Page 1 MultiMax Assembly Instructions Thank you for buying a Calf-Tel MultiMax Hutch. We recommend that you: First assemble the timber base Then assemble the MultiMax hutch Finally attach the hutch to the base. If possible, we suggest you leave the panels for a day or two after delivery to regain their natural shape before assembling them.
- Page 2 Drill through the two tabs in the roof as indicated and bolt the roof to the sides at the front. Bolt angle brackets on here Intershape Ltd Michaelmas House, Royal Oak Way North, Daventry, NN11 8PQ Tel: 01327 300 395 Email: sales@intershape.com...
Need help?
Do you have a question about the Calf-Tel MultiMax and is the answer not in the manual?
Questions and answers