Table of Contents
Advertisement
Advertisement
Table of Contents

Summary of Contents for Proteco S-Park Series
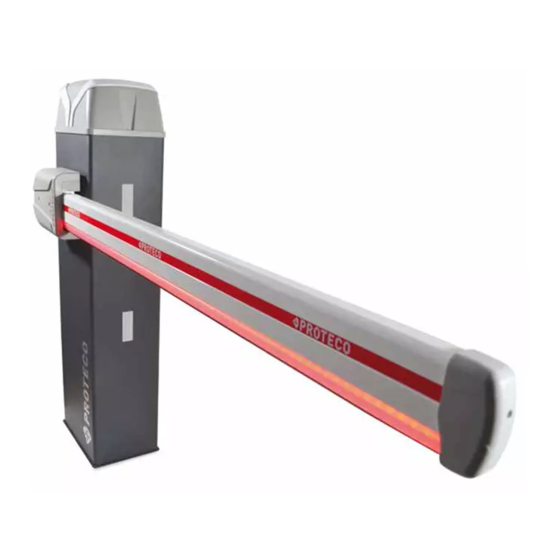
- Page 1 S-PARK AUTOMATIC ROAD BARRIER User manual S-PARK - rev.1.1_06_2020...
- Page 2 INDEX WARNING TECHNICAL FEATURES Main features Life line Electronics INSTALLATION Introduction Preliminary checks General layout Basement preparation Fixing the barrier on ground Balancing of the boom 3.6.1 Right hand and Left hand mounting 3.6.2 Mounting of the boom 3.6.3 Manual operation 3.6.4 Limit switches 3.6.5 Mounting and adjusting of the spring 3.6.6 Balancing (boom in unlocked mode)
-
Page 3: Maintenance
PROGRAMMING 5.1 Settings’ configuration Settings’ list Setting’s description 5.3.1 A. RADIO Store a remote control as START command Store a remote control as START2 command 5.3.2 C. PROGRAMMING Boom automatic learning Reset (factory default) C.4 LH and RH boom configuration C.5 Working logic configuration 5.3.3 F. TORQUE Obstacle detection 5.3.4 H. -
Page 4: Technical Features
After installation, packaging and waste materials (cardboard, plastic, metal parts etc.) must be kept away from children as they could be potentially harmfull. Use only original spare parts. Any alteration to the system is prohibited. Proteco Srl will not respond in case of using additional and/or fake spares. - Page 5 Follow the waste rate line on the bottom of the graph to get the estimated duty cycles. The duty cycles obtained may be compromised if the maintenance plan is not carefully respected. Duty cycles are determined on the base of design analysis, project calculations and tests carried out at factory.
-
Page 6: Installation
INSTALLATION Picture 3: dimensions Introduction For a proper installation, strictly follow the following procedure, re- specting the below chronological order: • Prepare a strong basement using ferro concrete. • Fix the cabinet to ground. • Fit the boom and accessories. •... - Page 7 Balancing of the boom Picture 5: Ground plate 3.6.1 Right hand and Left hand mounting Right version Left version Fixing the barrier on ground Remove washers and bolts M10 screwed on ground plate, lay the cabinet on the concrete basement and match protruding anchor screws to slots of cabinet floor.
- Page 8 Picture 10 Picture 14 CUT SIDE FRAME PRE-BREAKING BRACKET COMPARTMENT RUBBER 3.6.3 Manual operation PROFILE In order to facilitate adjustments, balancing, spring and limit switch regulation, put the barrier in manual operation mode. RUBBER PROFILE Put the barrier to manual operation mode just after completing the whole installation.
- Page 9 3.6.4 Limit switches Picture 18 In order to adjust the stroke of the boom, open the cabinet door, unlock the automation as explained above and use the two threaded pins on the "V" reinforcement positioned above the gearbox. Turn the two pins clockwise / counterclockwise to increase or decrease the stroke of the boom and evaluate the most correct position according to the inclination of the ground where the barrier will be fitted.
- Page 10 3.6.6 Balancing (boom in unlocked mode) 3.6.7 Photocells RF40 ATTENTION: IT IS MANDATORY TO The cabinet is provided with pre-drilled housings for RF40 photocell PROCEED TO BALANCING BEFORE mounting, protected by plastic covers. ACTIVATING THE BARRIER, IN ORDER Remove covers using a flathead screwdriver. TO AVOID INCORRECT OPERATION.
- Page 11 If the LED strip struggles when passing through the compartment, Wirings put a little oil to facilitate the insertion. Then drive the power wire through the bracket, before fitting the 3.7.1 Main power 230V boom. Fix the wire exactly as shown in Picture 27, then drive it through one The main power terminal is located on the upper side of the cabinet, of the cabinet’s holes, the most suitable one according to installation close to control unit:...
- Page 12 SHIELD 3.7.3 Stand-alone antenna (optional) The control unit is fitted with a Whip antenna. If you wish to connect an external stand-alone atenna, remove the Whip aerial and wire the core cable (RG58); wire the shield cable on the other terminal as shown in the picture. CORE 3.7.4 Wiring diagram (The below diagram is a mere overall view about all...
- Page 13 Legenda of terminals 3.8.1 START – wired command contacts 3.8.7 LD (Loop Detector) (key switch, key pad, timer) This terminal can manage both N.O. and N.C. contacts; loop detector works as closing photocells do, but in addition can also command Any start command contact shall be wired on this terminal, refer to an opening start pulse.
-
Page 14: Working Cycle
4. OPERATION Quickstart guide Working cycle Once the installation is mechanically and electrically completed, During normal operation the barrier could be in one of the following close the cabinet door and proceed to the following steps: mode: • Boom programming: perform C.1 p. -
Page 15: Settings' Configuration
5. PROGRAMMING 4.1.3 Programming keys Settings’ configuration Pressing any key during operation the barrier stops. Proceed to programming only when the barrier With an exception for key : if pressed during countdown the barrier is in still mode (any key pressed during operation starts immediately working again, refer to Chapter 4.1 Working stops the barrier). -
Page 16: Settings List
Settings’ list Here below you will find a resume of all available parameters and functions. More details are found in Chapter 5.3 Settings’ description p. 16. LINK DESCRIPTION Default Store a remote control as “START” command Store a remote control as START2 pedestrian command Store a remote control as AUX / 2nd channel Delete a single remote control Delete all remote controls AUX / 2nd channel output configuration... - Page 17 A.2 Store a remote control as START2 5.3.2 C. Programming pedestrian command Set A.2 and repeat the same procedure here above. C.1 Boom automatic learning For more details refer to Chapter 3.8.1.3 STRT2 (START2) p. 13. Boom automatic learning must be perfomed just when installation is fully completed (balancing included).
- Page 18 C.4 LH and RH boom configuration “Follow me” closing - Functions This parameter shows the boom opening direction or the boom The function is OFF. position. (default) The barrier closes according to the automatic closing time set up. Looking from inside the property (cabinet’s door inside the property) and boom in horizontal position, values are intended as follows: The barrier closes 2 seconds after completing the opening.
- Page 19 P.3 LD loop detector 5.3.7 U. Maintenance P.3 allows to fit to LD terminal a vehicle detector (loop detector) that works exactly as a safety device, like closing photocell. U.1 Overall cycles performed In addition it can command a START pulse: when the vehicle This feature allows to display the overall cycles performed. approaches the barrier, a START command is given and the barrier No possibility of reset.
- Page 20 6. DISPLAY U.5 Installation date The display shows the barrier status. This feature allows to load the installation date. If no key is pressed, after 8 hours the display switches off; shortly The display will show the installation date in 3 different steps: the press any key to light the display up.
-
Page 21: Maintenance
7. MAINTENANCE 8. END USER’S TIPS ATTENTION! - Maintenance must be performed by qualified Dear user, it is highly recommended to read the following pages personnel in compliance with outstanding safety regulations of because they may contain essential information for the safety of current legislation. - Page 22 Maintenance To lock the automation again, turn the handle anticlockwise: the two symbols of the locked padlock have to be realigned. Then turn the key of the lock clockwise to lock the rotation of the In order to preserve the proper performance and safety of the barrier handle, and remove the key from the barrell.
-
Page 23: Compliance Declaration
That’s why they must be removed and delivered to authorized companies for collection and disposal. Check the outstanding local disposal regulations. COMPLIANCE DECLARATION Manufacturer: PROTECO S.r.l. Address: Via Neive, 77 - 12050 CASTAGNITO (CN) - ITALY declares that The product type: S-PARK road barrier automation... - Page 24 Proteco S.r.l. Via Neive, 77 12050 CASTAGNITO (CN) ITALY Tel. +39 0173 210111 - Fax +39 0173 210199 info@proteco.net - www.proteco.net S-PARK - rev. 1.1_06_2020...