Table of Contents
Advertisement
Quick Links
Advertisement
Table of Contents

Subscribe to Our Youtube Channel
Related Manuals for Coredy TA100


Summary of Contents for Coredy TA100
- Page 1 GET STARTED V2.0 Coredy TA100 Nano Travel Router/Access Point/ Repeater...
- Page 2 Table of contents ............Introduction .............. Overview ....... Environment Requirements ..........Default Patameters ..........Mode Introduction ........AP/Access Point Mode ....Repeater (Range Extender) Mode ............ Router Mode ..........Quick Installation ........AP (Access Point) Mode ....Repeater (Range Extender) Mode ........
- Page 3 It could help quickly create your own a secure a Wi-Fi hotspot . TA100 could be powered by an outlet via a charger (not incluced in the package), a power bank, a power station or a computer.
- Page 4 TA100 and other WPS capable devices, like Wireless Router, AP, Cellphones and etc. Reset: This button is used to restore the TA100 to its factory default settings. With the TA100 power on, using a paper clip or similar...
-
Page 5: Environment Requirements
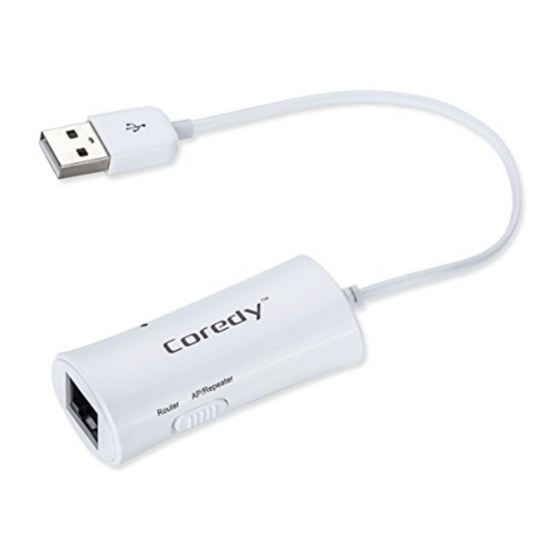
Reset button for 3~6 seconds, then release the button and wait the TA100 to reboot to its factory default settings. Router AP/Repeater: You can select your using mode physically. LAN/WAN: Use this port to connect to your Modem while in Router mode. - Page 6 Place the TA100 in a location where it can be connected to the various devices as well as to a power source. Avoid direct irradiation of any strong light (such as sunlight) Keep at least 2 inches (5 cm) of clear space around the TA100.
-
Page 7: Mode Introduction
Default Patameters http://ap.setup Default IP 192.168.10.1 Login Name admin Password admin Wireless SSID Travel Repeater Mode Introduction AP/Access Point Mode Create a wireless network from an Ethernet connection. This mode is suitable for dorm rooms or hotel rooms where there's already a wired Router but you need a wireless hotspot. - Page 8 INTERNET Power Repeater (Range Extender) Mode Extend signal from an existing wireless network, use a Different SSID or copy the Same SSID existing Router’s network.This mode is suitable to extend wireless coverage, reaching devices that were previously too far from your primary Router to maintain a stable wireless connection.
-
Page 9: Router Mode
INTERNET Power Router Mode Create an instant private wireless network and share Internet to multiple Wi-Fi devices. This mode is suitable for hotel rooms and home networks. Power INTERNET... -
Page 10: Quick Installation
Quick Installation AP (Access Point) Mode Note: Please be sure your TA100 is restored to factory default settings before getting start. 1. Power On Switch the TA100 to the AP/Repeater mode. Plug the USB of TA100 into an outlet via a charger (not included in the package), a Power Bank or a computer for Power, the LED would be ON;... - Page 11 Wired (Recommended.) Disconnect your computer from all wireless networks. Connect your computer with the TA100 via an Ethernet cable (not included in the package). Power LAN Port Or Wireless: Click the Wireless Network icon on your desktop. Select the Default SSID of the TA100: Travel Repeater, then click Connect.
- Page 12 3. Login the setup page Open a Web browser and type in http://ap.setup or 192.168.10.1. in the address bar, and press Enter button to go to the login page. Then Enter the default User Name and Password: admin (both in lower case letters). Click Submit. Note: If you could not login the setup page, please...
- Page 13 Security Type Security Key Unmask Apply Cancel 6. After the TA100 has reboot successfully, plug your Router’s Network cable into the TA100’s WAN/LAN port. Wait for the LED flash once. 7. Now refresh your devices’ wireless network options, and connect to your new wireless Network (SSID) you have just set, and enjoy.
- Page 14 INTERNET Power Repeater (Range Extender) Mode (2 Options) Note: Please be sure your TA100 is restored to factory default settings before getting start. Put your main Router in an open space area, and keep TA100 NEXT TO your Router during the installation process.
- Page 15 Setup) 1. Power On Switch the TA100 to the AP/Repeater mode. Plug the USB of TA100 into an outlet via a charger (not included in the package), a Power Bank or a computer for Power, the LED would be ON; and wait about 12 seconds until the LED flash once.
- Page 16 Press the WPS button on your TA100 for about 6 seconds. Then the LED will flash in a few seconds. Power Then immediately push the WPS button on your Router/AP. (For more information about using WPS on your Router, please refer to the Router manufacturer’s user...
- Page 17 When the TA100 have got connect to the Router successfully, it will Reboot. Note: The TA100’s new SSID will be XXXX VAP when your Router’s SSID is XXXXX. If the TA100 can not pairing with your Router successfully, please refer to Option 2.
- Page 18 Option 2. Using a Web Browser 1. Power On Switch the TA100 to the AP/Repeater mode. Plug the USB of TA100 into an outlet via a charger (not included in the package), a Powerbank or a computer for Power, the LED would be ON; and wait...
- Page 19 12 seconds until the LED flash once. Power Power Supply: Max. Power Input: 5V~2A 2. Connect Wired (Recommended) Disconnect your computer from all wireless networks. Connect your computer with the TA100 via an Ethernet cable (not included in the package). Power LAN Port -17-...
- Page 20 Or Wireless: Click the Wireless Network icon on your desktop. Select the Default SSID of the TA100: Travel Repeater, then click Connect. Your Router Wireless Name Travel Repeater Information sent over this network might be visible to others. Connect automatically Connect 3.
- Page 21 Submit Click the Repeater button in the Wizard field. Wizard User-PC Repeater Select your main Router’s wireless network, Enter exactly same password/key of your Router; then either customize creating network name/SSID of the TA100 or not. Then click Apply. -19-...
- Page 22 Repeater SSID Travel Repeater Security key The key of your Router’s WiFi Unmask Apply Refresh The TA100 will connect to the Router and reboot. (It will takes about 2 minutes to complete.) Wireless Repeater Mode Repeater Mode Wifi AP/Router User-PC...
- Page 23 And keep the Router in an open space area. Power On Switch the TA100 to the Router mode. Plug the USB of TA100 into an outlet via a charger (not included in the package), a Power Bank or a computer for Power, and -21-...
- Page 24 If you are connecting the TA100 directly to your cable modem, you must first power reset the modem and wait until its ONLINE LED is solid. If you are connecting the TA100 to an existing network, simply plug the Ethernet -22-...
- Page 25 Power Wired Ethernet Connection Cable Cable Modem (LAN Port) Connect Click the Wireless Network icon on your desktop. Select the Default SSID of the TA100: Travel Repeater, then click Connect. David Travel Repeater Information sent over this network might be visible to others.
- Page 26 Login the setup page Open a Web browser and type in http://ap.setup or 192.168.10.1. in the address bar, and press Enter button to go to the login page. Then Enter the default User Name and Password: admin (both in lower case letters). Click Submit. Note: If you could not find the login page or login the setup page, please refer to Q3 of Troubleshooting on Page 33 for more...
- Page 27 Select your WAN connection type: Dynamic IP (recommended): the TA100 gets the IP address automatically from the DHCP serve or the ISP. Internet service providers offer a fixed IP address (static IP) Automatically obtain an IP address (dynamic IP) ADSL Dial-up (PPPoE)
- Page 28 ADSL Dial-up (PPPoE): please enter the “User Name” and “Password” from your ISP, this field is case-sensitive. Internet service providers offer a fixed IP address (static IP) Automatically obtain an IP address (dynamic IP) ADSL Dial-up (PPPoE) User Name Password Unmask Then You can use the system’s original SSID for or choose to rename the SSID as...
-
Page 29: Other Settings
CONNECT WPS function. Please follow Option 1 of Repeater's Installation Guide (Page 13) to install. To Be Connected by other devices, like cellphones, laptops and repeater. Press the WPS button for about 3 seconds, this will open the TA100's TO BE -27-... -
Page 30: Basic Settings
In this field, you can rename the Network Name (SSID), Channel, change the Security type and Security key. Log in http://ap.setup or 192.168.10.1. Click Basic Settings field. After the settings has changed, Click Apply. The TA100 will Reboot with your new settings come into effect. -28-... - Page 31 Back to home page Login password settings Log in http://ap.setup or 192.168.10.1. Click Basic Settings. Type in the new User Name or password, Click Apply. The TA100 will Reboot with your new settings come into effect. Change your password User name New password...
-
Page 32: Firmware Upgrade
Firmware Upgrade In this field, you can add new functions to your Coredy TA100 and fix any bugs it has. Please go to www.coredytech.com to download the latest firmware file. Login http://ap.setup or 192.168.10.1. Click Upgrade Firmware Management field. Upgrade firmware RPTA2-AW.GD.R3464.1.20141022... -
Page 33: Save/Reload Settings
Save settings Browse... Load settings Upload Load default Reset settings Save Settings: Save all settings of your Coredy TA100 as another filename for different versions, and keep it in a safe place. Load Settings: Click Browse button to choose previously downloaded configuration file. -
Page 34: Troubleshooting And Support
Troubleshooting & Support How can I restore my TA100 to its factory default settings? With the TA100 power on, using a paper clip or similar small point to press and hold the Reset button for 3~6 seconds, then release the button and wait the TA100 to reboot to its factory default settings. - Page 35 192.168.10.1. In the AP mode, disconnect your Router’s Network from your TA100 first. Then connect your PC/devices with the TA100 via an Ethernet Cable (Recommended) or Wirelessly. Then you could login the setup page. After you have complete changing the setting, you could connect your Router’s Network cable to the TA100...
- Page 36 If you want to change the Operating Mode, please restore your TA100 to its factory default settings, then refer to the "Quick Installation” guideline section to install the TA100. You may also change any settings via the Web Management Page.
- Page 37 Weak signal strength can be caused by obstruction from walls or objects. If you are receiving low signal strength, try to place your TA100 in a higher location of your room, keeping it away from obstructed locations like under or behind a Desk.
-
Page 38: Warranty
12-Month Quality-related warranty Lifetime Technical Support from the date your Coredy TA100 Nano Travel Router/Access Point/ Repeater was purchased. CONTACT US For any inquiries or comments concerning our products, please send an email to support@coredytech.com, and we will respond to you ASAP. If there is any... - Page 39 STATEMENT Please note that we only provide after-sales service for the product purchased directly from coredytech. If your item was purchased from a different retailer, we are not responsible for it. WEEE Directive & Product Disposal At the end of its serviceable life, this product should treated...
- Page 40 1-800-999-8470 (US) Mon-Fri 9:00-5:00 (CST) support@coredytech.com www.coredytech.com...
Need help?
Do you have a question about the TA100 and is the answer not in the manual?
Questions and answers