
Subscribe to Our Youtube Channel
Related Manuals for Profile wireless +


Summary of Contents for Profile wireless +
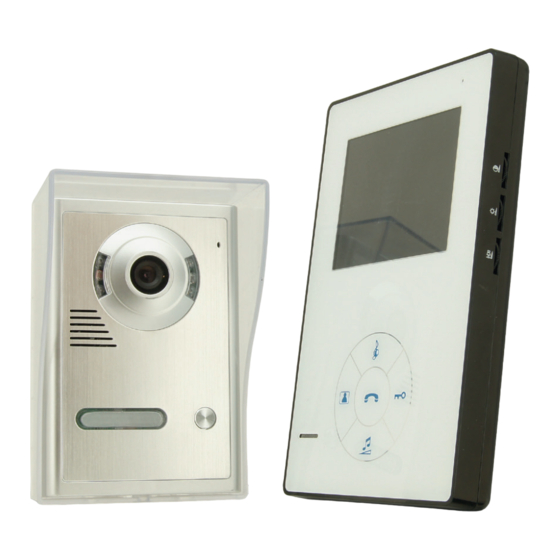
- Page 1 Design videofoon Vidéophone design Design Video-Türsprechanlage Design video doorphone WIRELESS+ Ref. : 200689002 Art. : PAC120 www.profile.eu...
- Page 2 BELANGRIJK ∙ U heeft een stopcontact nodig dat max. 1,5m van de monitor verwijderd is. ∙ Vereiste draden deurslot: 2 vanaf de buitenpost. ∙ De monitor of buitencamera mag nooit met detergenten gereinigd worden, enkel met zeep en vochtige doek. ∙...
- Page 3 SCHEMA 12-15V 12-15V 6 7 8 MATCHING...
- Page 4 TOETSEN...
-
Page 5: Verticale Installatie
INSTALLATIE BINNENPOST De positie voor de monitor wordt als volgt bepaald: de hoogte bedraagt ongeveer 170 cm, en is max. 150 cm verwijderd van een stopcontact, waar de adapter zal ingeplugd worden. U kunt er ook voor kiezen de monitor staand te gebruiken. U kunt via de USB poort aan de zijkant de camera ook van stroom voorzien. - Page 6 INSTALLATIE BUITENPOST (2) Bepaal buiten aan de deur de positie voor de camera. De ideale installatiehoogte is 165 tot 175 cm. Zowel kleinere als grotere personen blijven dan in beeld. Positioneer de camera zodanig dat hij geen direct zonlicht opvangt. Dit kan een slechte beeldkwaliteit veroorzaken.
-
Page 7: Instellingen Wijzigen
INSTELLINGEN WIJZIGEN (1) 1. INSTELLINGEN MONITOR Selecteer in het startscherm het icoon “instellingen monitor” door middel van de links-rechtstoets (D). Duw vervolgens op de bevestigingstoets (E) om dit menu te bekij- ken. Via de links-rechtstoets (D) kan u nu de gewenste monitor selecteren of kies voor wanneer u de vier monitoren tegelijk wil bekijken. -
Page 8: Tijd En Datum
INSTELLINGEN WIJZIGEN (2) 3. GELUIDSINSTELLINGEN VAN DE BUITENPOST Om het volume van de buitenposten aan te passen, selecteer dan het icoon op het startscherm van de binnenpost. Met de links-rechtstoets (D) kan u de buitenpost selec- teren die u wenst aan te passen. Druk vervolgens op de bevestigingstoets (E) om het volume van deze buitenpost aan te passen. - Page 9 INSTELLINGEN WIJZIGEN (3) B. INSTELLINGEN FOTO’S Selecteer het icoon “foto” en selecteer via de boven-ondertoets (C) hoeveel foto’s er moeten genomen telkens er wordt aangebeld (1, 2, 3 of Bevestig vervolgens via de bevestigingstoets (E) en druk ten slotte op de exittoets (B) om terug naar het vorige menu te gaan.
- Page 10 INSTELLINGEN WIJZIGEN (4) F. BELTOONINSTELLINGEN Selecteer het icoon “beltooninstellingen” en selecteer via de boven-ondertoets (C) uw favoriete beltoon. Bevestig vervolgens via de bevestigingstoets (E) en druk ten slotte op de exittoets (B) om terug naar het vorige menu te gaan. FOTO F G.
-
Page 11: Terug Naar Fabrieksinstellingen
INSTELLINGEN WIJZIGEN (5) J. INSTALLEREN VAN EEN EXTRA BUITENPOST Klik vanuit het startscherm op “Instellingen” en houd vervolgens de monitortoets (A) gedu- rende 5 seconden ingedrukt. Selecteer de buitenpost die je wil verbinden met de boven-ondertoets (C). Druk op bevestigen (E). De binnenpost toont de melding “pairing...”... - Page 12 GEBRUIK 1. De bezoeker belt aan via de toets op de buitenpost. Op dat moment klinkt vanuit de binnenpost een melodische beltoon. Om het volume van de beltoon te veranderen drukt u op de volumetoets (D) tijdens de melodie. De binnenpost zorgt er ook voor dat op dit moment automatisch foto’s worden genomen of een opname wordt gestart.
- Page 13 GARANTIE EN SCHADE De garantieperiode voor PAC120 bedraagt 2 jaar en vangt aan op de datum van aankoop. Gedurende de garantieperiode verhelpt Eltra nv alle defecten die te wijten zijn aan ma- teriaal- of productiefouten. Eltra nv kan, naar keuze, het defecte toestel ofwel herstellen ofwel vervangen.
-
Page 14: Caractéristiques
IMPORTANT ∙ Vous avez besoin d’une prise de courant située au maximum à 1,50 m du moniteur. ∙ Fils requis serrure: 2 ∙ Le moniteur ou la caméra extérieure ne peuvent jamais être nettoyés à l’aide de détergents, mais uniquement à l’aide de savon et d’un chiffon humide. ∙... - Page 15 SCHEMA 12-15V 12-15V 6 7 8 MATCHING...
- Page 16 TOUCHES...
-
Page 17: Installation Murale
INSTALLATION MONITEUR La position du moniteur est déterminée comme suit : sa hauteur s’élève plus ou moins à 170 cm, et il est situé à une distance maximale de 150 cm de la prise de courant à laquelle l’adaptateur sera branché. Vouz pouvez utiliser le moniteur au table. Vous pouvez aussi brancher le monitor avec un fils USB. - Page 18 INSTALLATIE CAMÉRA (2) Devant la porte à l’extérieur, déterminez la position de la ca- méra. La hauteur idéale pour l’installation est de 165 à 175 cm. Des personnes de taille plus petite ou plus grande entreront dès lors dans le champ de vision de la caméra. Positionez la caméra d’une manière qu’...
-
Page 19: Modifier Les Paramètres
MODIFIER LES PARAMÈTRES (1) 1. PARAMÈTRES DU MONITEUR Depuis l’écran d’accueil, sélectionnez l’icône « Paramètres du moniteur » à l’aide de la touche gauche-droite (D). Appuyez ensuite sur la touche de confirmation (E) pour consul- ter ce menu. La touche gauche-droite (D) vous permet à présent de sélectionner le moniteur souhaité ou l’icône si vous souhaitez afficher les quatre moniteurs en même temps. -
Page 20: Paramétrage Du Système
MODIFIER LES PARAMÈTRES (2) 3. RÉGLAGES SONORES DU POSTE EXTÉRIEUR Pour adapter le volume des postes extérieurs, sélectionnez l’icône sur l’écran d’accueil de votre poste intérieur. La touche gauche-droite (D) vous permet de sélectionner le poste extérieur que vous souhaitez adapter. Appuyez ensuite sur la touche de confirma- tion (E) pour régler le volume de ce poste extérieur. -
Page 21: Enregistrements Vidéo
MODIFIER LES PARAMÈTRES (3) B. PARAMÈTRES DES PHOTOS Sélectionnez l’icône « Photo » et configurez le nombre de photos à prendre (1, 2, 3 ou 5) à chaque activation de la sonnette en utilisant la touche haut-bas (C). Confirmez ensuite grâce à la touche de confir- mation (E) et appuyez enfin sur la touche sortie (B) pour revenir au menu précédent. -
Page 22: Réglage De La Sonnerie
MODIFIER LES PARAMÈTRES (4) F. RÉGLAGE DE LA SONNERIE Sélectionnez l’icône « Réglage de la sonne- rie » et utilisez la touche haut-bas (C) pour sélectionner votre sonnerie préférée. Confirmez ensuite grâce à la touche de confirmation (E) et appuyez enfin sur la touche sortie (B) pour revenir au menu précédent. -
Page 23: Retour Aux Paramètres D'usine
MODIFIER LES PARAMÈTRES (5) J. INSTALLATION D’UN POSTE EXTÉRIEUR SUPPLÉ- MENTAIRE Depuis l’écran d’accueil, cliquez sur « Para- mètres » et maintenez ensuite la touche moniteur (A) enfoncée durant 5 secondes. Sélectionnez le poste extérieur que vous souhai- tez raccorder à l’aide de la touche haut-bas (C). Appuyez sur confirmer (E). - Page 24 UTILISATION 1. Le visiteur sonne à la porte en appuyant sur la touche du poste extérieur. À ce mo- ment, la mélodie de sonnerie sélectionnée retentit sur le poste intérieur. Pour adapter le volume de la sonnerie, vous pouvez appuyer sur la touche volume (D) pendant la mélodie.
- Page 25 GARANTIE ET DOMMAGES La période de garantie pour le PAC-120 est de 2 ans à compter de la date d’achat. Au cours de la période de garantie, ELTRA sa/nv prendra en charge toutes les pannes dues à des défauts de matériel ou de production. ELTRA sa/nv peut, au choix, réparer ou rem- placer l’appareil défectueux.
- Page 26 WICHTIG ∙ Sie benötigen eine Steckdose, die max. 1,5 m vom Monitor entfernt liegt. ∙ Minimum Drähte Türschloss: 2. ∙ Der Monitor oder die Außenkamera dürfen nie mit Lösungsmitteln gereinigt werden, sondern ausschließlich mit Seife und einem feuchten Tuch. ∙ Die Versorgungsdrähte des Adapters dürfen nie durchtrennt oder verlängert werden; andernfalls verfällt sofort der Garantieanspruch! ∙...
- Page 27 SCHEMA 12-15V 12-15V 6 7 8 MATCHING...
- Page 28 TASTEN...
-
Page 29: Installation Monitor
INSTALLATION MONITOR Die Position des Monitors wird wie folgt bestimmt: Die Höhe beträgt circa 170 cm und er liegt max. 150 cm entfernt von einer Steckdose, in die der Adapter eingesteckt wird. A. WANDMONTAGE BRACKET B. TISCH MONTAGE C. ON/OFF INSTALLATION KAMERA (1) - Page 30 INSTALLATION KAMERA (2) Legen Sie außen an der Tür die Position der Außenkamera fest. Die ideale Installationshöhe ist 155 bis 165 cm. Sowohl kleine als auch große Personen bleiben so im Blickfeld. Installieren Sie die Kamera so, dass sie keinen direkten Sonnenstrahlung ausgesetzt ist.
-
Page 31: Einstellungen Ändern
EINSTELLUNGEN ÄNDERN (1) 1. EINSTELLUNGEN MONITOR Wählen Sie im Startbildschirm mit der Links-Rechts-Taste (D) das Symbol “Einstellungen Monitor” . Drücken Sie anschließend die Bestätigungstaste (E), um sich dieses Menü anzusehen. Mit der Links-Rechts-Taste (D) können Sie jetzt den gewünschten Monitor auswählen oder wählen Sie , wenn Sie die vier Monitore gleichzeitig sehen möchten. -
Page 32: Uhrzeit Und Datum
EINSTELLUNGEN ÄNDERN (2) 3. TONEINSTELLUNG FÜR AUSSENEINHEIT Um die Lautstärke der Außeneinheit anzupassen, wählen Sie das Symbol auf dem Startbildschirm der Inneneinheit. Mit der Links-Rechts-Taste (D) können Sie die Außenein- heit auswählen, deren Einstellung angepasst werden soll. Drücken Sie anschließend die Bestätigungstaste (E), um die Lautstärke dieser Außeneinheit einzustellen. - Page 33 EINSTELLUNGEN ÄNDERN (3) B. EINSTELLUNGEN FOTOS Wählen Sie das Symbol "Foto" und wählen Sie mit der Aufwärts-Abwärts-Taste (C), wie viele Fotos bei Klingelbetätigung aufgenommen werden sollen (1, 2, 3 oder 5). Bestätigen Sie anschließend die Einstellung über die Bestätigungstaste (E) und drücken Sie abschließend die Exit-Taste (B), um zum vorheri- ABBILDUNG B gen Menü...
-
Page 34: Speicher Formatieren
EINSTELLUNGEN ÄNDERN (4) F. KLINGELTONEINSTELLUNGEN Wählen Sie das Symbol "Klingeltoneinstellun- gen" und wählen Sie über die Aufwärts- Abwärts-Taste (C) den gewünschten Klingelton. Bestätigen Sie anschließend die Einstellung über die Bestätigungstaste (E) und drücken Sie abschließend die Exit-Taste (B), um zum vorheri- gen Menü... - Page 35 EINSTELLUNGEN ÄNDERN (5) J. INSTALLIEREN EINER ZUSÄTZLICHEN AUSSENEIN- HEIT Klicken Sie vom Startbildschirm aus auf “Ein- stellungen” und halten Sie anschließend die Monitortaste (A) 5 Sekunden lang gedrückt. Wählen Sie mit der Aufwärts-Abwärts-Taste die Außeneinheit, die Sie verbinden möchten. Drücken Sie die Bestätigungstaste (E). Auf der ABBILDUNG J -1 Inneneinheit erscheint die Meldung "pairing...".
-
Page 36: Bedienung
BEDIENUNG 1. Der Besucher klingelt durch Betätigen einer Taste an der Außeneinheit. Bei Tastenbetätigung gibt die Inneneinheit einen melodischen Klingelton aus. Um die Lautstärke des Klingeltons zu verändern, drücken Sie während der Melodie die Lautstärke- taste (D). Die Inneneinheit sorgt auch dafür, dass zu diesem Zeitpunkt automatisch Fotos aufgenommen oder eine Aufnahme gestartet wird. - Page 37 GARANTIEBEDINGUNGEN UND SCHADEN Der Gewährleistungszeitraum für das Gerät PAC-120 umfasst 2 Jahre und beginnt mit dem Kaufdatum. Während des Gewährleistungszeitraums verpflichtet sich Eltra NV, sämtliche auf Material- bzw. Herstellungsfehler zurückzuführende Mängel zu beheben. Eltra NV ist wahlweise zur Mängelbeseitigung bzw. zur Ersatzlieferung berechtigt. Das defekte Gerät ist unter Vorlage der Originalquittung zu dem Händler zurückzubrin- gen, bei dem das Gerät gekauft wurde.
- Page 38 IMPORTANT ∙ You need a plug socket that is max. 1.5 m from the monitor. ∙ Minimum wiring door lock: 2 ∙ The monitor and outside camera may never be cleaned with detergents. Only use soap and a damp cloth. ∙...
- Page 39 SCHEMA 12-15V 12-15V 6 7 8 MATCHING...
- Page 40 KEYS...
-
Page 41: Wall Installation
INSTALLATION MONITOR The position of the monitor is determined as follows: the height is approximately 170 cm, and is max. 150 cm from the plug socket into which the adapter will be plugged. The mo- nitor can be table mounted. The monitor can be powered with a USB cable. A. - Page 42 INSTALLATION CAMERA (2) Determine the position of the camera outside at the door. The ideal installation height is 155 to 165 cm. Then smaller and larger persons remain in picture. Install the camera in such a way that direct sunlight is avoided. This results in poor image quality. Connect the wiring according to diagram below.
-
Page 43: Change Settings
CHANGE SETTINGS (1) 1. MONITOR SETTINGS In the start screen select the “monitor settings” icon using the left/right key (D). Press the confirm key (E) to see this menu. Using the left/right key (D) you can now select the required monitor or choose if you want to view the four monitors at the same time. -
Page 44: System Settings
CHANGE SETTINGS (2) 3. EXTERNAL UNIT SOUND SETTINGS To change the external unit volume, select the icon on the internal unit start screen. With the left/right key (D) you can select the external unit for changing the settings. Then press the confirm key (E) to change the volume of this external unit. Use the up/ down key (C) to select the required menu and use the exit key (B) to go back to the previous menu. -
Page 45: Photo Settings
CHANGE SETTINGS (3) B. PHOTO SETTINGS Select the “photo” icon and using the up/ down key (C) select how many photos must be taken each time someone rings (1, 2, 3 or 5). Confirm with the confirm key (E) and finally press the exit key (B) to go back to the previous menu. -
Page 46: Ringtone Settings
CHANGE SETTINGS (4) F. RINGTONE SETTINGS Select the “ringtone settings” icon and use the up/down key (C) to choose your favourite ringtone. Confirm with the confirm key (E) and finally press the exit key (B) to go back to the previous menu. -
Page 47: Back To Factory Settings
CHANGE SETTINGS (5) J. INSTALLATION OF AN EXTRA EXTERNAL UNIT On the start screen click on “Settings” keep the monitor key (A) pressed for 5 seconds. Select the external unit that you want to con- nect with the up/down key (C). Press confirm (E). - Page 48 1. The visitor rings using the key on the external unit. A melodic ringtone then sounds from the internal unit. To change the volume of the ringtone press the volume key (D) while the ringtone is sounding. The internal unit then automatically takes photos or a recording starts. (see “Settings”...
- Page 49 WARRANTY AND DAMMAGE The guarantee period for the PAC-120 amounts to 2 years and commences on the date of purchase. During this guarantee period Eltra nv will repair any defects attributable to material or production faults. Eltra nv may choose to either repair or replace a defective appliance.
Need help?
Do you have a question about the wireless + and is the answer not in the manual?
Questions and answers