Table of Contents
Advertisement
Quick Links
Ti300 PRO, Ti400 PRO, Ti401 PRO,
Ti450 PRO, Ti480 PRO
Professional Series Thermal Imagers
Ti450 SF6
Gas Leak Detector
Users Manual
November 2017 Rev. 2, 4/19
(English)
© 2017-2019 Fluke Corporation. All rights reserved. Specifications are subject to change without notice.
All product names are trademarks of their respective companies.
1.800.561.8187
information@itm.com
www.
.com
Advertisement
Table of Contents

Summary of Contents for Itm FLUKE Professional Series
- Page 1 Ti450 SF6 Gas Leak Detector Users Manual November 2017 Rev. 2, 4/19 (English) © 2017-2019 Fluke Corporation. All rights reserved. Specifications are subject to change without notice. All product names are trademarks of their respective companies. 1.800.561.8187 information@itm.com www. .com...
- Page 2 If any provision of this Warranty is held invalid or unenforceable by a court or other decision-maker of competent jurisdiction, such holding will not affect the validity or enforceability of any other provision. 11/99 1.800.561.8187 information@itm.com www. .com...
-
Page 3: Table Of Contents
Fluke Connect Wireless System..............28 Fluke Connect App ..................28 Fluke Connect Tools................... 29 Memory Menu....................30 Review Image..................... 30 Edit Image ....................30 Delete Image ....................32 Settings Menu....................33 File Format ....................34 Date ......................35 1.800.561.8187 information@itm.com www. .com... - Page 4 Charge Batteries ....................44 Two-Bay Battery Charger Base ..............44 AC Power Socket on Imager............... 44 Optional 12 V Vehicle Charger ..............45 Radio Frequency Data ..................45 General Specifications ..................45 Detailed Specifications ..................47 1.800.561.8187 information@itm.com www. .com...
-
Page 5: Introduction
The Imager works with the Fluke Connect app available on mobile devices. A rugged, rechargeable lithium-ion smart battery provides power to the Imager. Direct ac power is accessible with the included ac power adapter. 1.800.561.8187 information@itm.com www. .com... -
Page 6: Safety Information
• Remove the batteries if the Product is not used for an extended period of time, or if stored in temperatures above 50 °C. If the batteries are not removed, battery leakage can damage the Product. 1.800.561.8187 information@itm.com www. .com... - Page 7 High-Definition Multimedia Interface (HDMI) connection. HDMI Conforms to European Union directives. Certified by CSA Group to North American safety standards. Conforms to relevant Australian Safety and EMC standards. Conforms to relevant South Korean EMC standards. 1.800.561.8187 information@itm.com www. .com...
-
Page 8: Product Familiarization
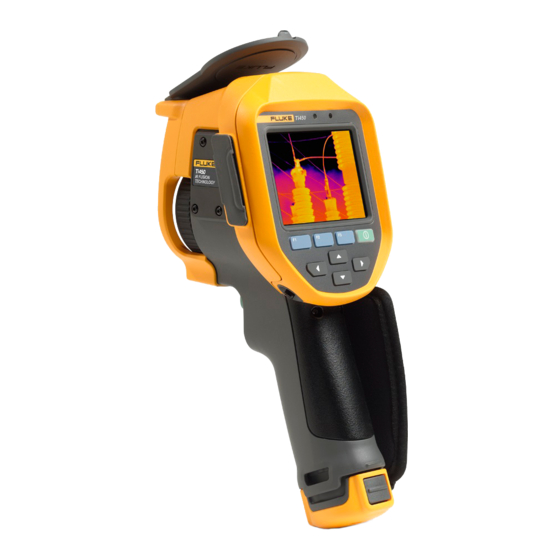
LaserSharp Auto Focus System Filter mode MultiSharp Focus SuperResolution Digital Zoom 1.800.561.8187 information@itm.com www. .com... - Page 9 SmartView software Stream video (remote display) Remote operation of Imager Gas Leak Detection Relative Humidity and Temperature Adjustment 1.800.561.8187 information@itm.com www. .com...
-
Page 10: Controls
Micro SD Memory Card Slot Connector Cover HDMI Connection Lithium-ion Smart Battery AC Power Supply with Universal USB Cable Connection Adapters USB Storage Device Connection 2-Bay Battery Charging Base AC Adapter/Charger Input Terminal 1.800.561.8187 information@itm.com www. .com... - Page 11 Table shows the front of the Product. Table 4. Front Item Description Item Description LED Torch/Flashlight Infrared Camera Lens Retractable Lens Cover Secondary Trigger Visual Light Camera Lens Primary Trigger Laser Pointer/Distance Finder 1.800.561.8187 information@itm.com www. .com...
-
Page 12: Touch Screen
The touch screen is a shortcut to the most used settings. To change parameters or select functions and options, touch a target on the display. The touch screen has a backlight for work in dimly lit spaces. When not in a menu, double tap on the display to capture an image. 1.800.561.8187 information@itm.com www. .com... -
Page 13: Control Panel
In normal operation (video is off), use the primary trigger to capture an image to save or edit. When video is on, use the primary trigger to start/stop recording a video. The secondary trigger operates the LaserSharp Auto Focus System (see LaserSharp Auto Focus System) and the Laser Pointer/Distance Finder (see Distance). 1.800.561.8187 information@itm.com www. .com... -
Page 14: Basic Operation
Image. Depending on the selected file format settings, the Imager shows the captured image and a menu bar. The menu bar shows the available options. Note MultiSharp Focus captures and freezes images differently. See MultiSharp Focus. 1.800.561.8187 information@itm.com www. .com... -
Page 15: Save Image
Fluke Connect tools. Fluke Connect Note The Fluke Connect system is not available in all countries. Settings Set user preferences and to view information about the Imager. SF6 Gas Detection Set options for gas-detection features. Mode 1.800.561.8187 information@itm.com www. .com... -
Page 16: Measurement Menu
(IR window), relative humidity, and the distance the Imager is from the target. See Transmission. Transmission <options> Note If Display is set to Display All, the transmission correction shows as T: xxx% on the display. 1.800.561.8187 information@itm.com www. .com... - Page 17 Select the number of fixed-temperature spot markers to use to <options> Markers highlight a region before you take an image. See Spot Markers. Select to set the center point or a spot marker to use as a Delta-T temperature reference mark. See Delta-T. 1.800.561.8187 information@itm.com www. .com...
-
Page 18: Level/Span
When the Range of the Imager is set to one of the preset measurement ranges and Level/Span is set to Manual, the level setting moves the thermal span up or down within the total temperature range. To change the Level/Span: 1. Select Measurement > Level/Span > Manual. 2. Select Set Level/Span. 1.800.561.8187 information@itm.com www. .com... -
Page 19: Emissivity Adjustment
The lower the emissivity is the greater the potential of error is when the Imager calculates the temperature measurement because more of the energy reaching the camera is specified as background temperature. This is also true even when adjustments to the emissivity and reflected background adjustments are performed properly. 1.800.561.8187 information@itm.com www. .com... -
Page 20: Transmission
Spot Box. • to increase the vertical size of the Spot Box. • to decrease the horizontal size of the Spot Box. • to increase the horizontal size of the Spot Box. 1.800.561.8187 information@itm.com www. .com... -
Page 21: Spot Markers
Note The center point can be a temperature reference mark, but it cannot have a delta symbol. It is either the main reference mark or it is not a delta reference at all. 1.800.561.8187 information@itm.com www. .com... -
Page 22: Image Menu
IR-Fusion <options> Note The visible image and infrared image can be customized or separated in SmartView and Fluke Connect Software when you use the .is2 or .is3 file format. See File Format. 1.800.561.8187 information@itm.com www. .com... - Page 23 Shows color isotherms, or infrared information, inside of a set of Inside both high and low limits. Requires High Alarm and Low Alarm to be on and temperature levels for both alarms to be set. 1.800.561.8187 information@itm.com www. .com...
-
Page 24: Image Enhancement
Combine values from successive frames within a small range of temperatures to Filter Mode reduce pixel noise or thermal sensitivity (NETD) to as low as 30 mK. Turn off MultiSharp Focus mode or SuperResolution mode and not affect Filter mode. 1.800.561.8187 information@itm.com www. .com... - Page 25 1. Point the Imager at the target. 2. Capture an image. Hold the Imager still while it captures the images. Saving… shows on the display for ∼2 seconds for a 60 Hz model or 5 seconds for a 9 Hz model. 1.800.561.8187 information@itm.com www. .com...
-
Page 26: Distance
Do not look into the laser. Do not point the laser directly at persons or animals or indirectly off reflective surfaces. • Do not open the Product. The laser beam is dangerous to eyes. Have the Product repaired only through an approved technical site. 1.800.561.8187 information@itm.com www. .com... -
Page 27: Camera Menu
Turns on/off the built in flashlight. Video/Audio Select to record video and audio when Record Video is selected. Video Video ONLY Select to record video only when Record Video is selected. Record Video Select to start recording a video. See Video. 1.800.561.8187 information@itm.com www. .com... - Page 28 Uses the Imager to create a wireless Hotspot when no WiFi network Wireless WiFi Hotspot exists. See Wireless Connectivity. Connects the Imager to a WiFi network so you can sign into your WiFi Network Fluke Connect account on the Imager. See Wireless Connectivity. 1.800.561.8187 information@itm.com www. .com...
-
Page 29: Lasersharp Auto Focus System
The elapsed time shows at the bottom of the display. 5. Pull and release the Primary Trigger to stop recording. 6. Push to end the recording session. 7. Push to save the video file. 1.800.561.8187 information@itm.com www. .com... -
Page 30: Wireless Connectivity
WiFi is for indoor use only in Kuwait, Chile, and United Arab Emirates. To create a Hotspot, select Camera > Wireless > WiFi Hotspot > On. To change the settings: 1. Select Camera > Wireless > WiFi Hotspot > Off. 2. Select Settings. 1.800.561.8187 information@itm.com www. .com... - Page 31 To sign in to your Fluke Connect account: 1. Select Camera > Wireless > Sign In to open a keyboard on the display. 2. Use the keyboard to enter your user name. 3. Push 4. Use the keyboard to enter your password. 1.800.561.8187 information@itm.com www. .com...
-
Page 32: Fluke Connect Wireless System
4. On the Imager, capture an image. The image is now in the buffer. 5. Push to save the image and view the image on the phone app. Go to www.flukeconnect.com for more information about how to use the app. 1.800.561.8187 information@itm.com www. .com... -
Page 33: Fluke Connect Tools
Edit target. The Edit menu shows the option to show the measurement data and save it with the image to the memory location selected in the Settings menu. The display on the Imager updates to show the wireless icon and the live measurement for each selected wireless tool. 1.800.561.8187 information@itm.com www. .com... -
Page 34: Memory Menu
Picture mode. 4. Capture an image. 5. Capture additional images as required. See Detailed Specifications for the maximum number of images that can be stored with IR-PhotoNotes. 6. Push to save the pictures with the image. 1.800.561.8187 information@itm.com www. .com... - Page 35 Edit audio file 3. Push to append audio to the end of the file, or push to replace the audio file. 4. Do the steps to add an audio file. 1.800.561.8187 information@itm.com www. .com...
-
Page 36: Delete Image
2. Push to open the Delete menu. Delete all files 3. Select All Images and push The Imager prompts you to continue or cancel. 4. Push to delete all the files from the memory. 1.800.561.8187 information@itm.com www. .com... -
Page 37: Settings Menu
Erases all user-set preferences and restores the factory default Advanced Factory Defaults settings. View information about the version, certificates, and Open Source Imager Info Software Licenses of the Imager. Adjust Parallax Fine-tunes the parallax adjustment to precisely align the image. 1.800.561.8187 information@itm.com www. .com... -
Page 38: File Format
To edit the .is3 video file, use SmartView software or the Fluke Connect app. Saves videos as an .avi file with .mpeg encoding. Choose the .avi video format when video modification is not required. The file retains the video settings at the time the video was captured and saved. 1.800.561.8187 information@itm.com www. .com... -
Page 39: Date
4. Select Set Time. 5. Push to open the Set Time menu. 6. Push to select Hours or Minutes. 7. If you selected the 12 hour format, select AM or PM. 1.800.561.8187 information@itm.com www. .com... -
Page 40: Sf6 Gas Detection Mode Menu
• The stability of the Imager • The proximity of the Imager to the leak Note The lower the volume of the gas leak the more challenging it is for the Imager to detect the leak. 1.800.561.8187 information@itm.com www. .com... - Page 41 ≥3 °C difference between the gas and the background environment temperatures • Wind speed: <4.47 mps (<10 mph) • >50 lbs (>22,7 kg) • Variable background scene (high altitude clouds okay) • Imager on a tripod or handheld. 1.800.561.8187 information@itm.com www. .com...
-
Page 42: Smartview Software
4. On the Imager, once the firmware is downloaded, select Update Firmware, to update the firmware in the Imager. To complete the firmware update, the Imager turns off. 5. To use the new firmware, turn on the Imager. 1.800.561.8187 information@itm.com www. .com... -
Page 43: Enable The Radio
Connectivity. Streaming Video (Remote Display) The Imager can stream live infrared and IR-Fusion technology video to a PC that has SmartView software installed, to the Fluke Connect app (where available), or to an HDMI compatible device. 1.800.561.8187 information@itm.com www. .com... -
Page 44: Stream Live To A Pc
Imager to a compatible HDMI device. To stream live to an HDMI device: 1. Attach the included HDMI cable to the HDMI port on the Imager. 2. Connect the other end to an HDMI video device. 1.800.561.8187 information@itm.com www. .com... -
Page 45: Remote Control Of Imager
Tripod Mounting Accessory 4335389 FLK-Bluetooth Bluetooth Headset 4603258 BOOK-ITP Introduction to Thermography Principles 3413459 FLK-LENS/TELE2 2X Telephoto Infrared Lens 4335377 FLK-LENS/WIDE2 Wide-Angle Infrared Lens 4335361 FLK-LENS/4XTELE2 4X Telephoto Infrared Lens 4607058 FLK-LENS/25MAC2 25-Micron Macro Infrared Lens 4607064 1.800.561.8187 information@itm.com www. .com... -
Page 46: Optional Lenses
Use optional telephoto and wide-angle lenses for more applications of infrared inspection work. To install a lens, align the dot on the lens with the dot on the Product. See Figure 1. Figure 1. Optional Lens Installation 1.800.561.8187 information@itm.com www. .com... -
Page 47: Maintenance
Connect the battery charger to the mains power outlet before the charger. • Use only Fluke approved power adapters to charge the battery. • Keep cells and battery packs clean and dry. Clean dirty connectors with a dry, clean cloth. 1.800.561.8187 information@itm.com www. .com... -
Page 48: Charge Batteries
shows on the display when the Imager is connected to ac power and the battery is removed. When the power is off on the Imager and the ac power adapter is connected to the Imager, flashes on the display to show that the battery charge is in process. 1.800.561.8187 information@itm.com www. .com... -
Page 49: Optional 12 V Vehicle Charger
-20 °C to 50 °C (-4 °F to 122 °F) without batteries Storage Relative Humidity 10 % to 95 % non-condensing Altitude Operating 2000 m Storage 12 000 m Display 8.9 cm (3.5 in) touchscreen diagonal landscape color VGA LCD with backlight 1.800.561.8187 information@itm.com www. .com... - Page 50 IEC 60529: IP54 Calibration Cycle 2 years (assumes normal operation and normal aging) Czech, Dutch, English, Finnish, French, German, Hungarian, Italian, Japanese, Korean, Polish, Supported Languages Portuguese, Russian, Simplified Chinese, Spanish, Swedish, Traditional Chinese, and Turkish 1.800.561.8187 information@itm.com www. .com...
-
Page 51: Detailed Specifications
48 ° x 34 ° Field of View (H x V) Spatial Resolution (IFOV) 3.49 mRad 2.62 mRad 1.31 mRad 2.62 mRad 2.62 mRad 1.31 mRad Minimum Focus Distance 15 cm (∼6 in) IR-Fusion blending Full screen 1.800.561.8187 information@itm.com www. .com... - Page 52 Non-Radiometric (.bmp, .jpg) or Fully-Radiometric (.is2). No analysis software is required for Non- File Formats Radiometric (.bmp, .jpg) files. Export File Formats with SmartView .bmp, .gif, .jpg, .png, .tiff Software Memory Review Thumbnail and full screen review 1.800.561.8187 information@itm.com www. .com...
- Page 53 PC, mobile device (iOS 4s or newer or Android 4.3 or newer), and WiFi to LAN (where available) Gas Leak Detection [1] Applies to radiometric mode only. [2] When SF6 Gas Detection mode is enabled, the radiometric features of the Imager are disabled and cannot be selected in the menus. 1.800.561.8187 information@itm.com www. .com...
Need help?
Do you have a question about the FLUKE Professional Series and is the answer not in the manual?
Questions and answers