Advertisement
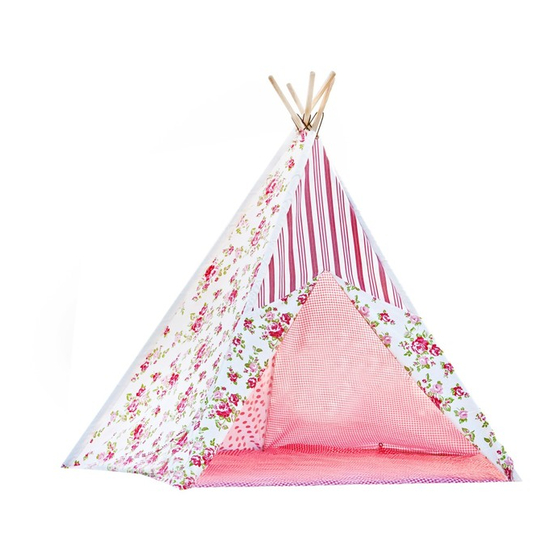
Teepee
Assembly Instructions
Thank you for your purchase.
Please follow the instructions below for correct assembly.
A
metal pole
(top)
x5
Hardware Supplied
W ARNING: KEEP AWAY FROM FIRE/FLAME
ASSEMBLY OF THIS ITEM SHOULD BE PREFORMED BY AN ADULT ONLY
mocka.co.nz | mocka.com.au
B
C
Cotton String
(130cm)
x1
metal pole
(bottom)
x5
1
Advertisement
Table of Contents

Subscribe to Our Youtube Channel
Related Manuals for Mocka Teepee


Summary of Contents for Mocka Teepee
- Page 1 Please follow the instructions below for correct assembly. Cotton String (130cm) metal pole metal pole (top) (bottom) Hardware Supplied W ARNING: KEEP AWAY FROM FIRE/FLAME ASSEMBLY OF THIS ITEM SHOULD BE PREFORMED BY AN ADULT ONLY mocka.co.nz | mocka.com.au...
- Page 2 Insert five complete poles one at a time into the side channels in the tent Repeat until all five poles are assembled. canvas. Ensure the metal poles (A) with hole are at the top. Slide each pole right to the base of the canvas channel. mocka.co.nz | mocka.com.au...
- Page 3 Attach metal poles and tent canvas together with the cotton string (C). Secure the string with a tight knot. Roll out the ground sheet [2] and Lie the teepee flat and bunch the ends together, thread the string position the base of the five poles around the corners of the sheet.
- Page 4 Attach the tent canvas to the ground sheet by threading the string ties All done! Ensure all teepee poles are fully extended and the fabric in through all eyelets at the base of the canvas. Secure with a knot in each section is taught.
Need help?
Do you have a question about the Teepee and is the answer not in the manual?
Questions and answers